Role generators
Use role generators to systematically populate your development role model with roles, members, and/or groups. Role generators are useful when roles and/or their contents can be (at least partially) determined based on source system data.
To get started, follow the example in the Role Model tutorial.
A role generator takes two filters as input. These two filters are the most important parts of a role generator, and must be configured in a specific way. These include the Role Generation Filter and the Role Member Filter.
Tip
An alternative way of adding groups to roles is Role mining.
Below is a full breakdown of the role generator configuration screen. User-specified fields are denotated with an asterisk (*). They are the fields that you must manually specify. All other fields are automatically calculated by NIM.
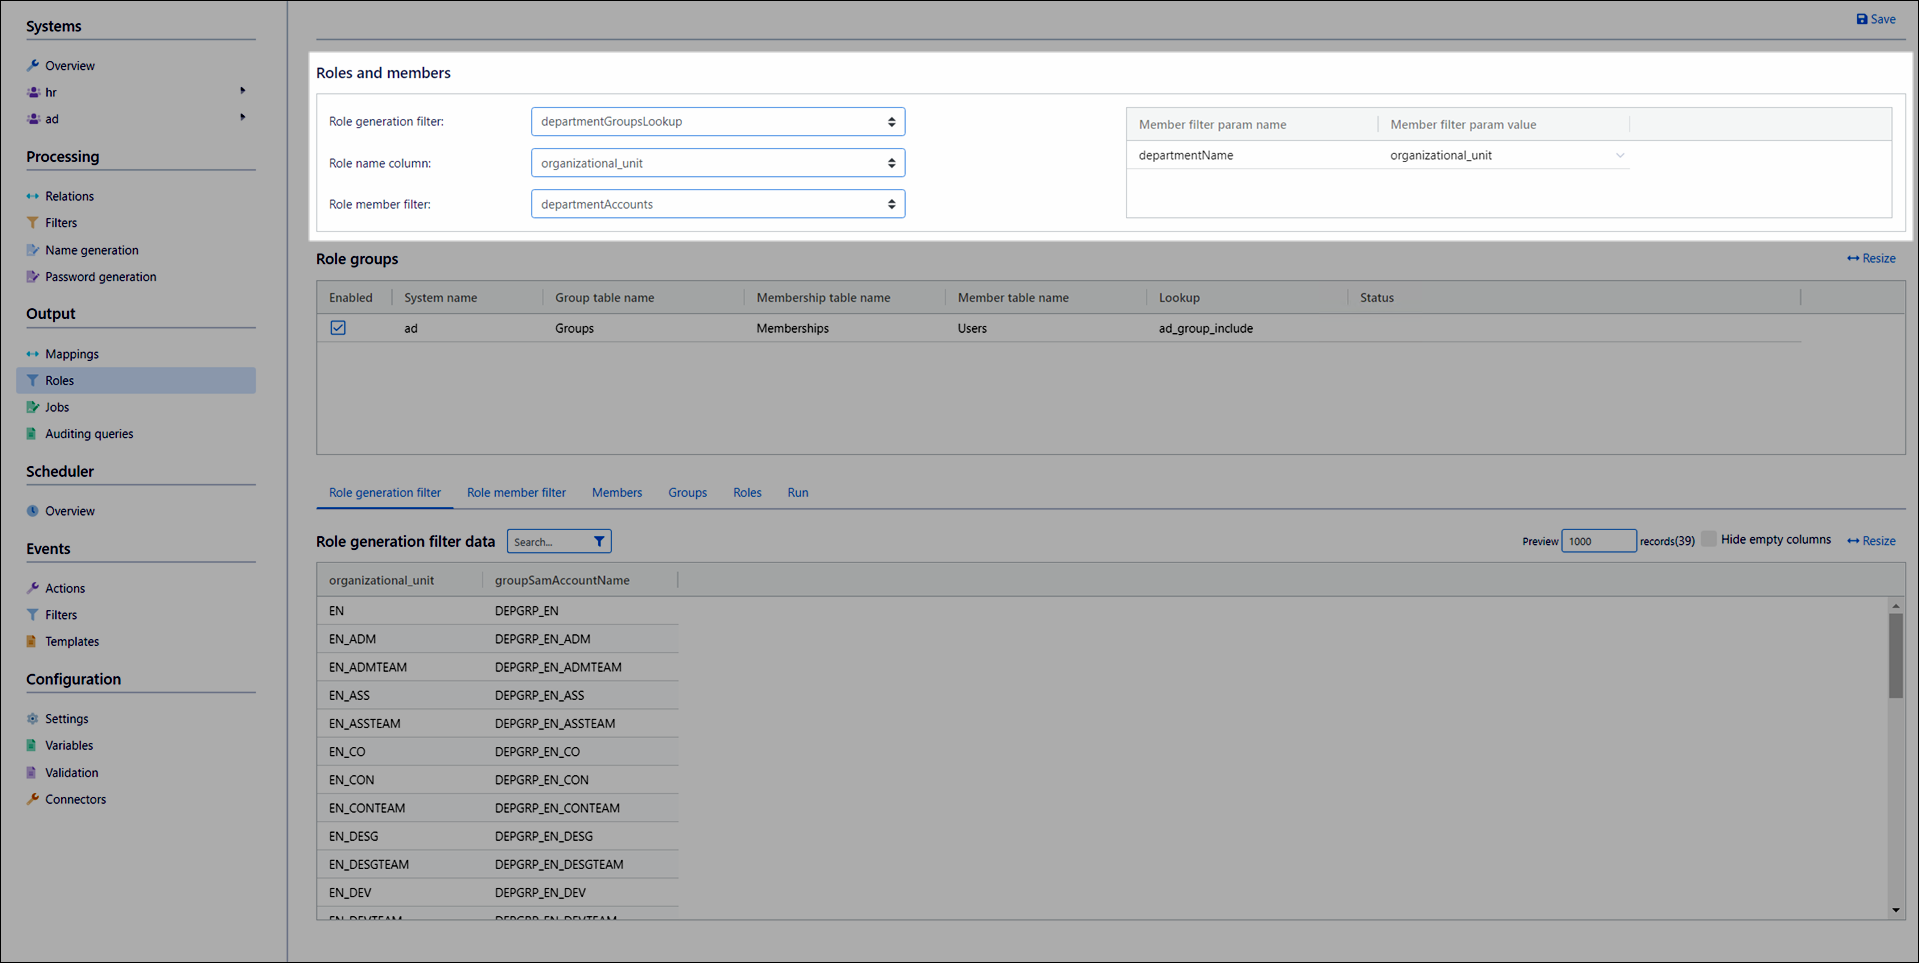
The options in the Roles And Members Pane determine the roles to be created and the target accounts to be added to the roles. (Subsequently, the options in the Role groups pane determine the groups to be added to the roles.)
Role Generation Filter
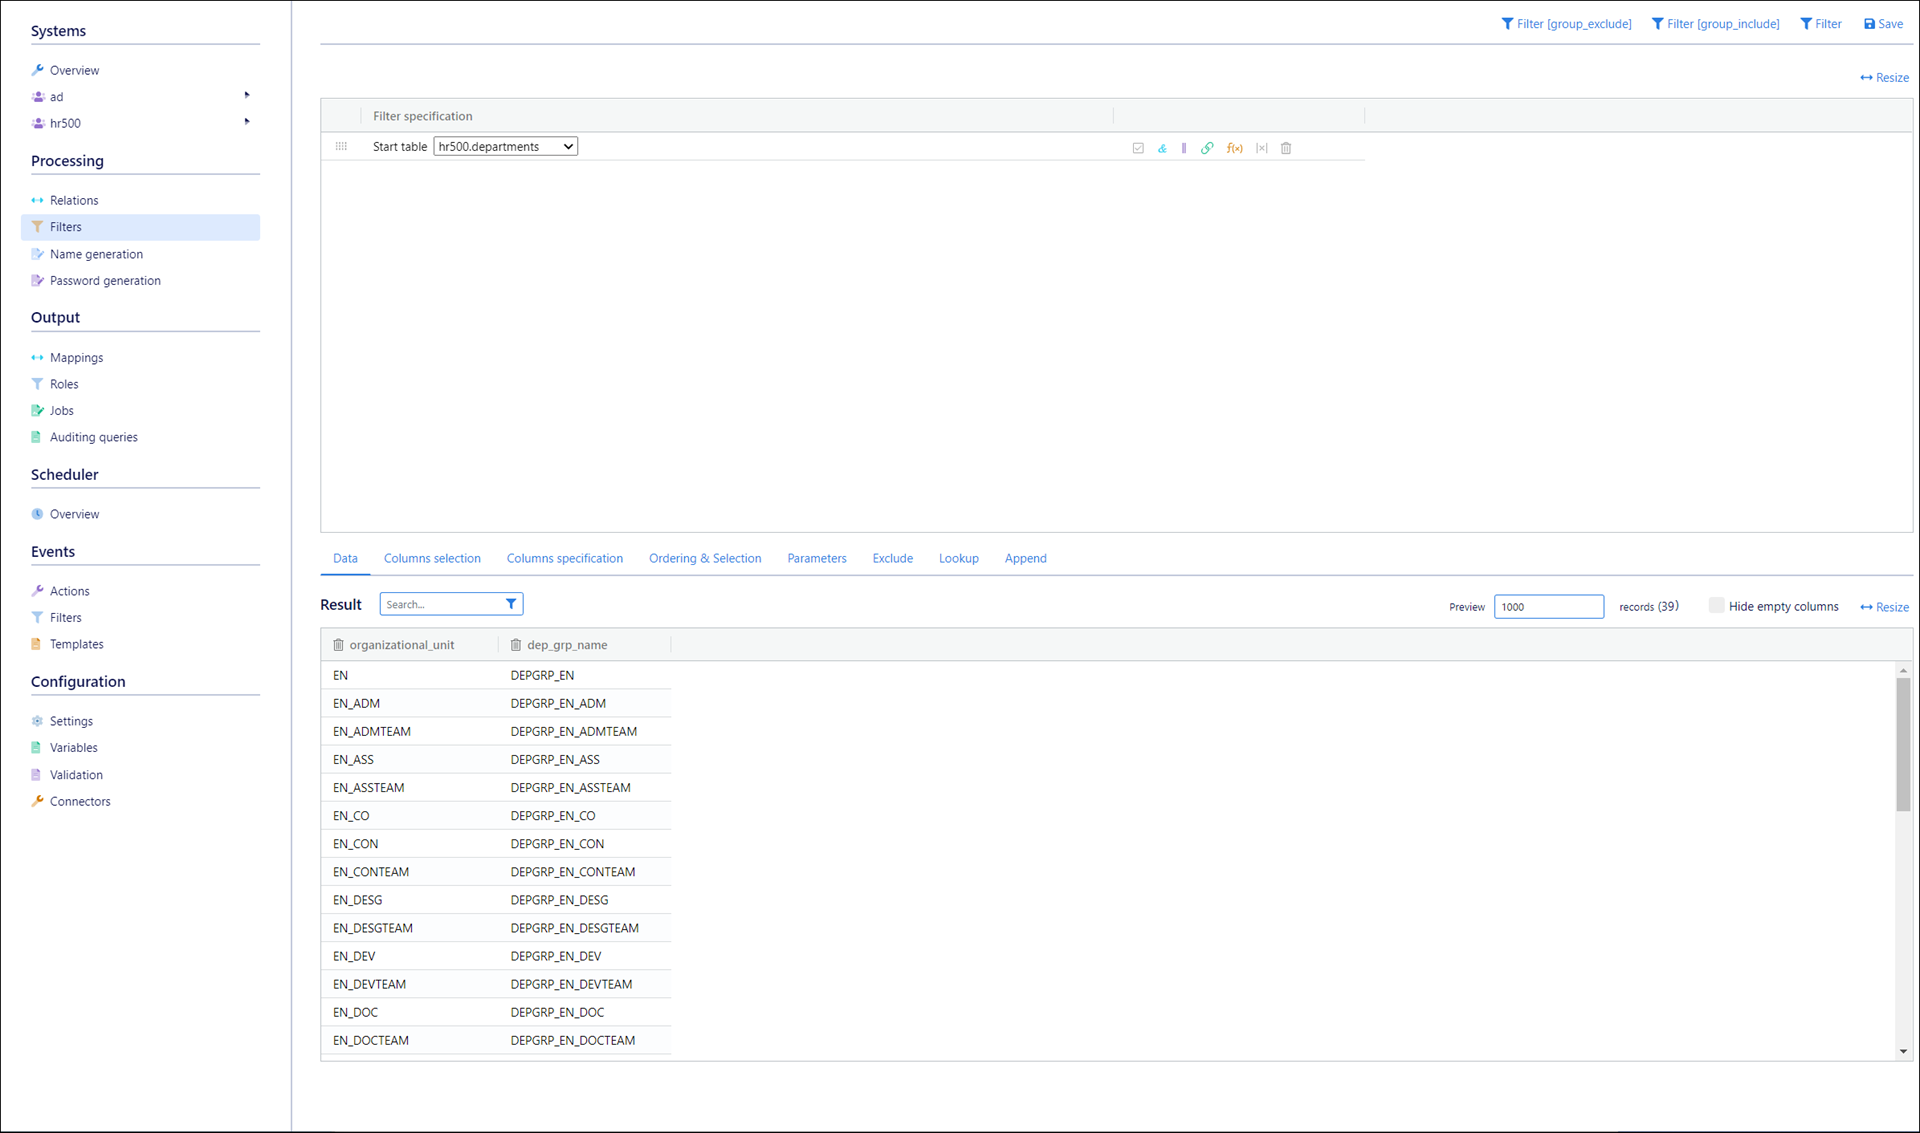
The Role Generation Filter is used to determine the roles that a role generator generates.
It must contain:
A column whose rows correspond to the names of the roles to be generated. This becomes the Role Name Column. For example, the name column from your HR system's departments table (for the common scenario of 1:1 correspondence of roles to departments).
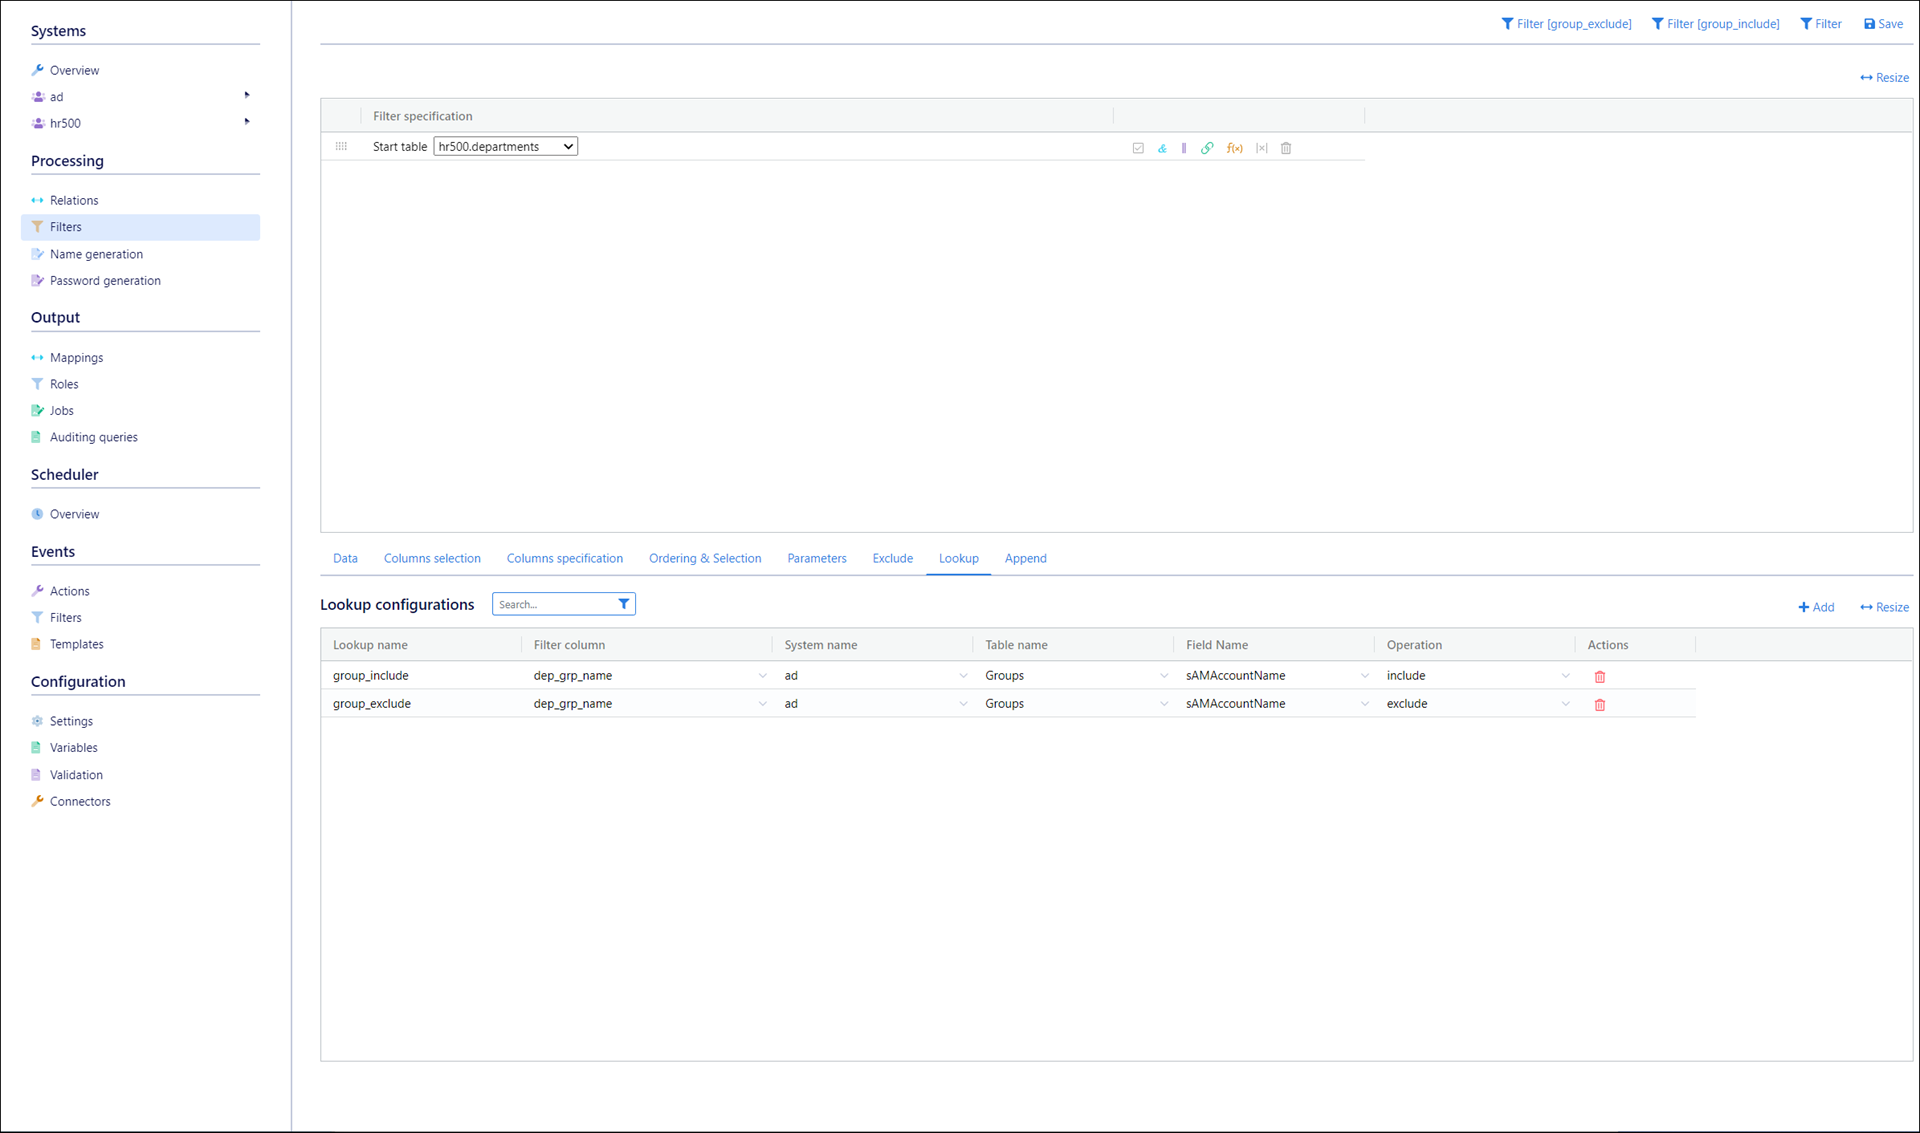
Optional: An include lookup (see Lookups) of that column against the name column of the
Groupstable of the target system. This lookup lets the role generator add the correct groups to the generated roles in the Role groups pane. A transformation may be required via Custom JavaScript columns, if the naming scheme of departments in the HR source system is different than the desired naming scheme of groups in the target system. For example, appendingDEPGRP_.If you are also using NIM to provision groups into the target system, you can additionally create an exclude version of the lookup, to use the same filter in a group create mapping prior to role generation. This process is demonstrated in the Role Model tutorial.
For example:
Role Name Column
The column in the Role Generation Filter whose rows will be used to name the generated roles.
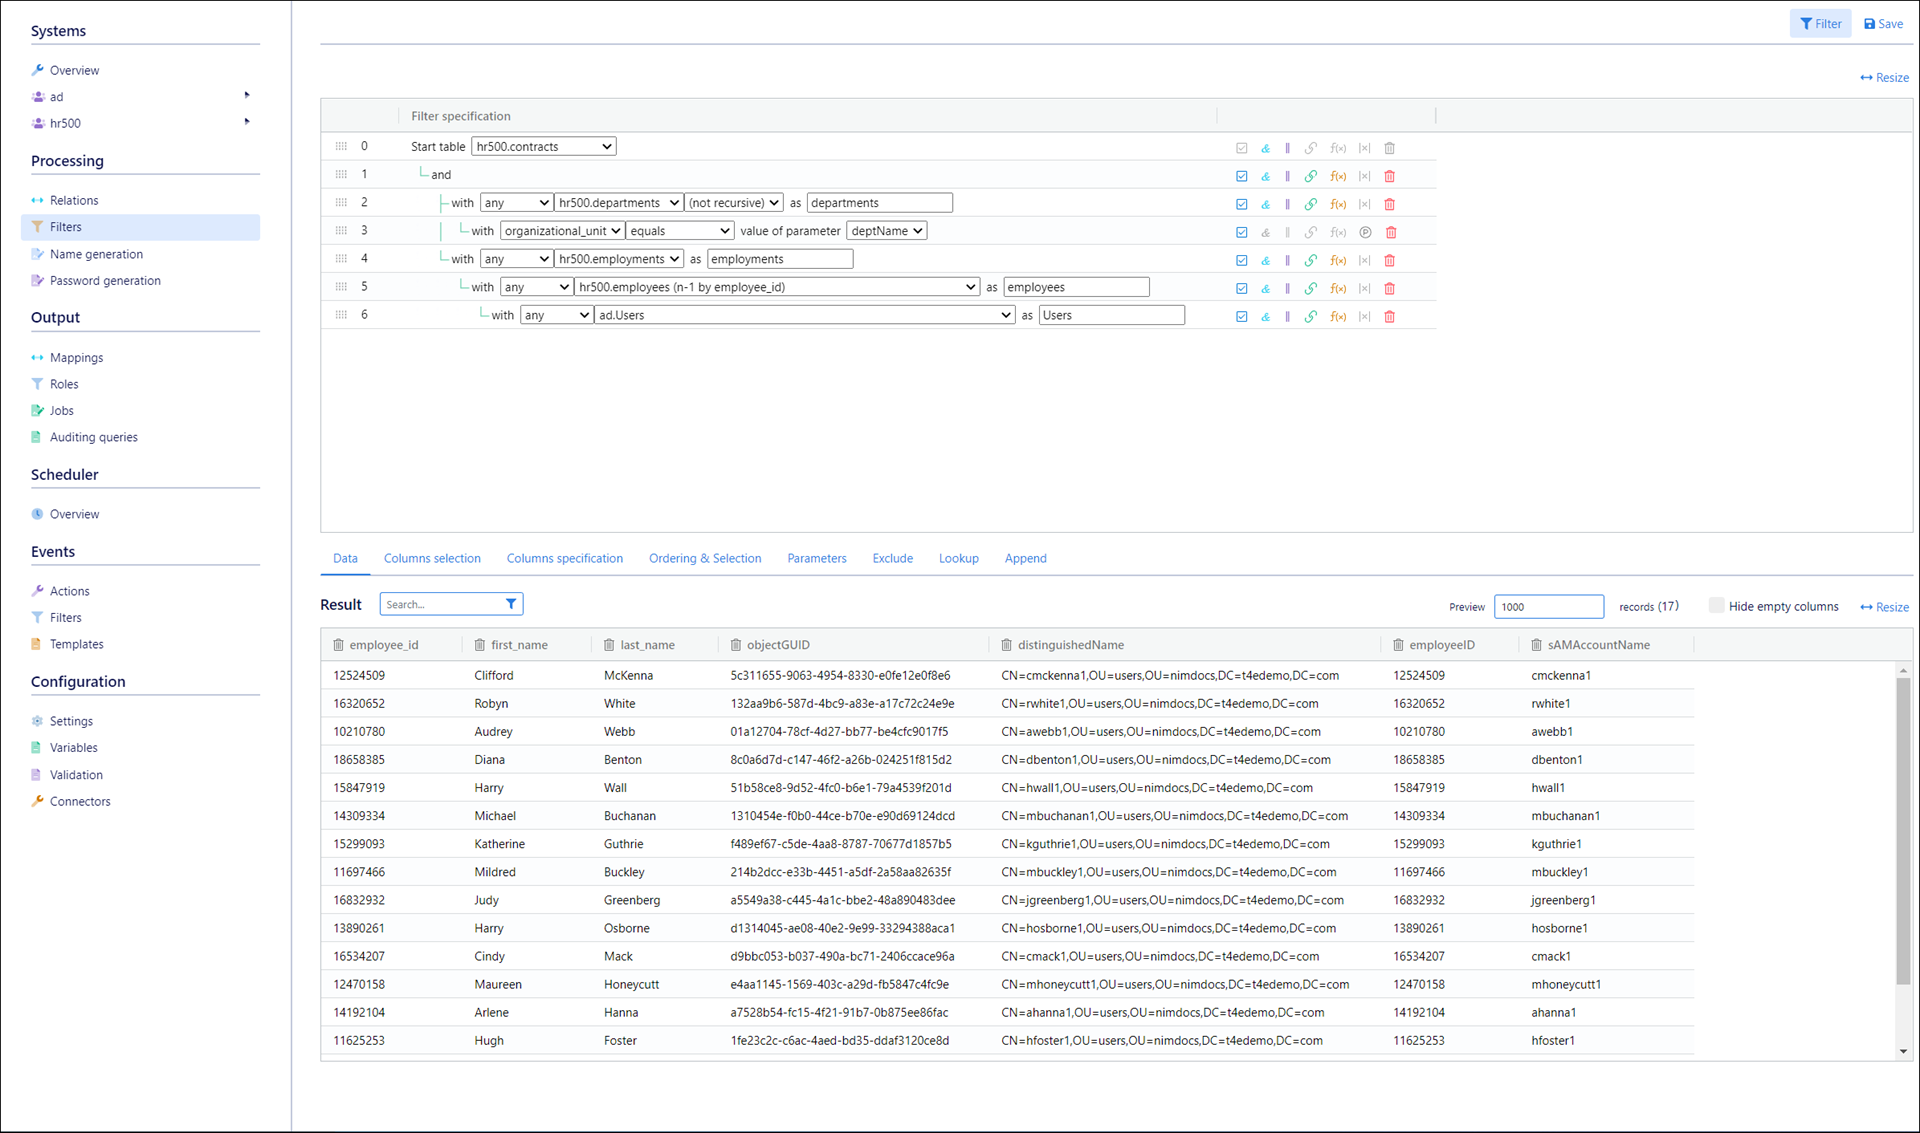
Role Member Filter
The Role Member Filter is used to determine which target accounts will become members of which roles.
It must:
Relate source system employees to their relevant target system accounts
Parameterize the source system column which roles are based on (e.g., departments)
Include the unique ID column (typically the primary key column) of the target system users table (e.g., the
objectGUIDfor Active Directory)
The role generator assigns the correct members (i.e., target accounts) to each generated role, by iterating the rows of the Member Filter Param Value column through the parameterized expression item (the Member Filter Param Name).
For example, if you want a role model based on a 1:1 correspondence of roles to departments, then your filter must 1) relate the source system employees table to the target system users table, and 2) be parameterized on the name column of the departments table. See Parameters.
For example:
Member Filter Param Name
The name of the parameter in the Role Member Filter through which NIM will iterate each row in the selected Member Filter Param Value column to generate the roles.
If the filter has more than one parameterized expression item, this pane will contain multiple rows.
Member Filter Param Value
The specific column in the Role Generation Filter whose rows will be iterated through the Member Filter Param Name parameter, in order to determine the members for each generated role. Often, this is the same column used for the Role Name Column.
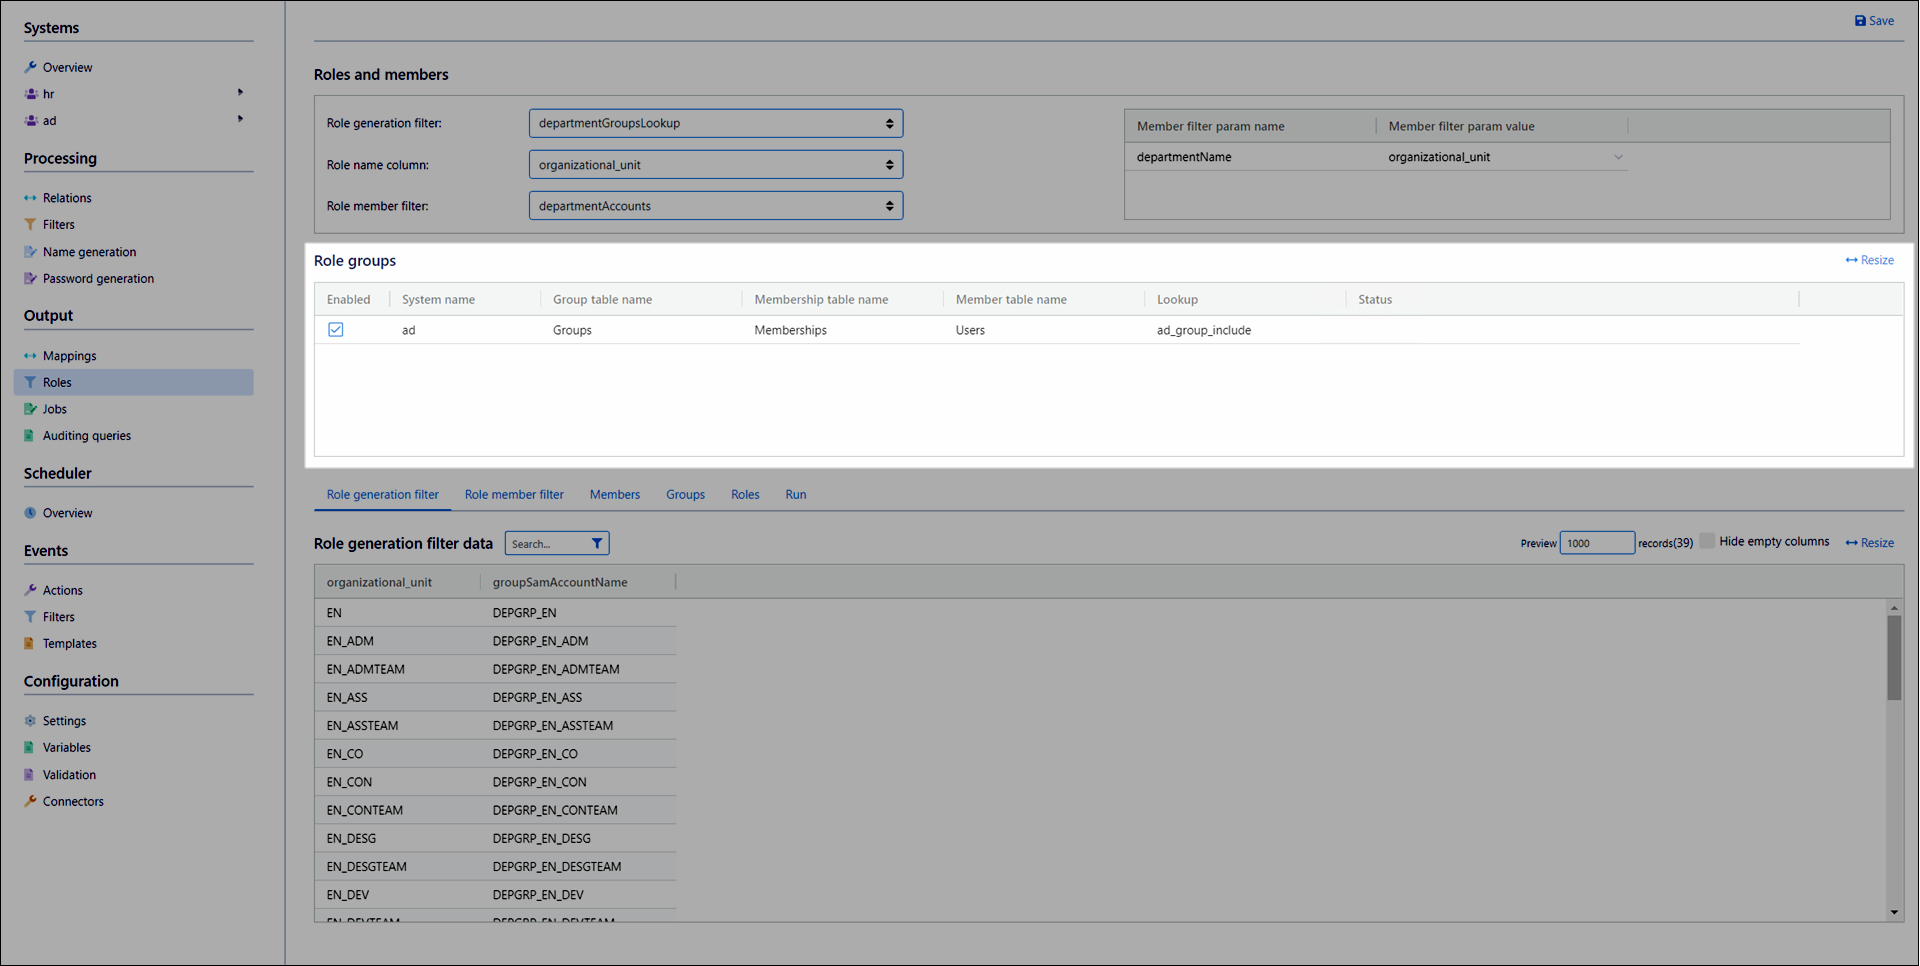
Whereas the options in the Roles and members pane determine the roles to be created and the target accounts to be added to the roles, the options in the Role Groups Pane determine the groups to be added to the roles.
Tip
Using the Role Groups pane is entirely optional. A potential alternative way of adding groups to your generated roles is Role mining.
- Enabled*
Select this checkbox to include the groups looked up in the associated System Name in this role generator. Typically there will only be one target system and thus one row in this pane, and it should be enabled. However, if your Role Generation Filter performs lookups in multiple target systems, there will be multiple rows and you may want to disable some to exclude those systems from this role generator.
- System Name
The target system from the Role Generation Filter, in which the Lookup is being performed.
- Group Table Name
The target system data table in which the lookup in the Role Generation Filter is being performed. Typically is a
Groupstable.- Membership Table Name
The target system data table which contains Intra-system relations between users and groups. Typically is a
Membershipstable or similar.- Member Table Name
The target system data table whose rows will become members in roles. Typically is a
Userstable or similar.- Lookup
The lookup being used in the Role Generation Filter. Only include lookups are detected.
- Status
The options in the Tabs Pane help you preview the output of the role generator, and subsequently apply the role generator.
- Role Generation Filter tab
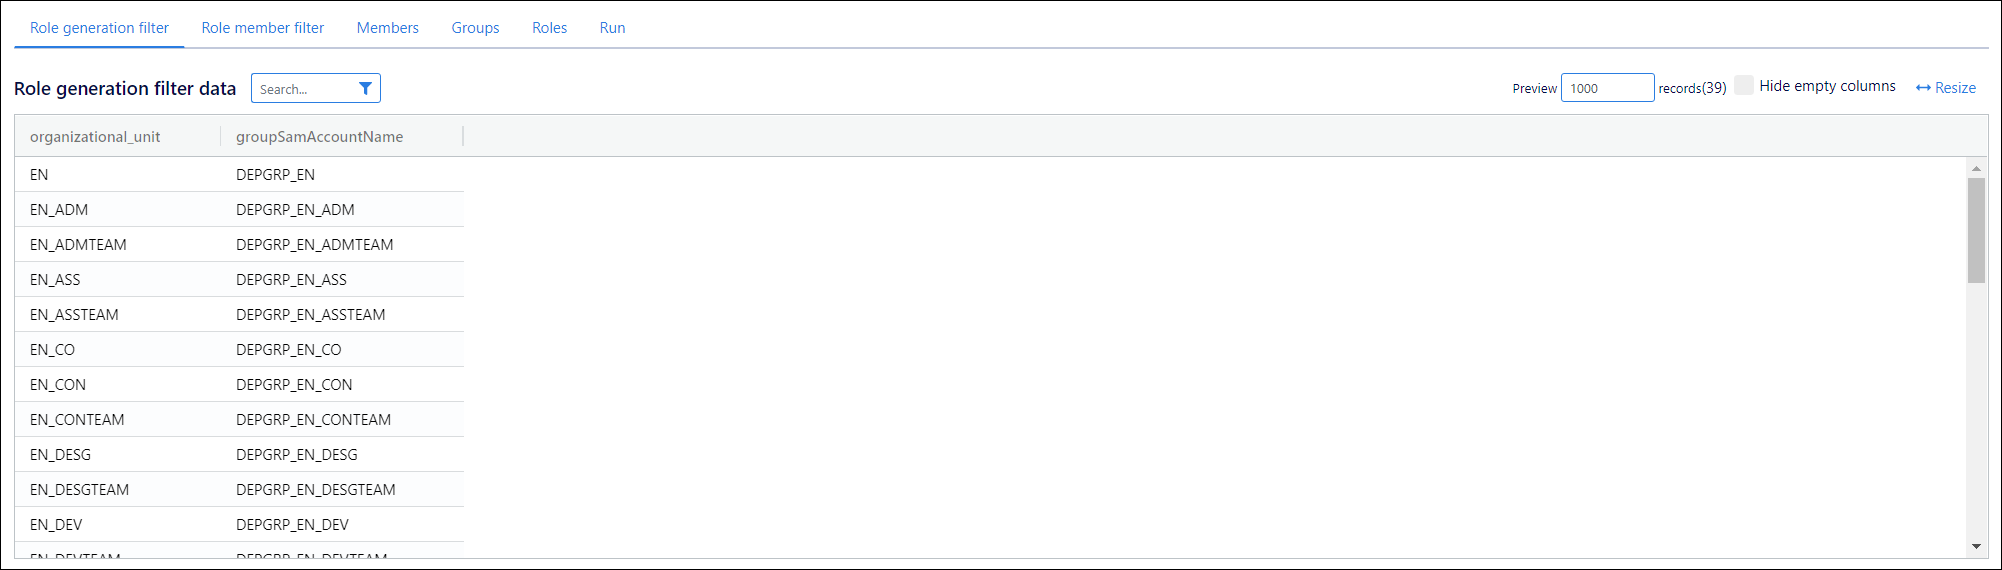
Shows the output of the Role Generation Filter.
- Role Member Filter tab

Shows the output of the Role Member Filter.
- Members tab
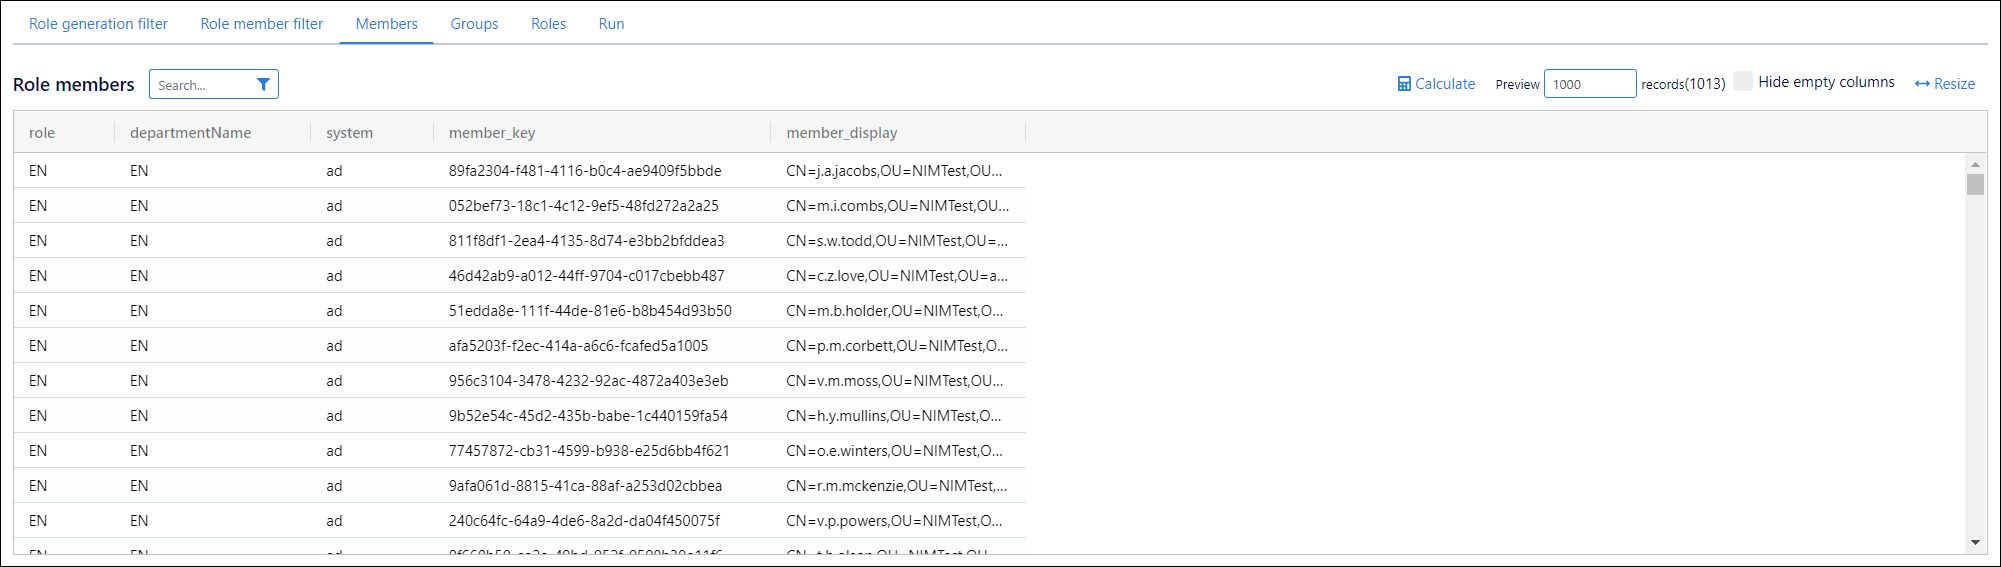
Click Calculate to see the results of every parameter iteration for the Role Member Filter. In other words, this is a preview of all members involved in this role generator, and the roles to which they will be assigned.
- Groups tab
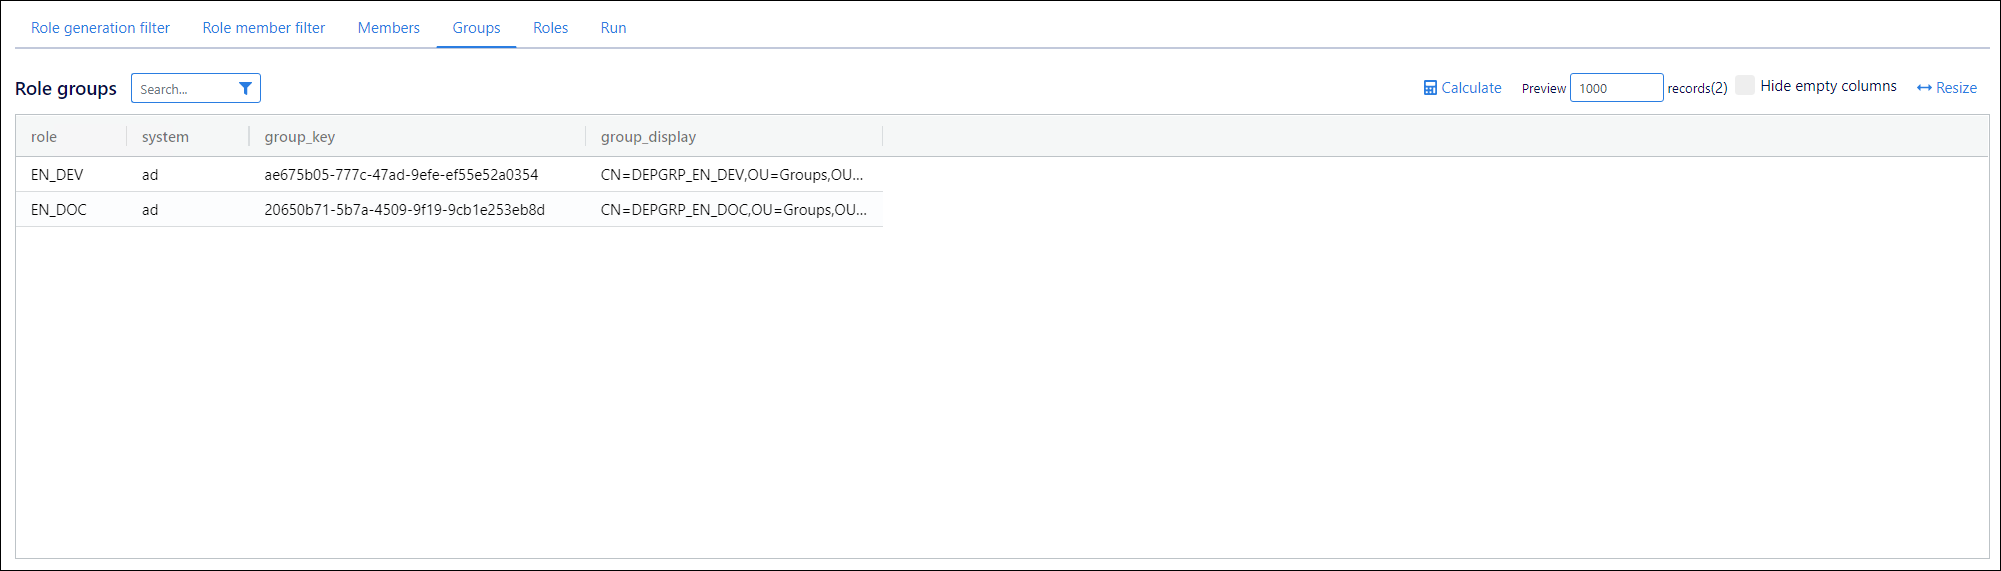
Click Calculate to see all groups in the target system to which this role generator will assign members, and their corresponding roles. This only includes groups that already exist in the target system, as determined by the Lookup.
- Roles tab
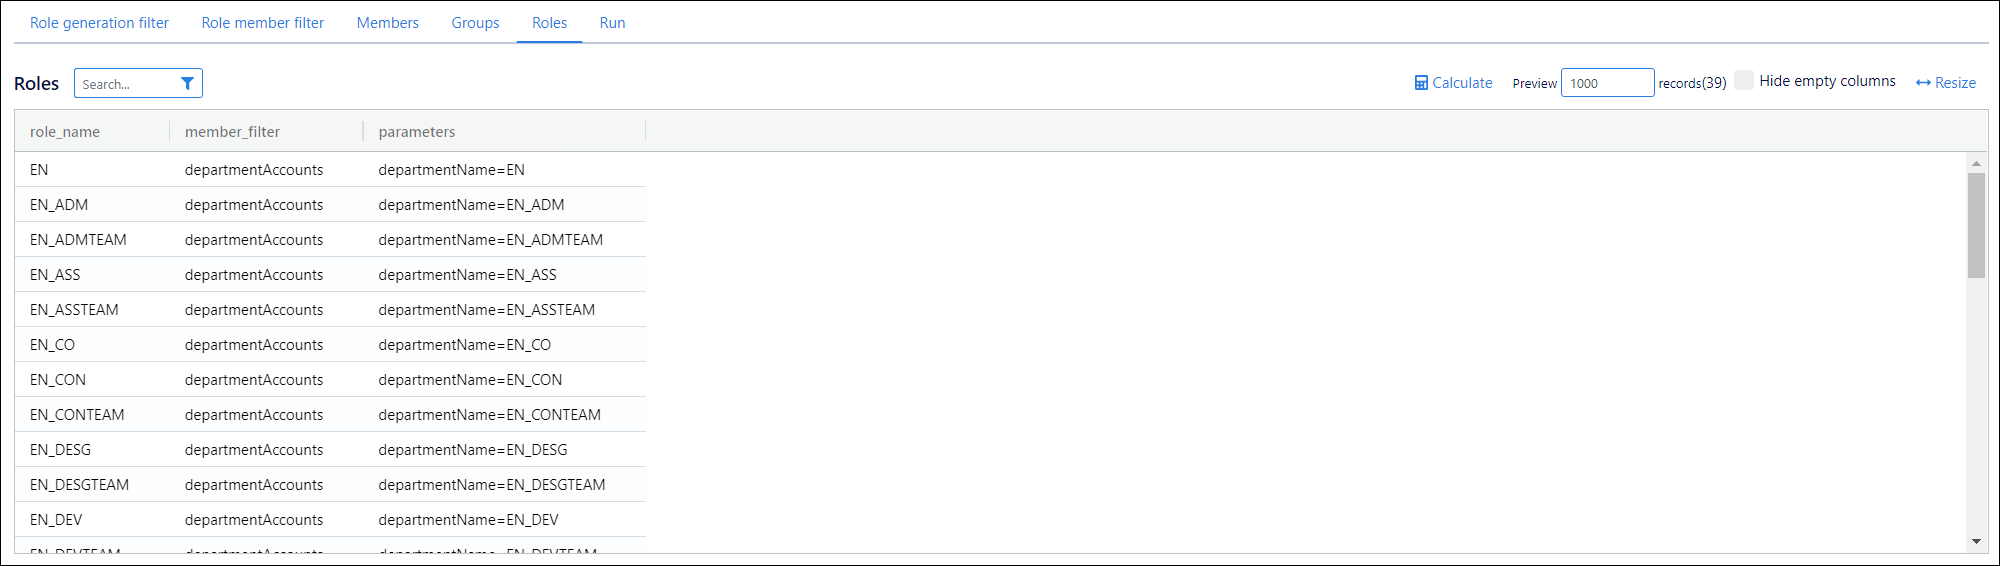
Click Calculate to see all roles that this role generator will create.
- Run tab
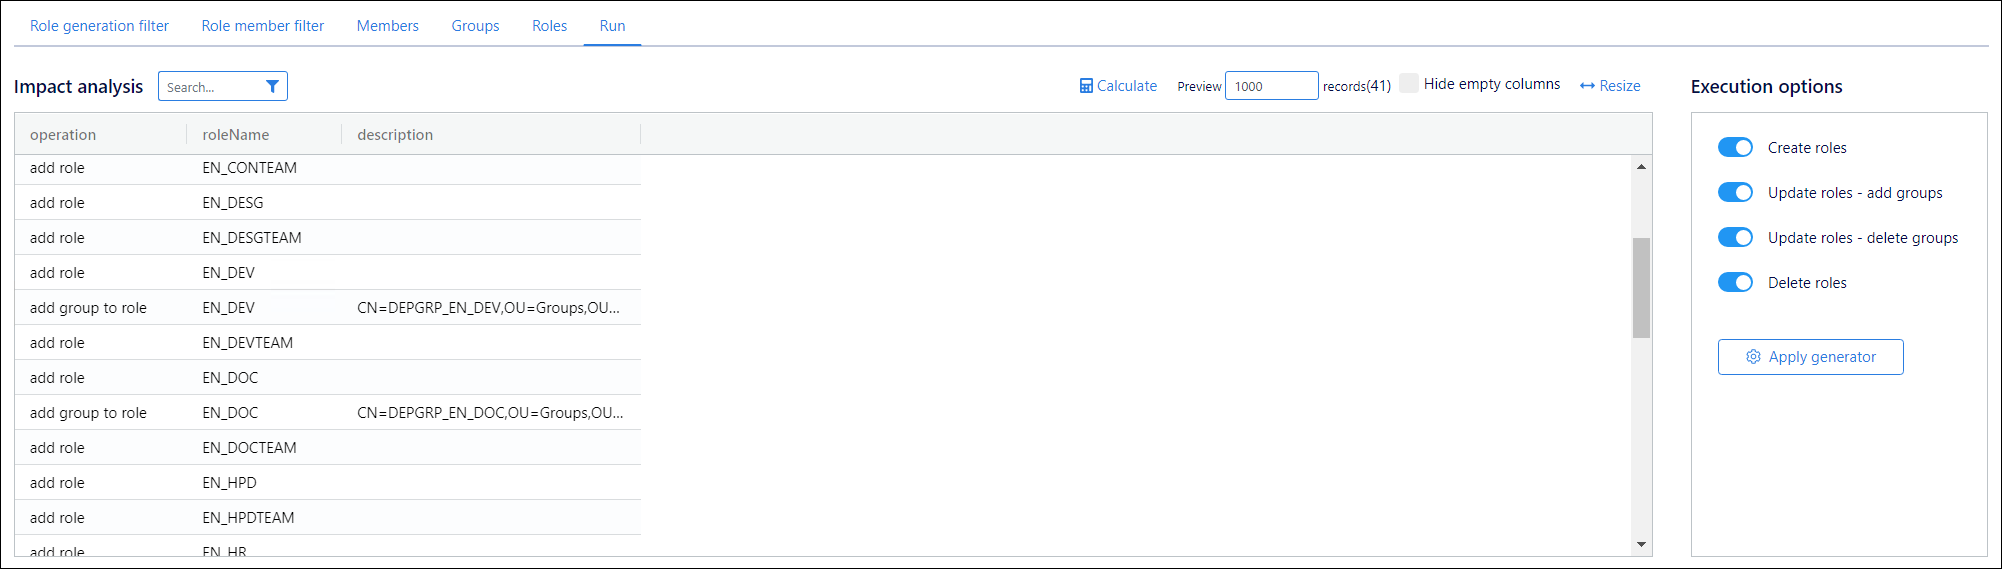
Click Calculate to preview the operations that will be performed when you apply the role generator. Note that no changes are written into the target system when you do so. Applying the role generator only updates your active role model.
Execution Options pane- Create Roles
Include all
add roleoperations in the Impact Analysis pane under the Run tab.- Update Roles - Add Groups
Include all
add group to roleoperations listed in the Impact Analysis pane under the Run tab. Determined by which rows' Enabled checkboxes have been selected in the Role Groups pane.- Update Roles - Delete Groups
Include all
delete group from roleoperations listed in the Impact Analysis pane under the Run tab. Determined by which rows' Enabled checkboxes have been cleared in the Role Groups pane.- Delete Roles
Include all
delete roleoperations in the Impact Analysis pane under the Run tab.- Apply Generator
Click to apply the role generator, based on the Impact Analysis pane under the Run tab.
Applying a role generator does not write any changes into target systems. It only updates the relevant role model. Changes are only written into target systems when you execute the relevant role model.