Step 1: Provision groups into AD (tutorial)
Before we can manage group memberships via a NIM role model, we need to create those groups in our target system.
For this example, we'll assume a business logic with 1:1 correspondence of HR departments to AD groups. That is, we'll assume that each employee needs to be in one and only one group, and that the group is based on the employee's department.
Create a group filter
First, we'll create a filter that outputs a column with all departments in our CSV source system.
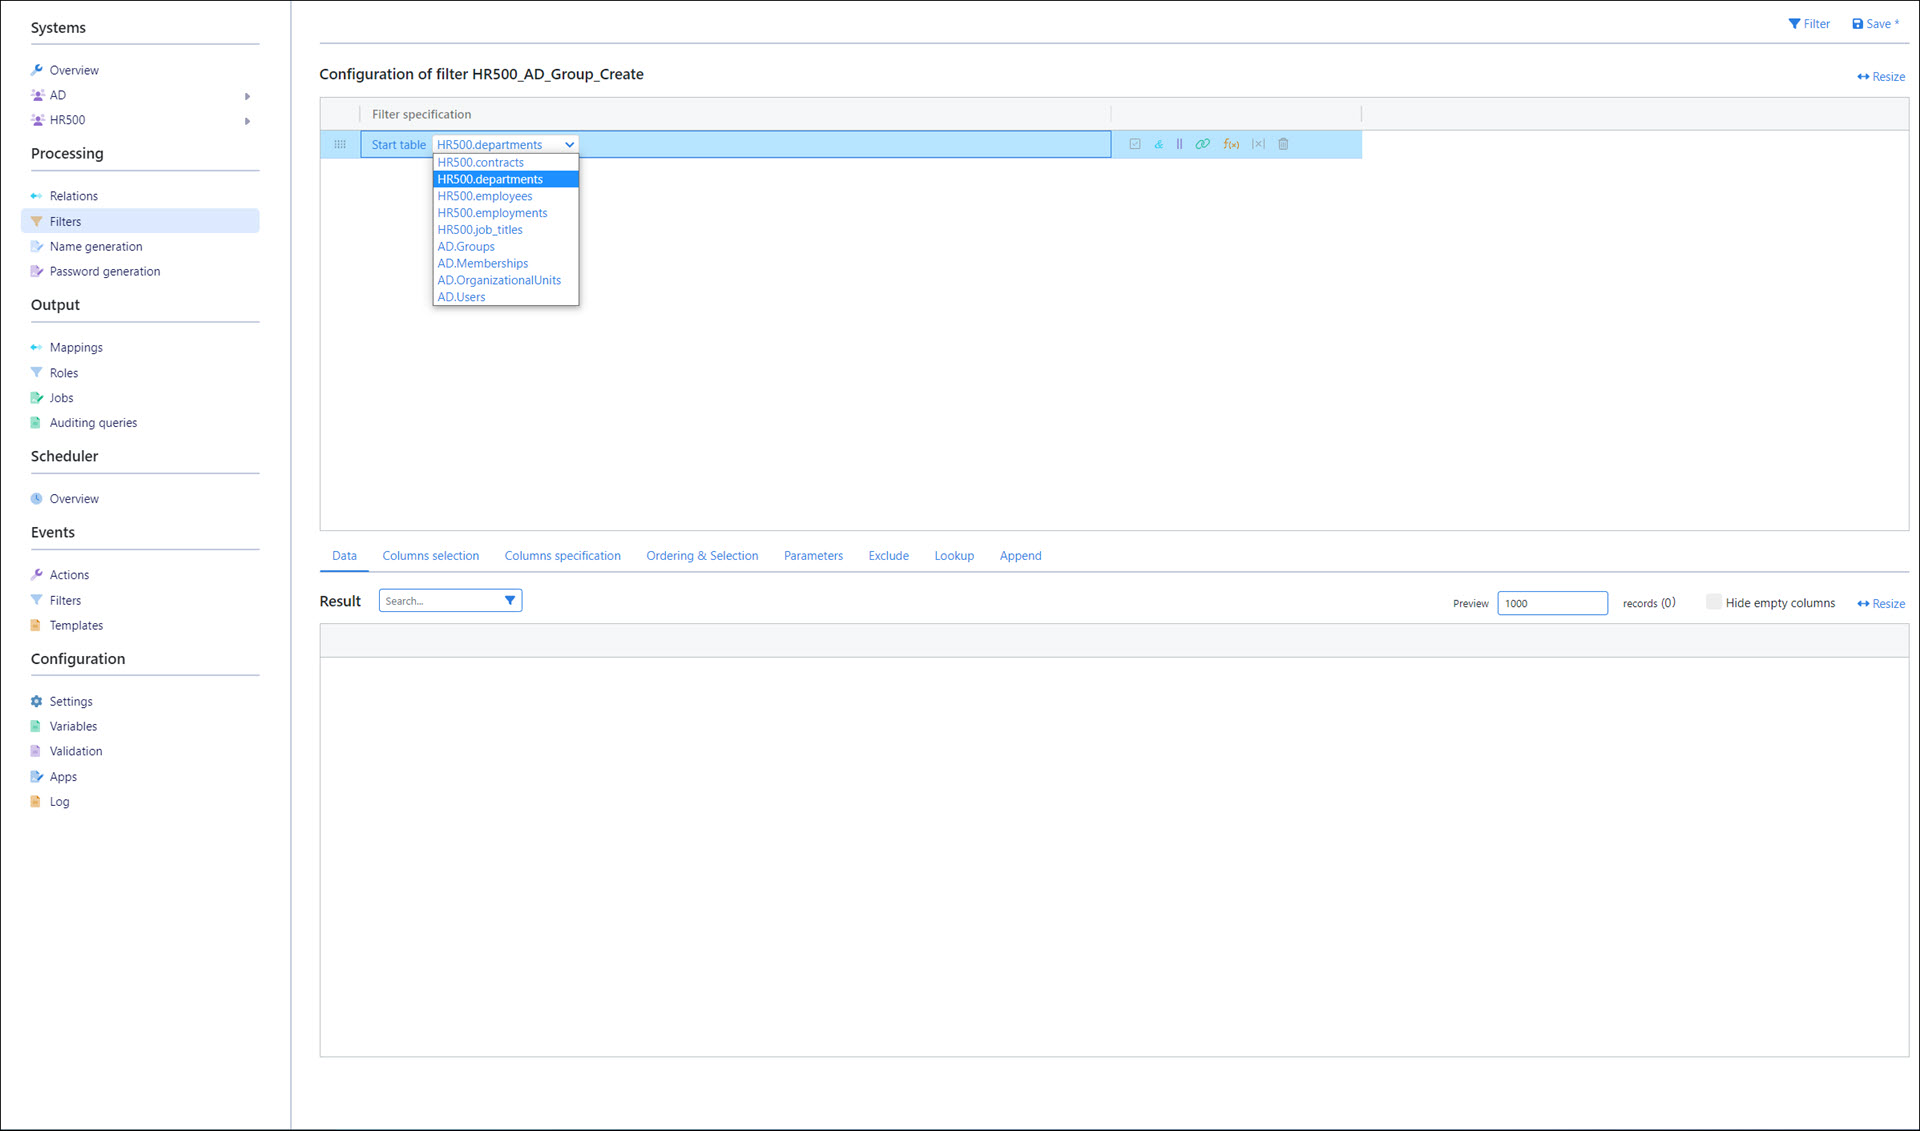
Go to Processing > Filters.
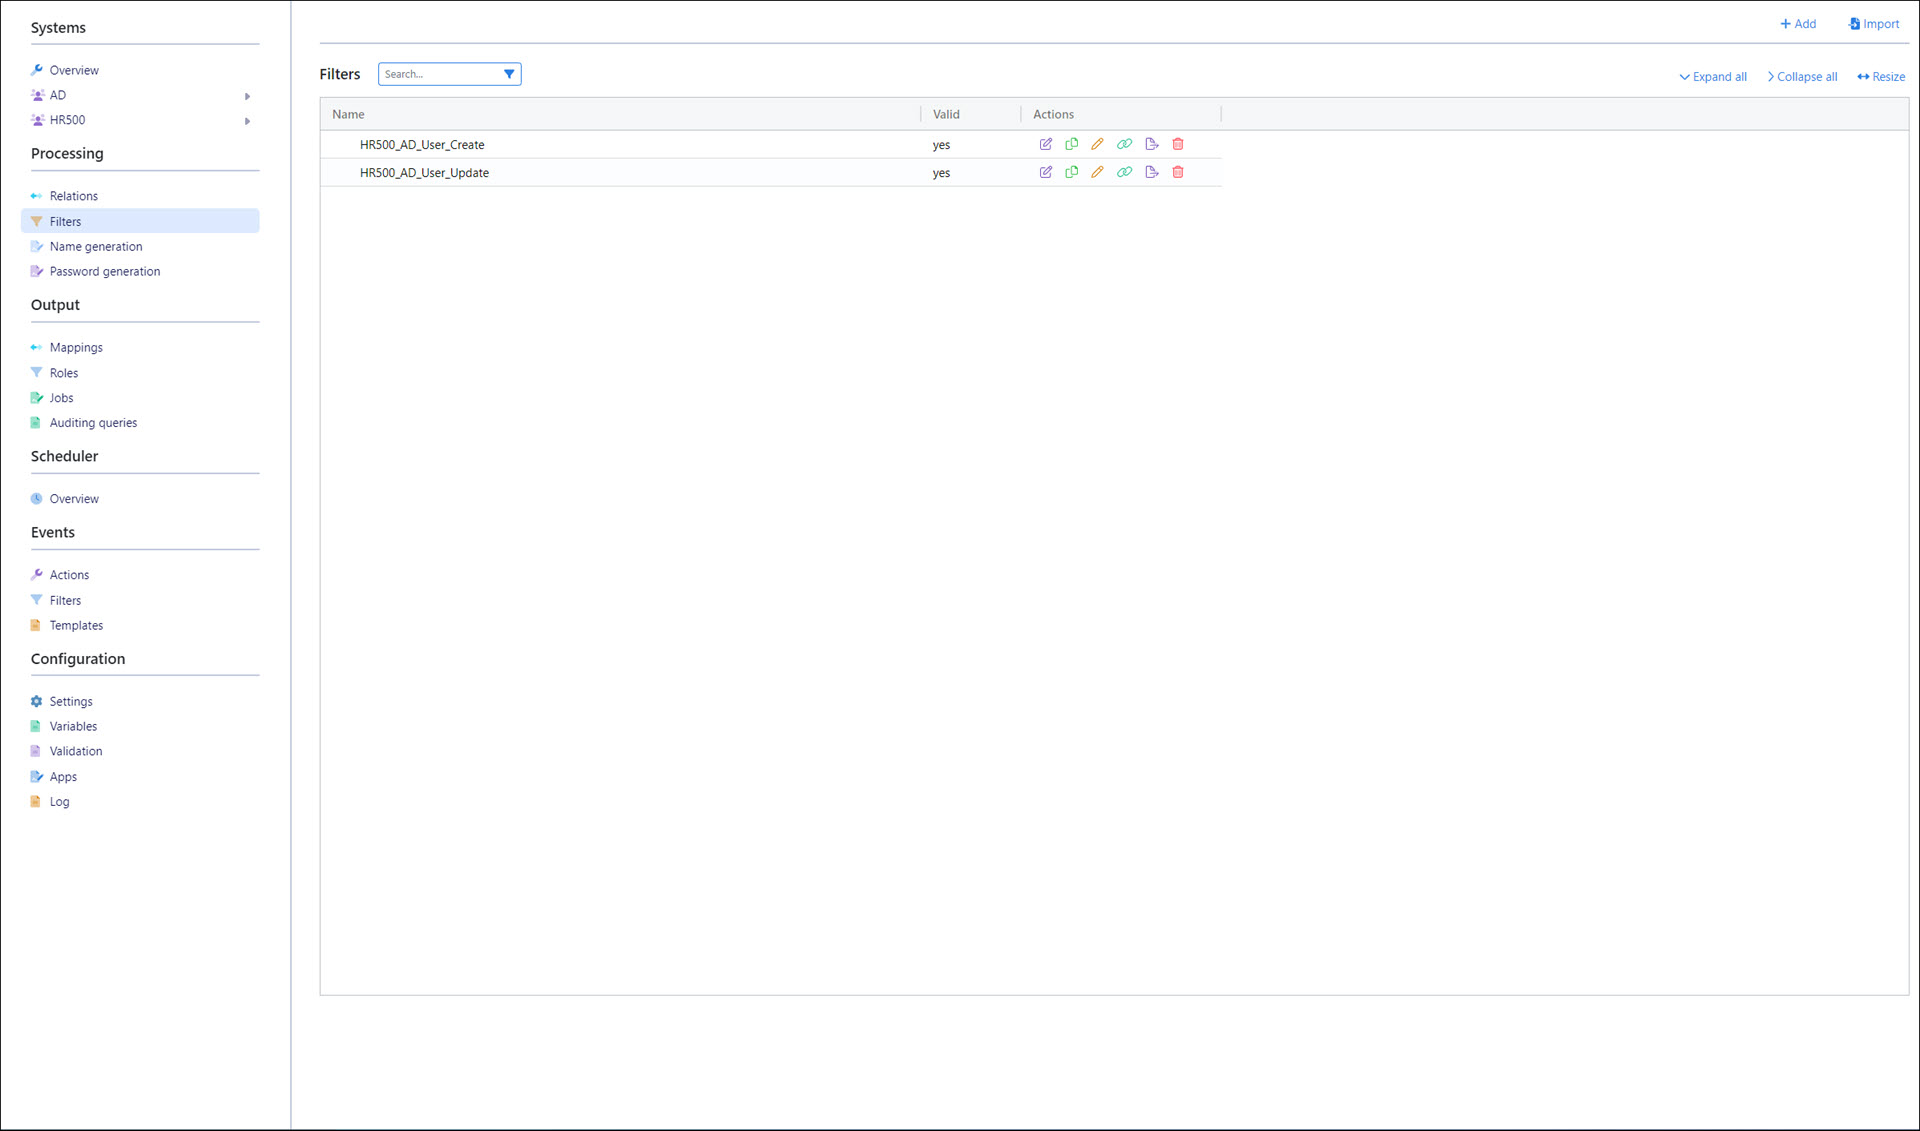
Click Add.
For the Filter Name, enter
HR500_AD_Group_Create.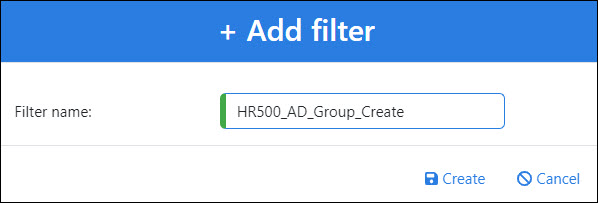
Click Create.
Configure the filter
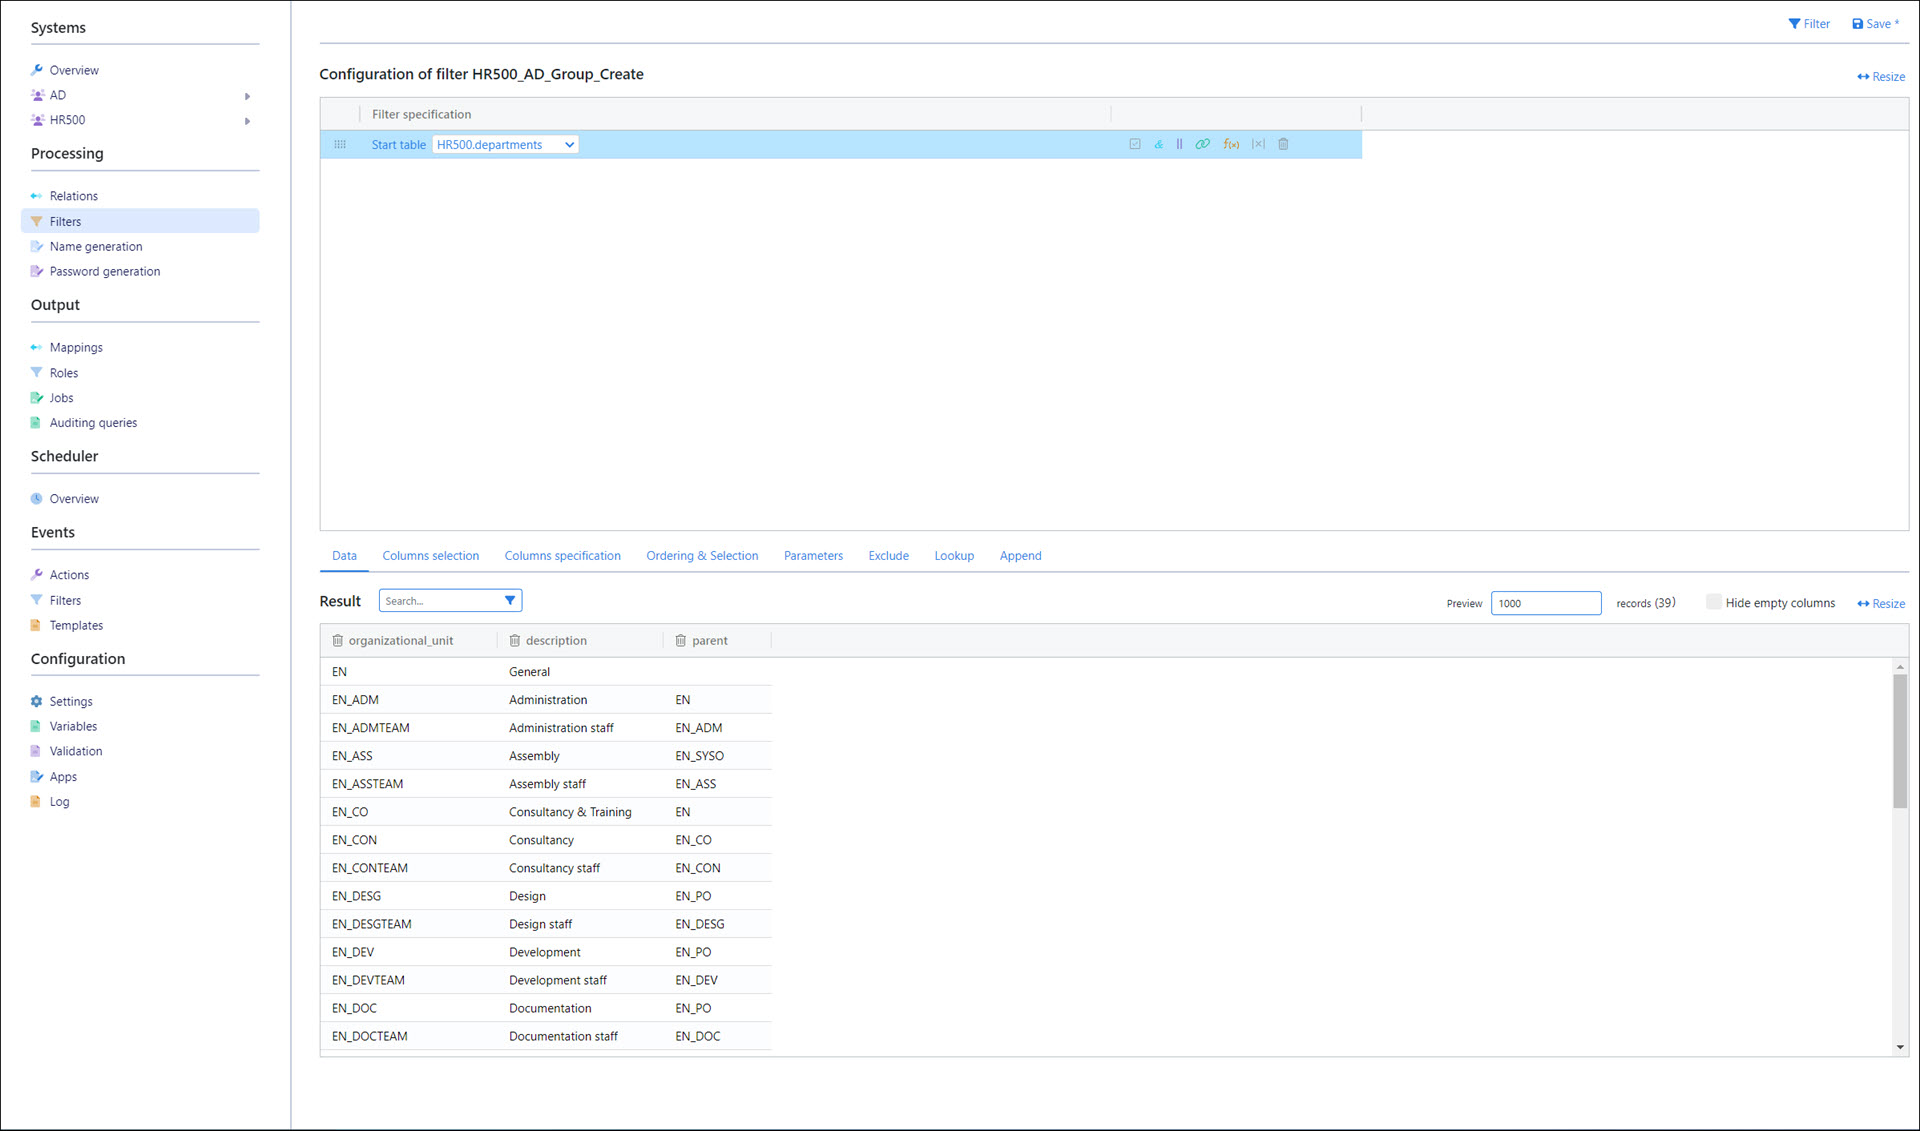
Select HR500.departments as the Start Table.
Click Filter to run the filter. The results are populated into the Result pane.
Optional: If the naming scheme of departments in the HR source system is different than the desired naming scheme of groups in the target system, a transformation is required.
For this example, let's say we want to prefix department names with
DEPGRP_. For example, the HR departmentEN_DOCshould become the target AD groupDEPGRP_EN_DOC.Go to the Columns Specification tab.
Click Add Script Column.
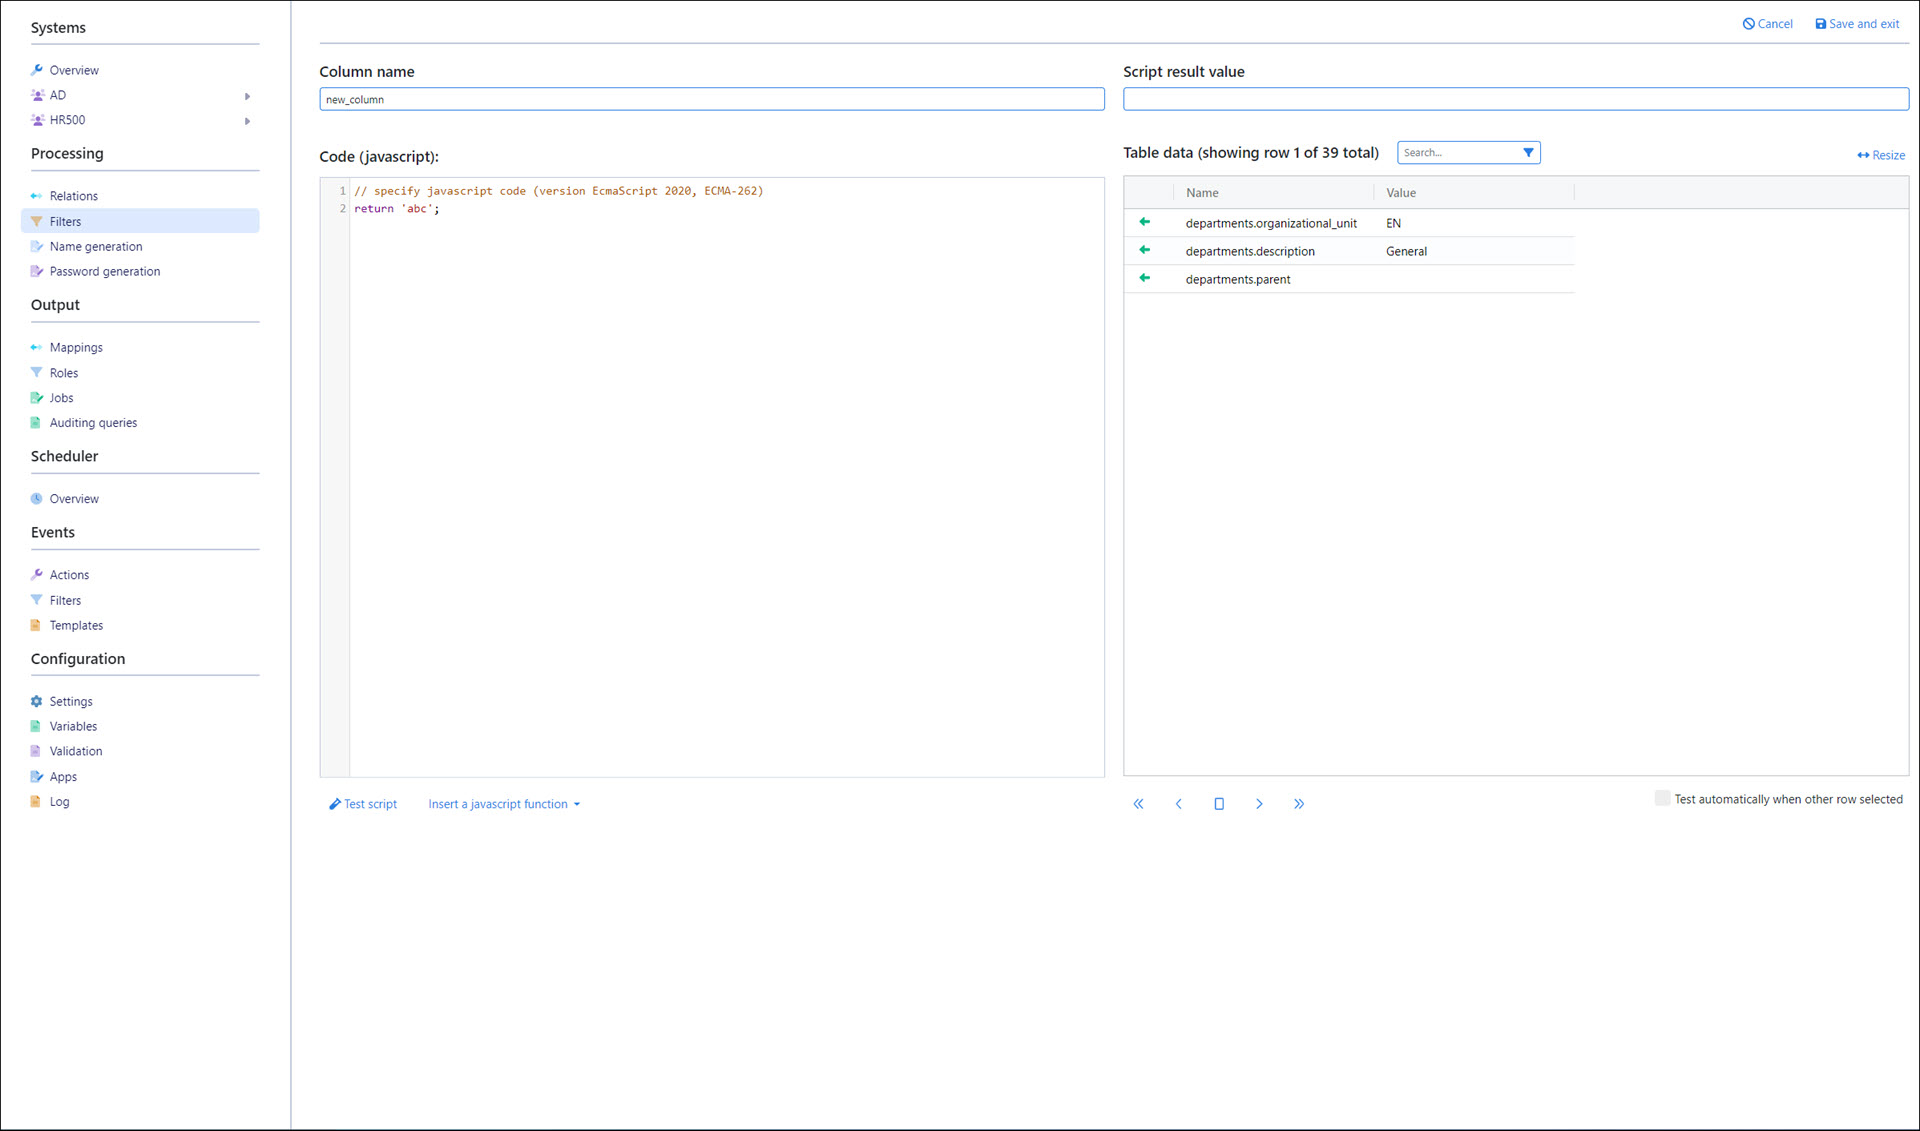
Enter a Column Name.
For this example, we'll name the column
dep_grp_name.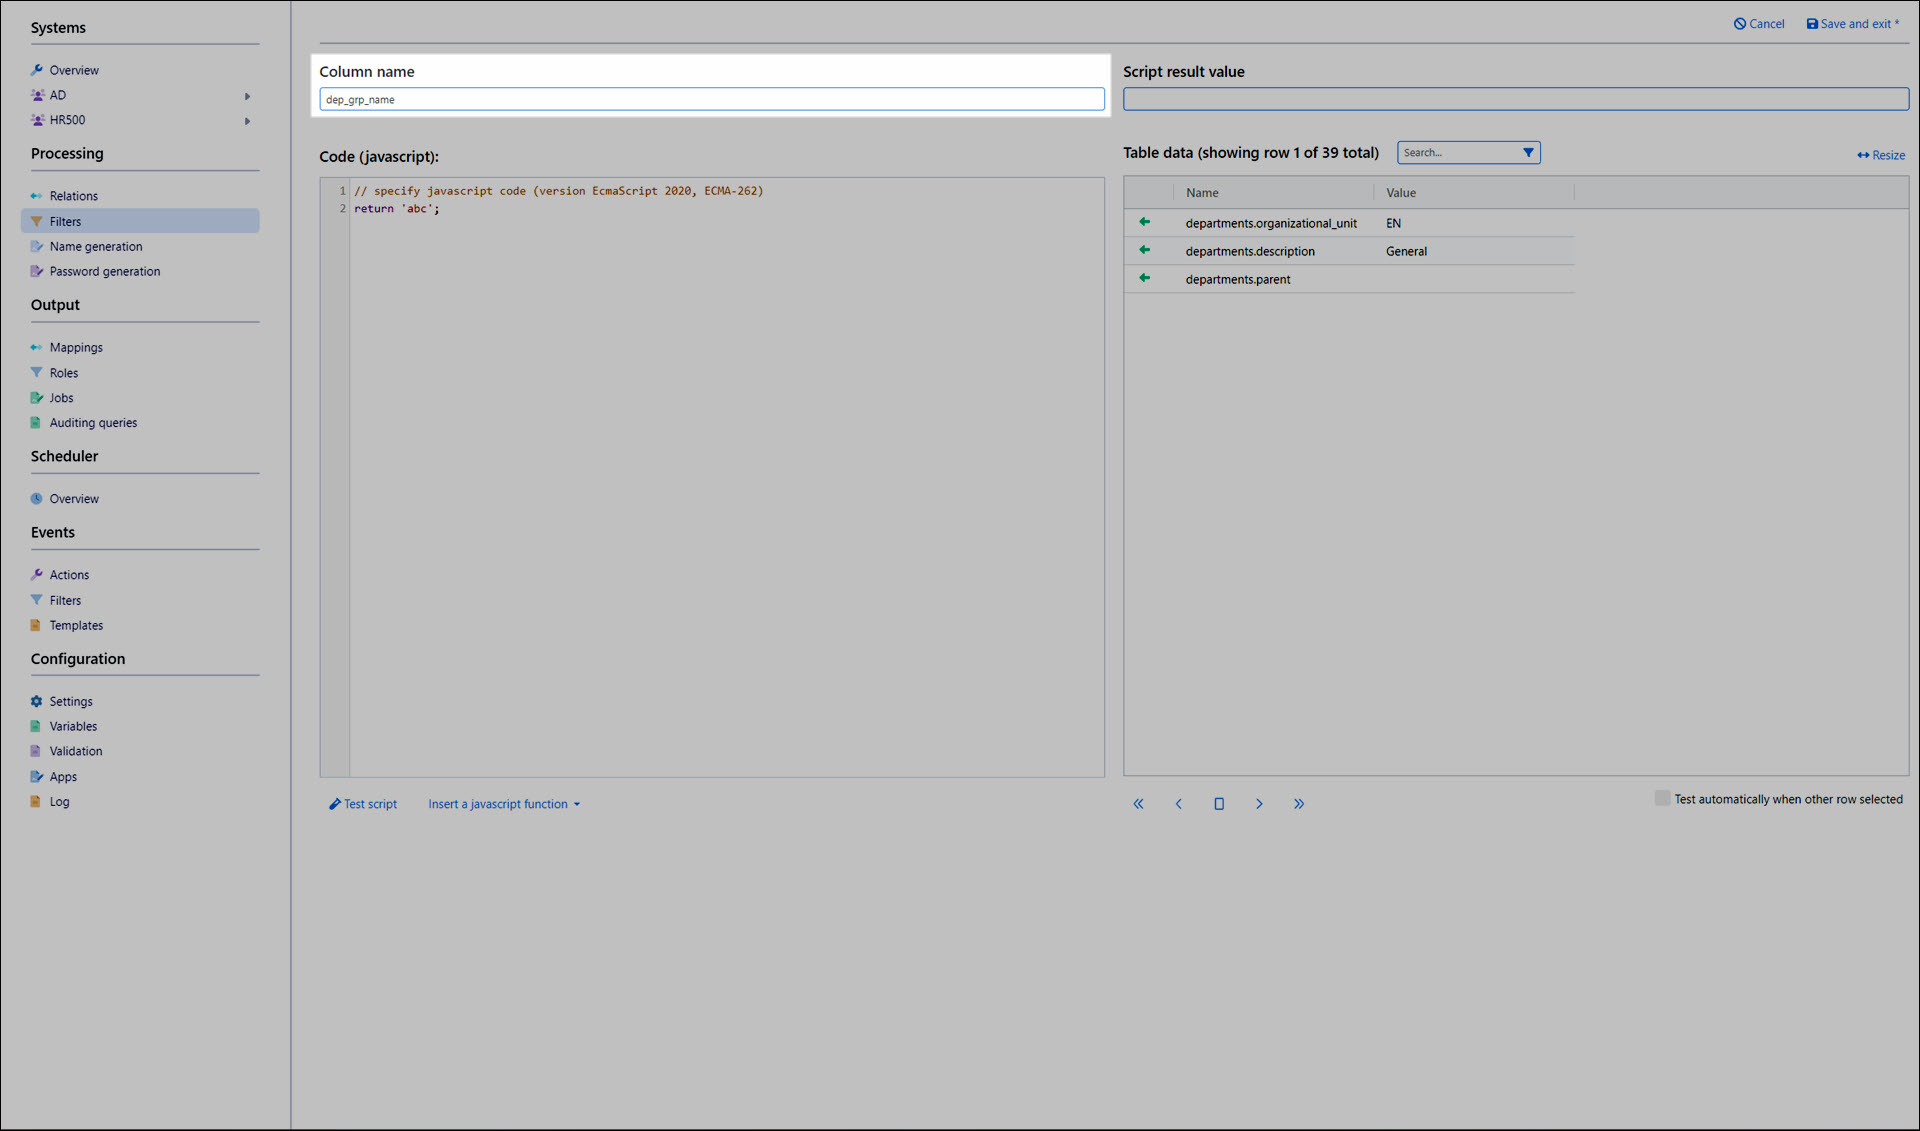
Enter your JavaScript in the Code pane.
For this example, we'll use the following JavaScript:
return 'DEPGRP_'+departments['organizational_unit'].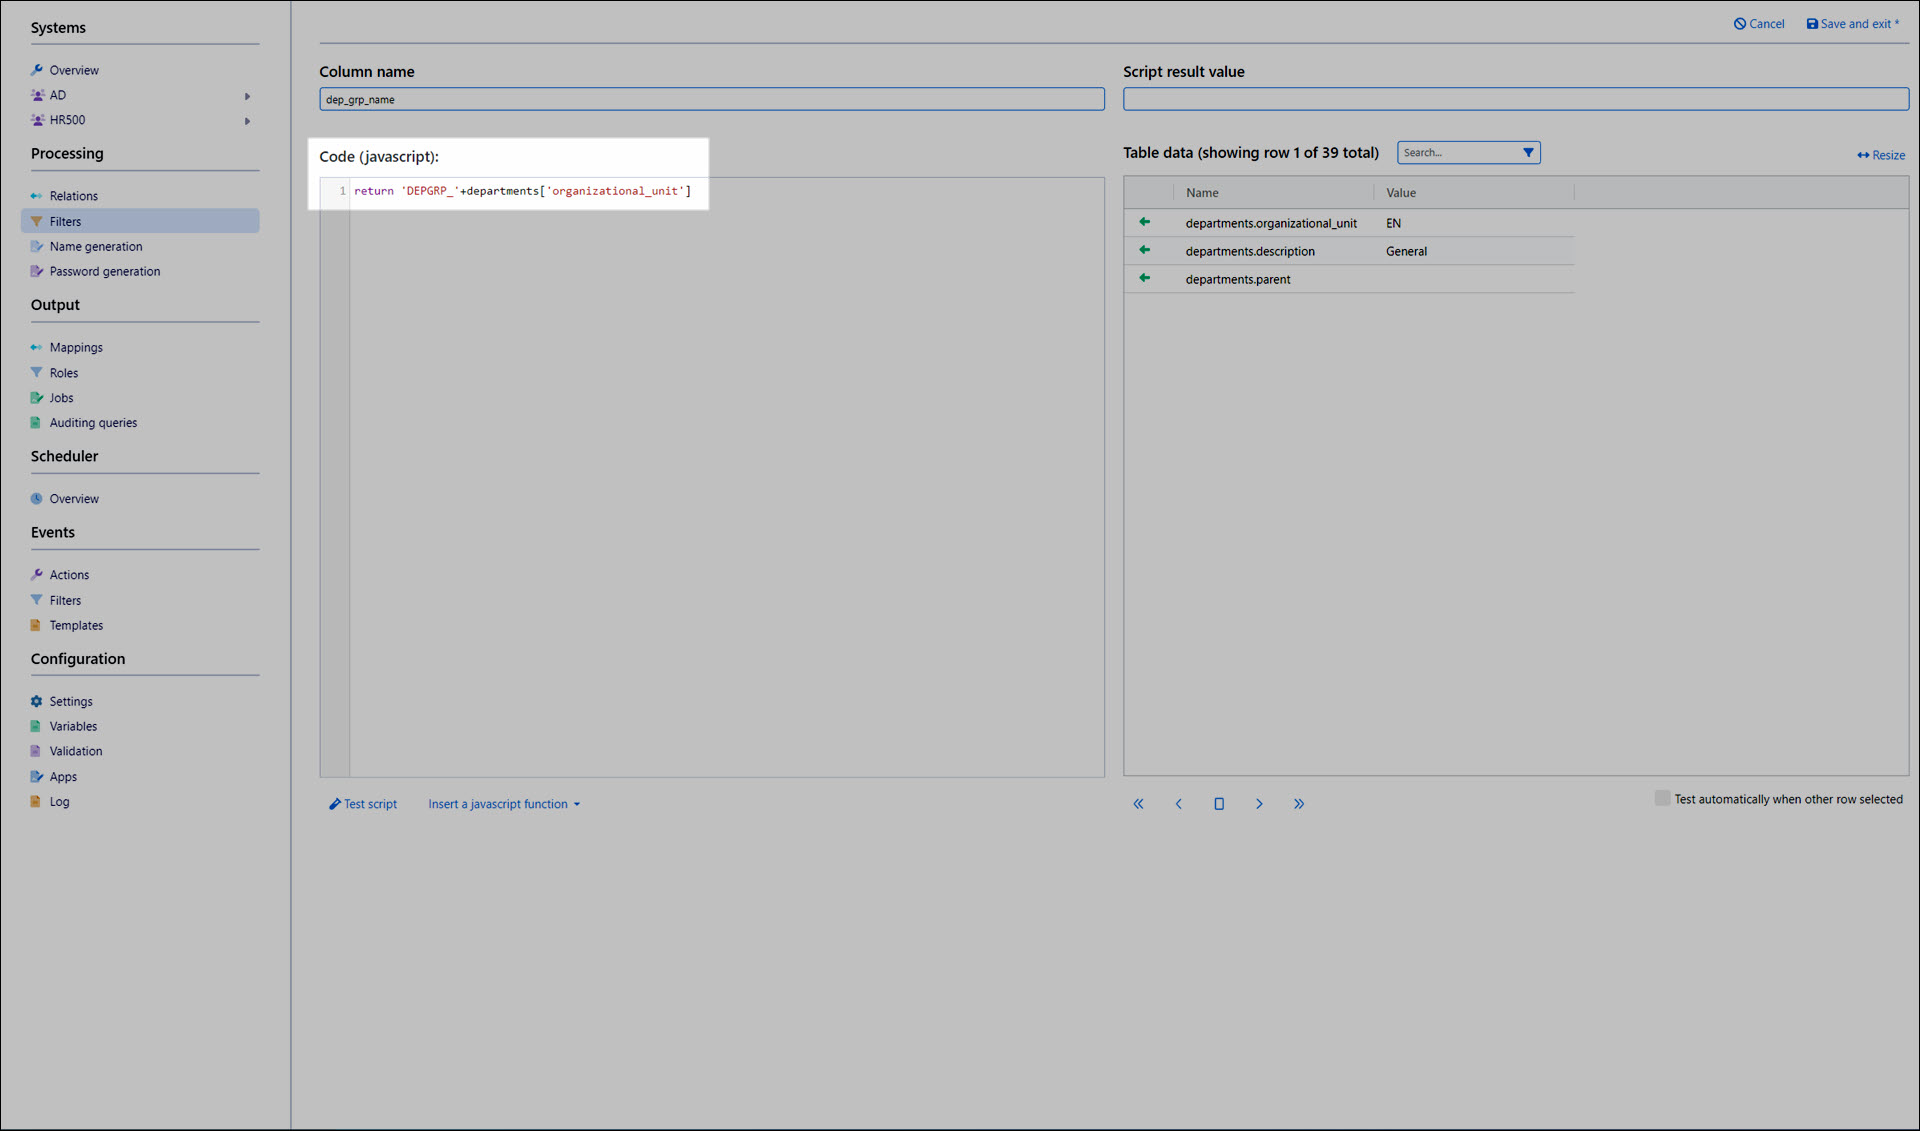
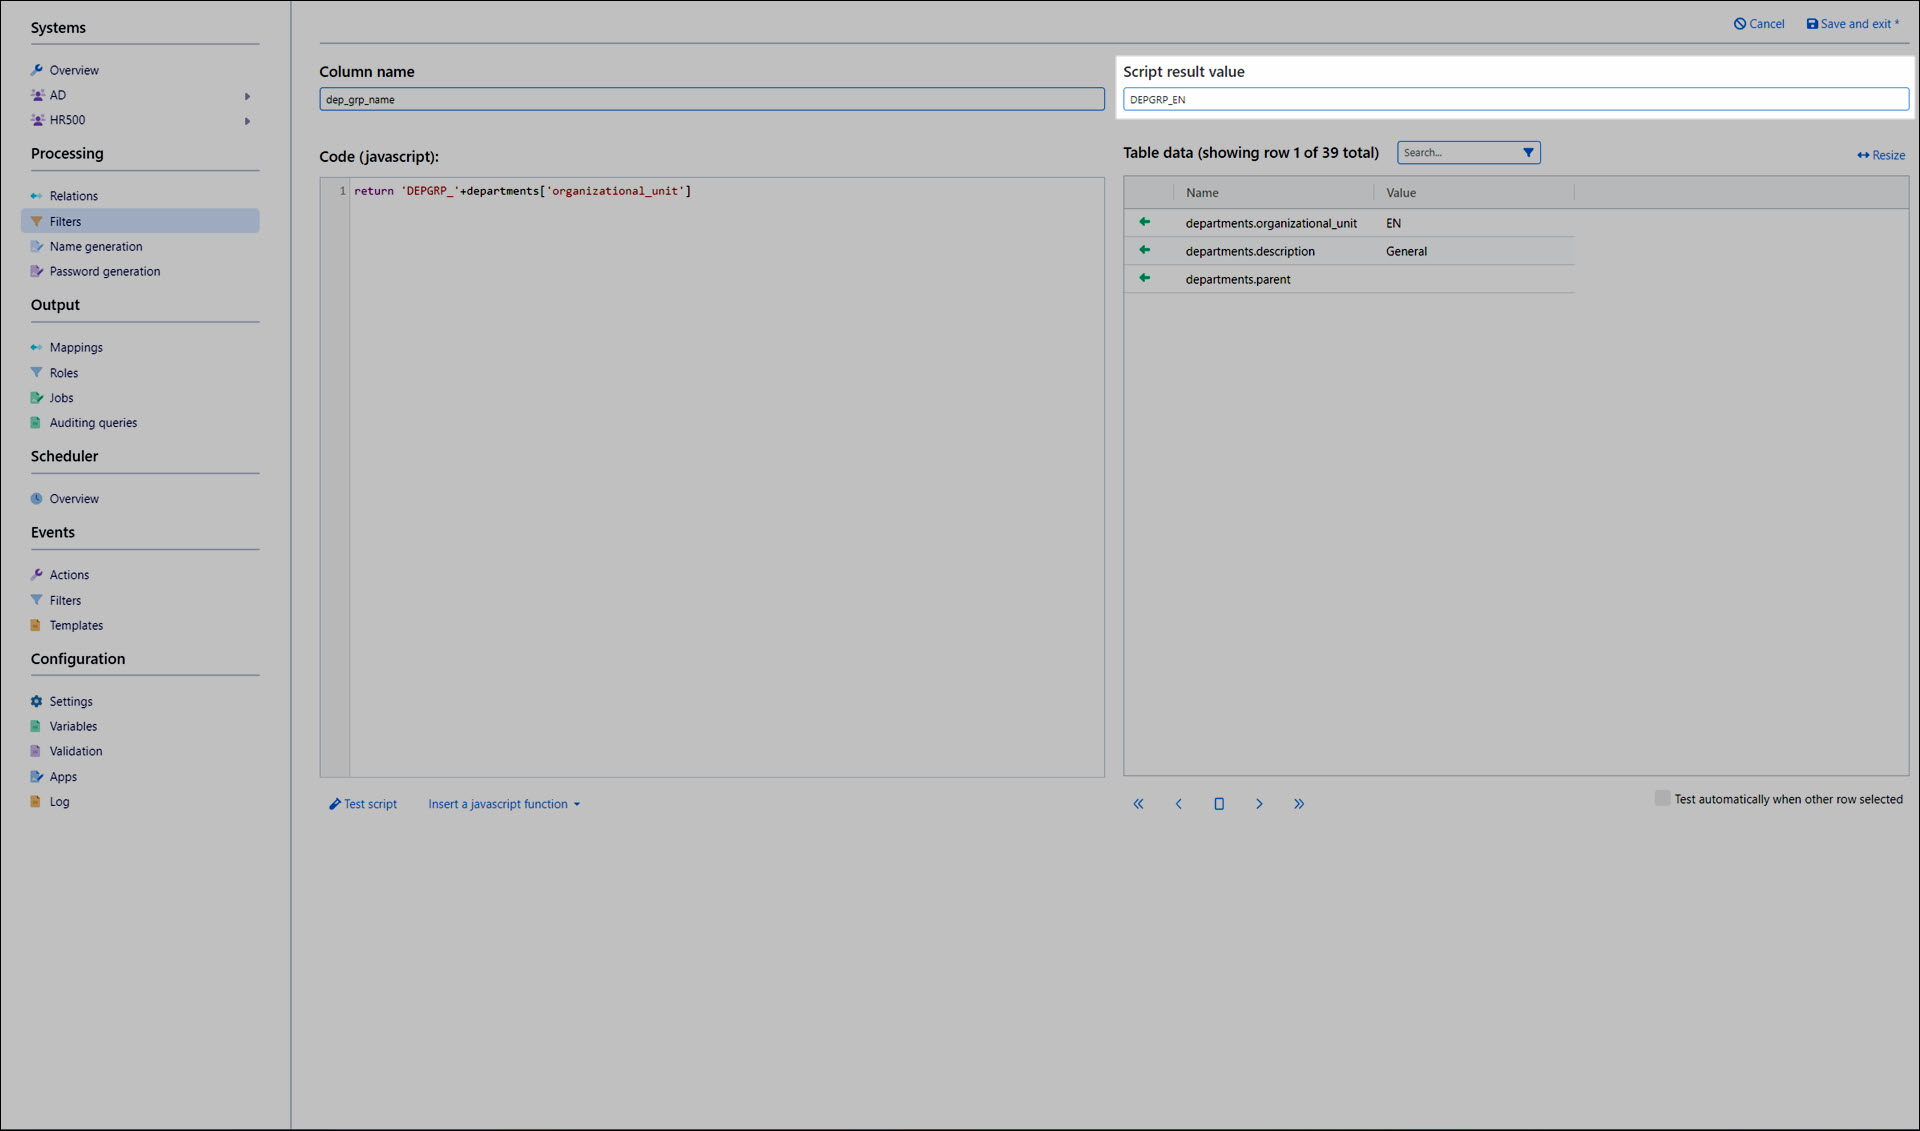
Click Test Script to execute your JavaScript code.
The result appears in the Script Result Value field.
Click Save and Exit.
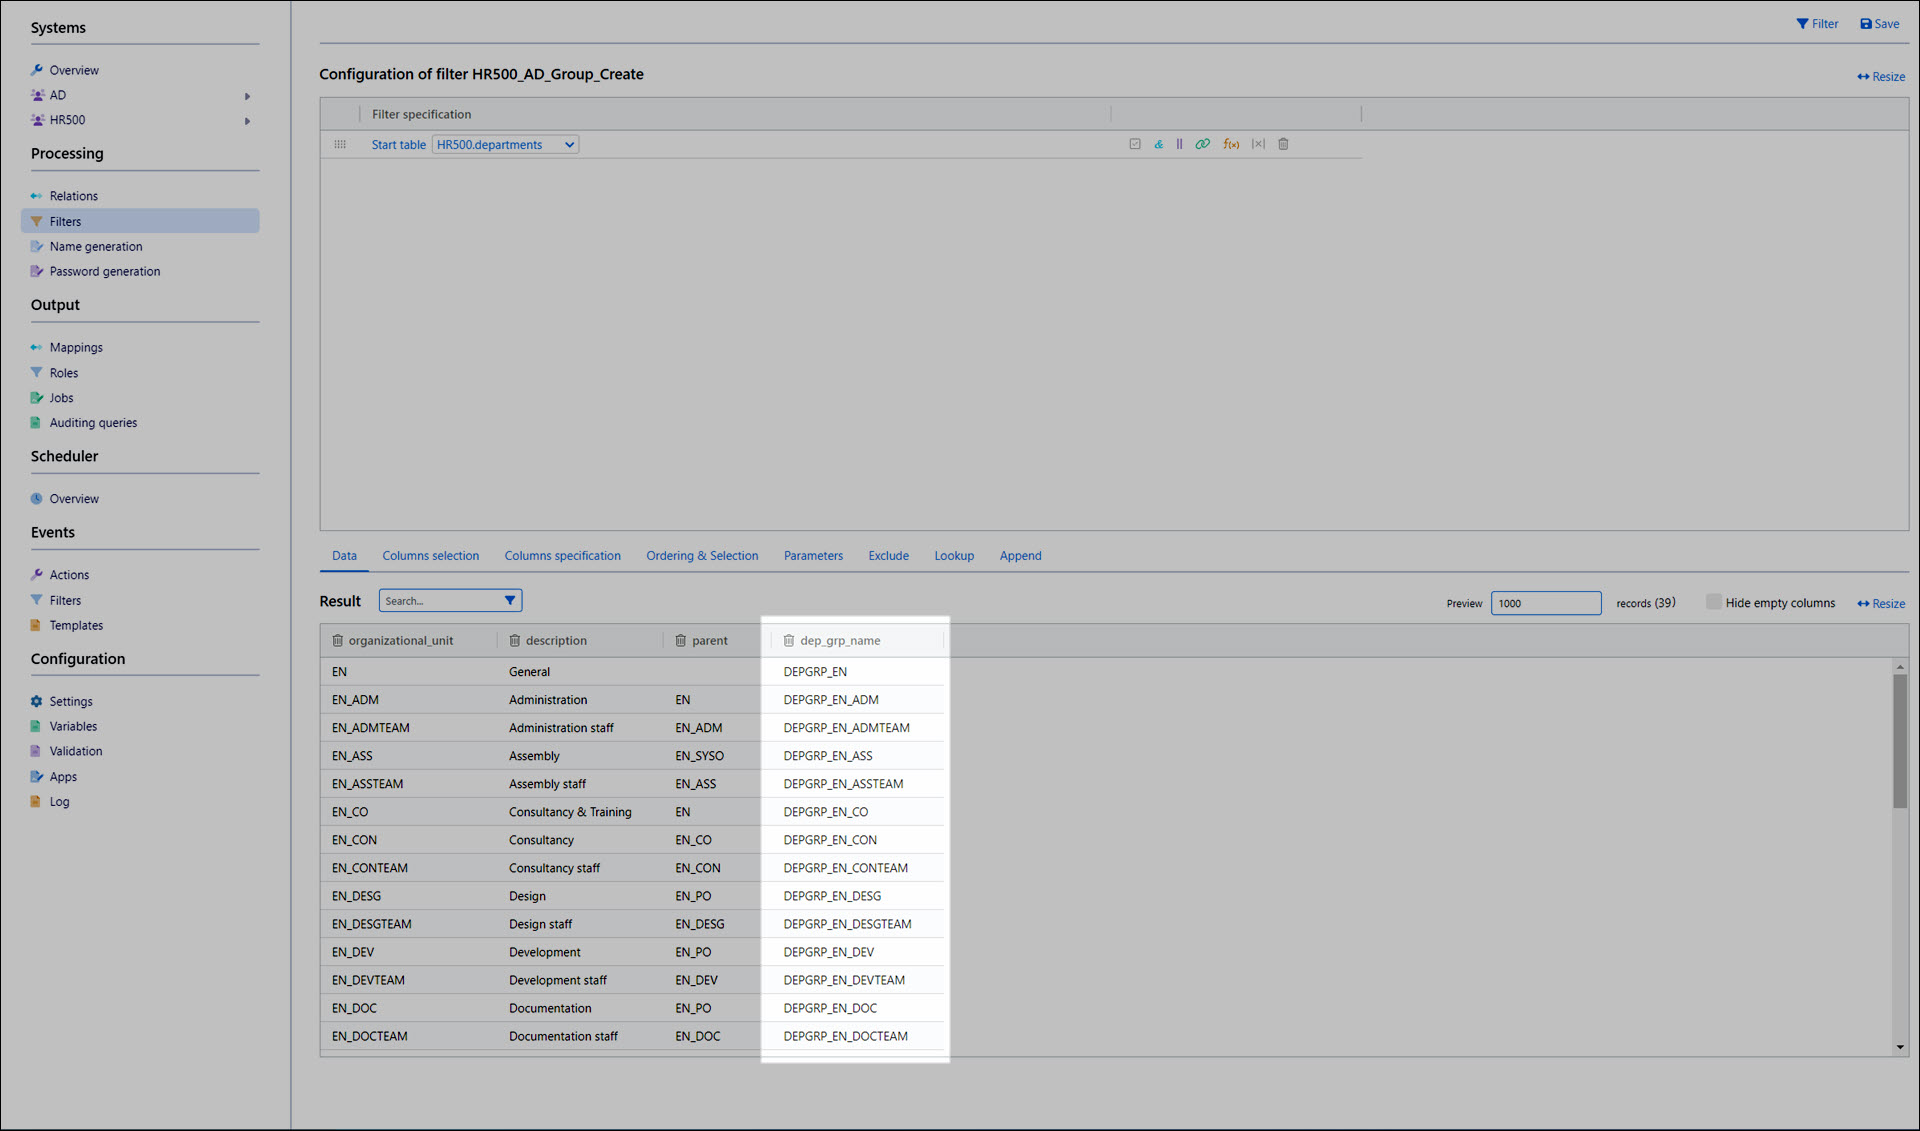
Click Filter to refresh the data.
The HR500_AD_Group_Create filter now contains the dep_grp_name column.
Now, we'll create both Include and Exclude lookups for the dep_grp_name column.
We'll be using the exclude lookup to dynamically create groups in AD, and then the include lookup in a role generator to assign those groups to roles.
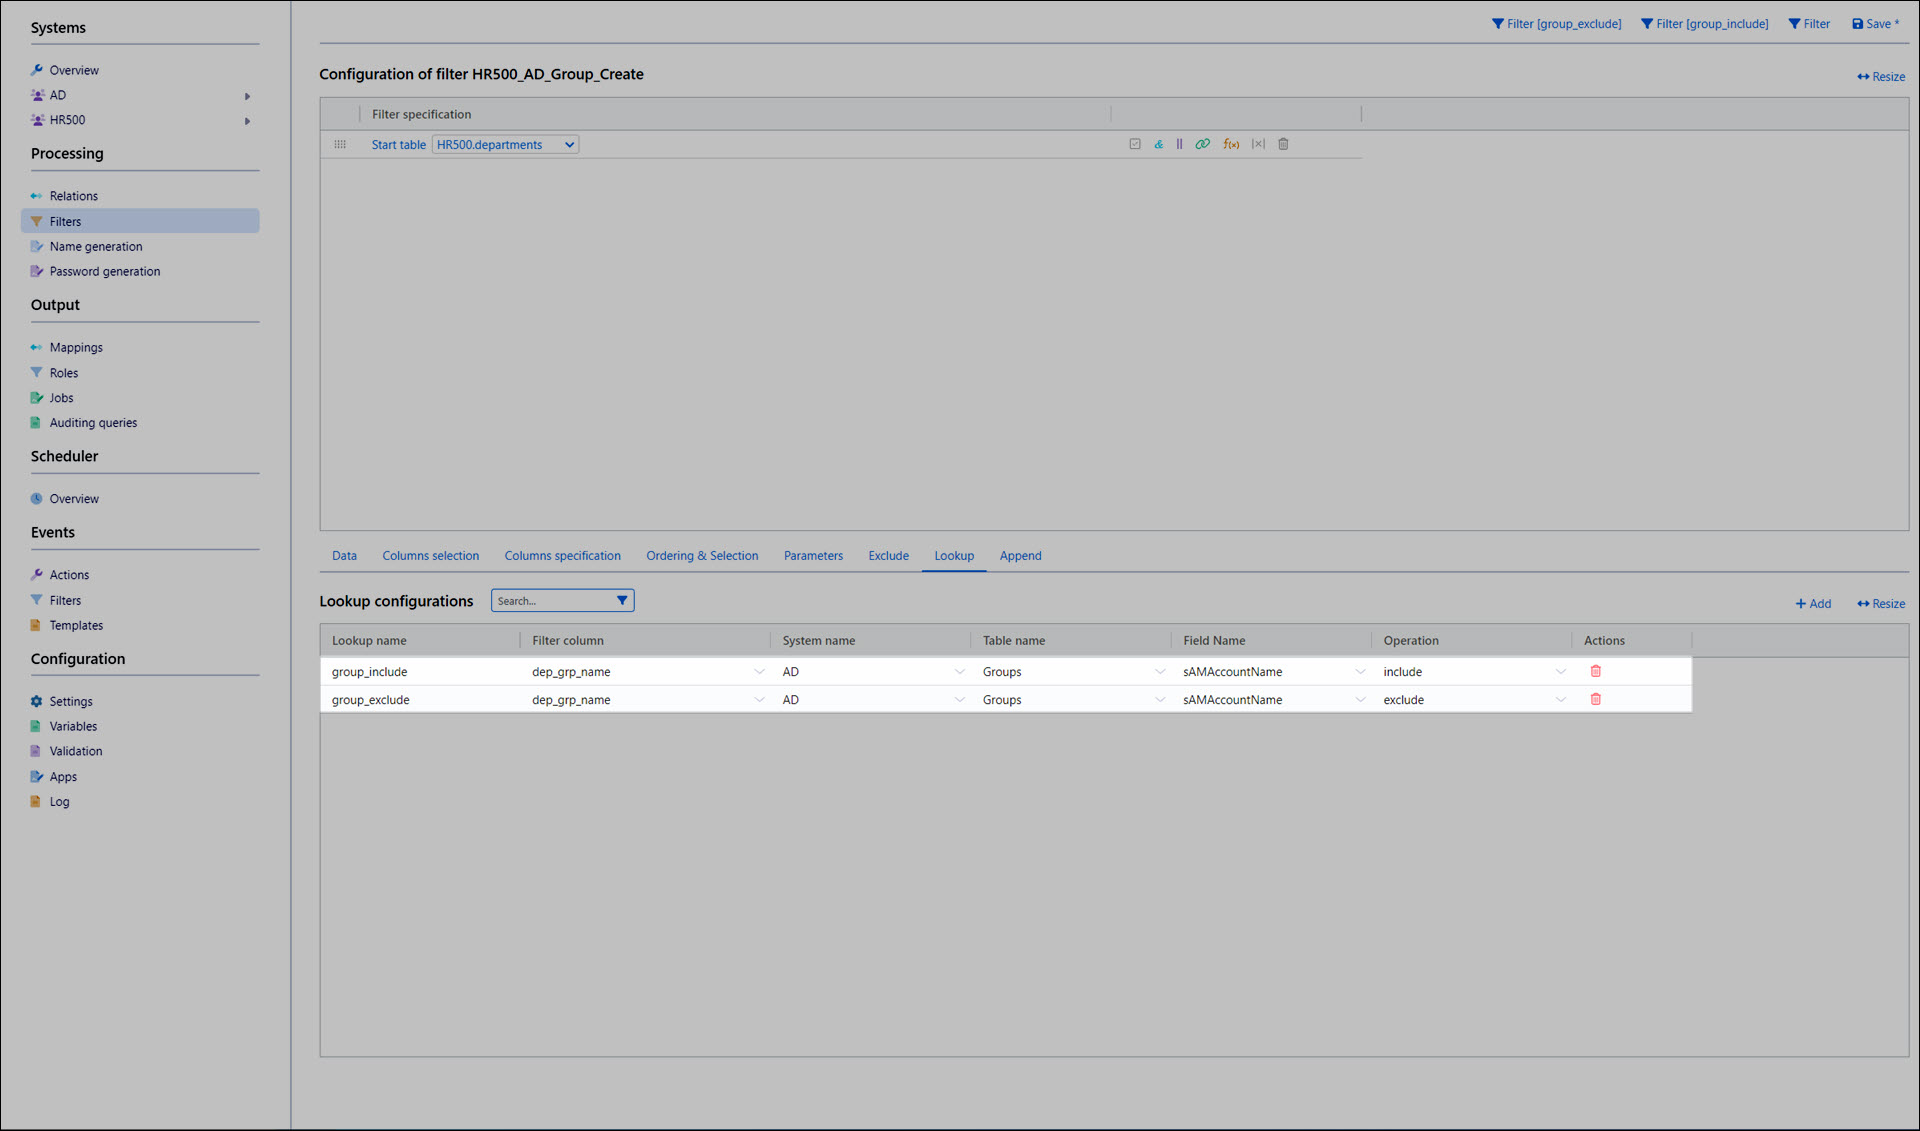
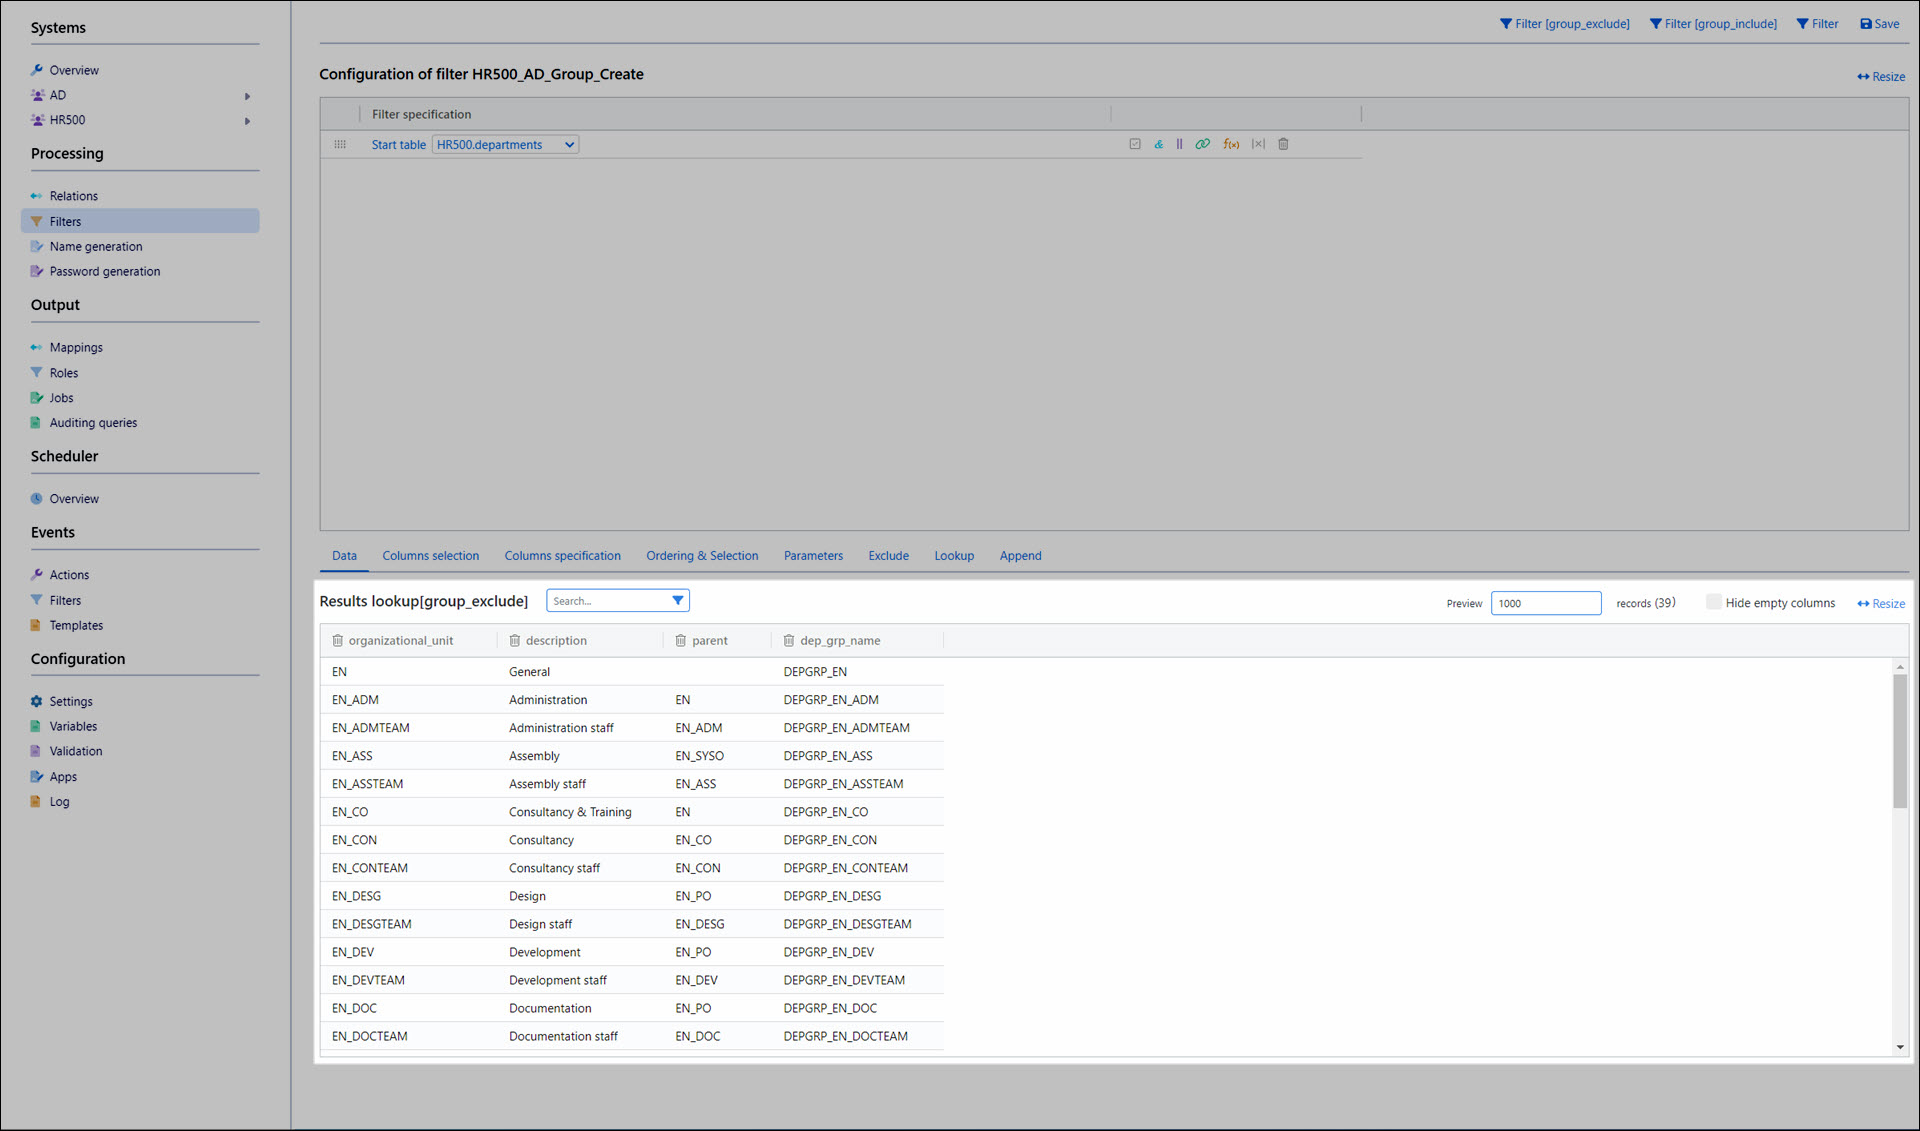
Go to the Lookup tab and create the following two lookups:
Lookup Name
Filter Column
System Name
Table Name
Field Name
Operation
group_include
dep_grp_name
AD
Groups
sAMAccountName
include
group_exclude
dep_grp_name
AD
Groups
sAMAccountName
exclude
Click Save.
Go back to the Data tab.
Click Filter [group_exclude] to test the exclude lookup. It should return all 39 groups, since they don't yet exist in AD:
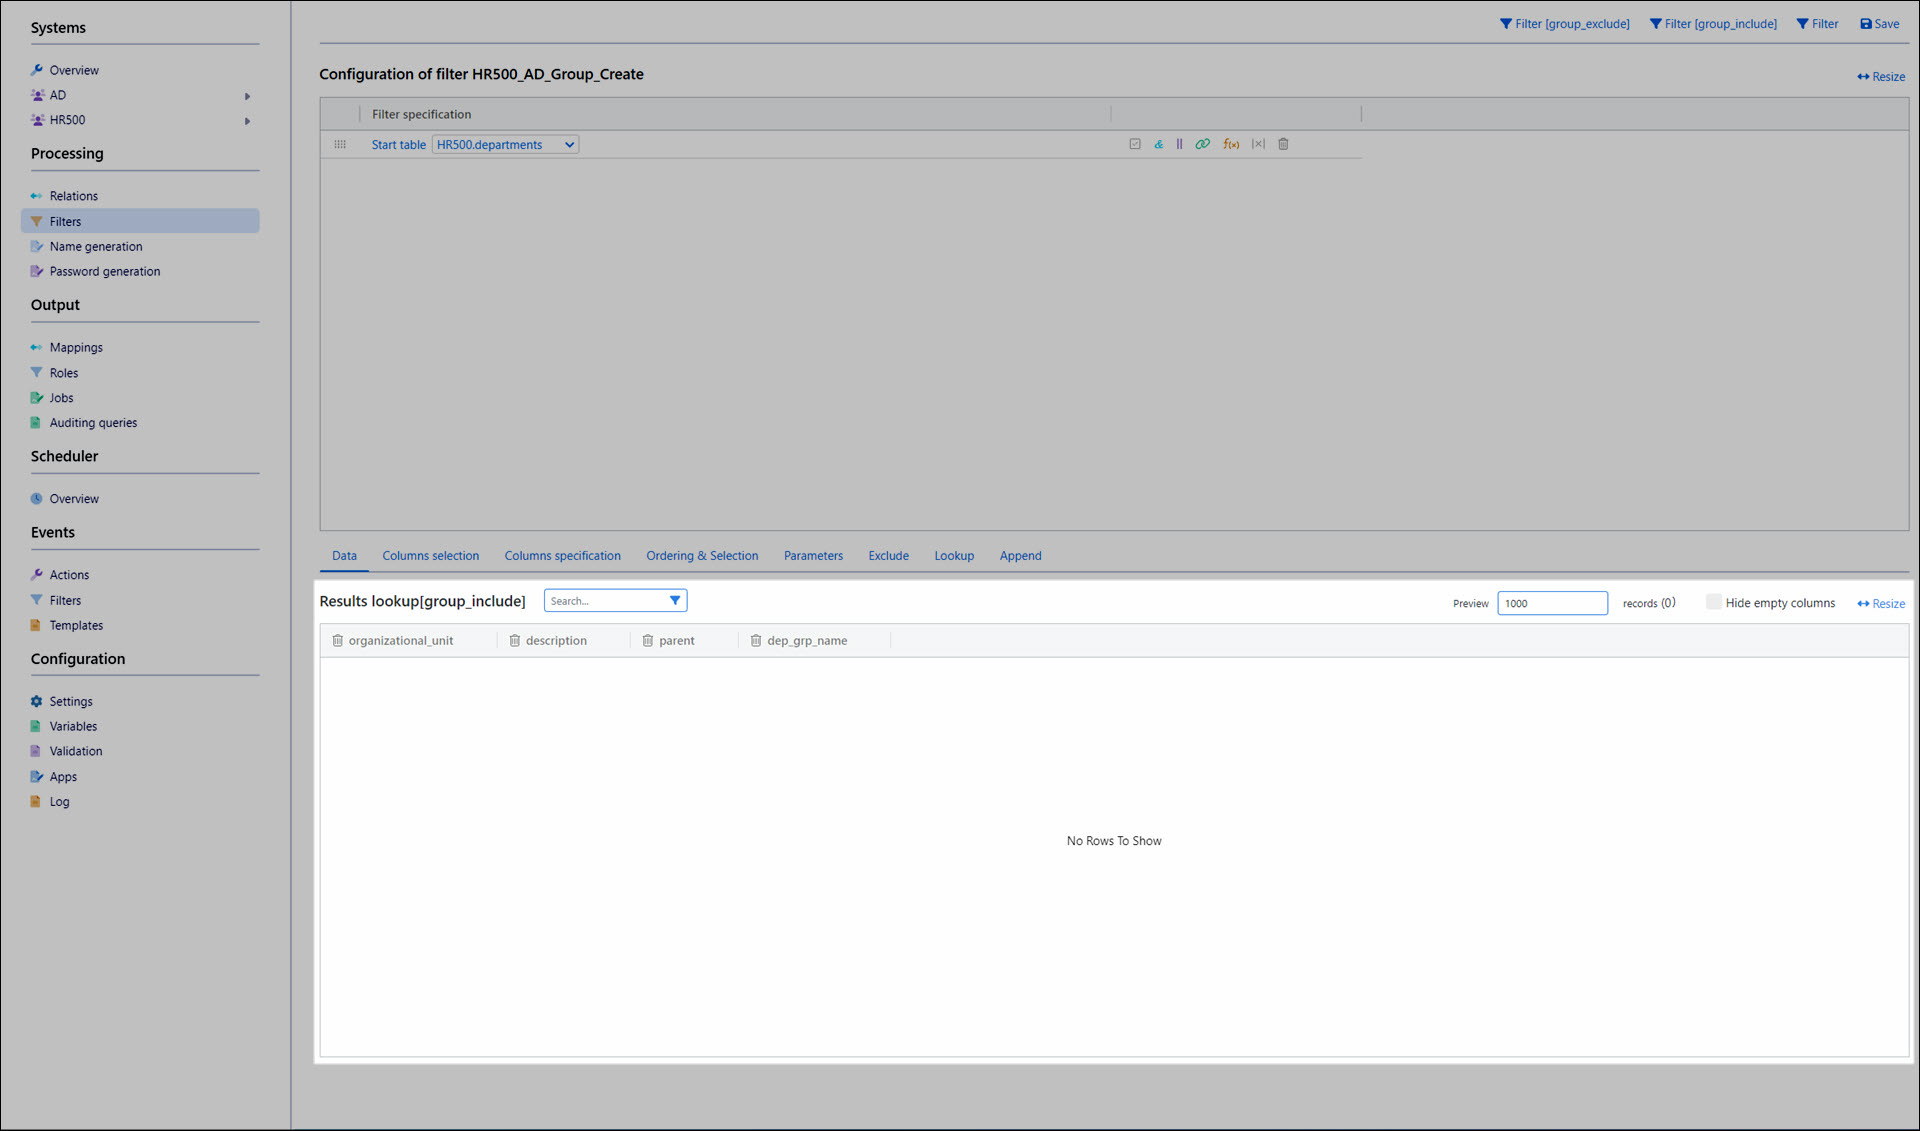
Click Filter [group_include] to test the include lookup. It should return 0 groups, since they (likewise) don't yet exist in AD:
Add a mapping
Go to Output > Mappings.
Click Add.
Enter the following values:
System: AD
Target: Groups
Function: GroupCreate
Name: HR500_AD_GroupCreate
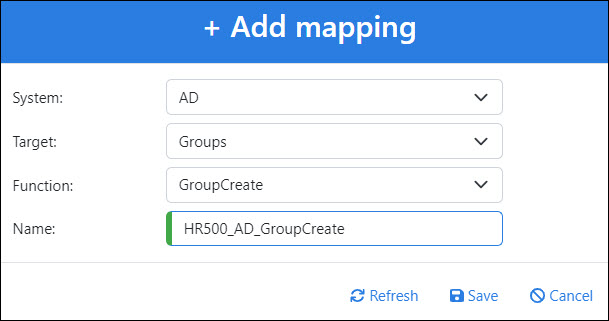
Click Save.

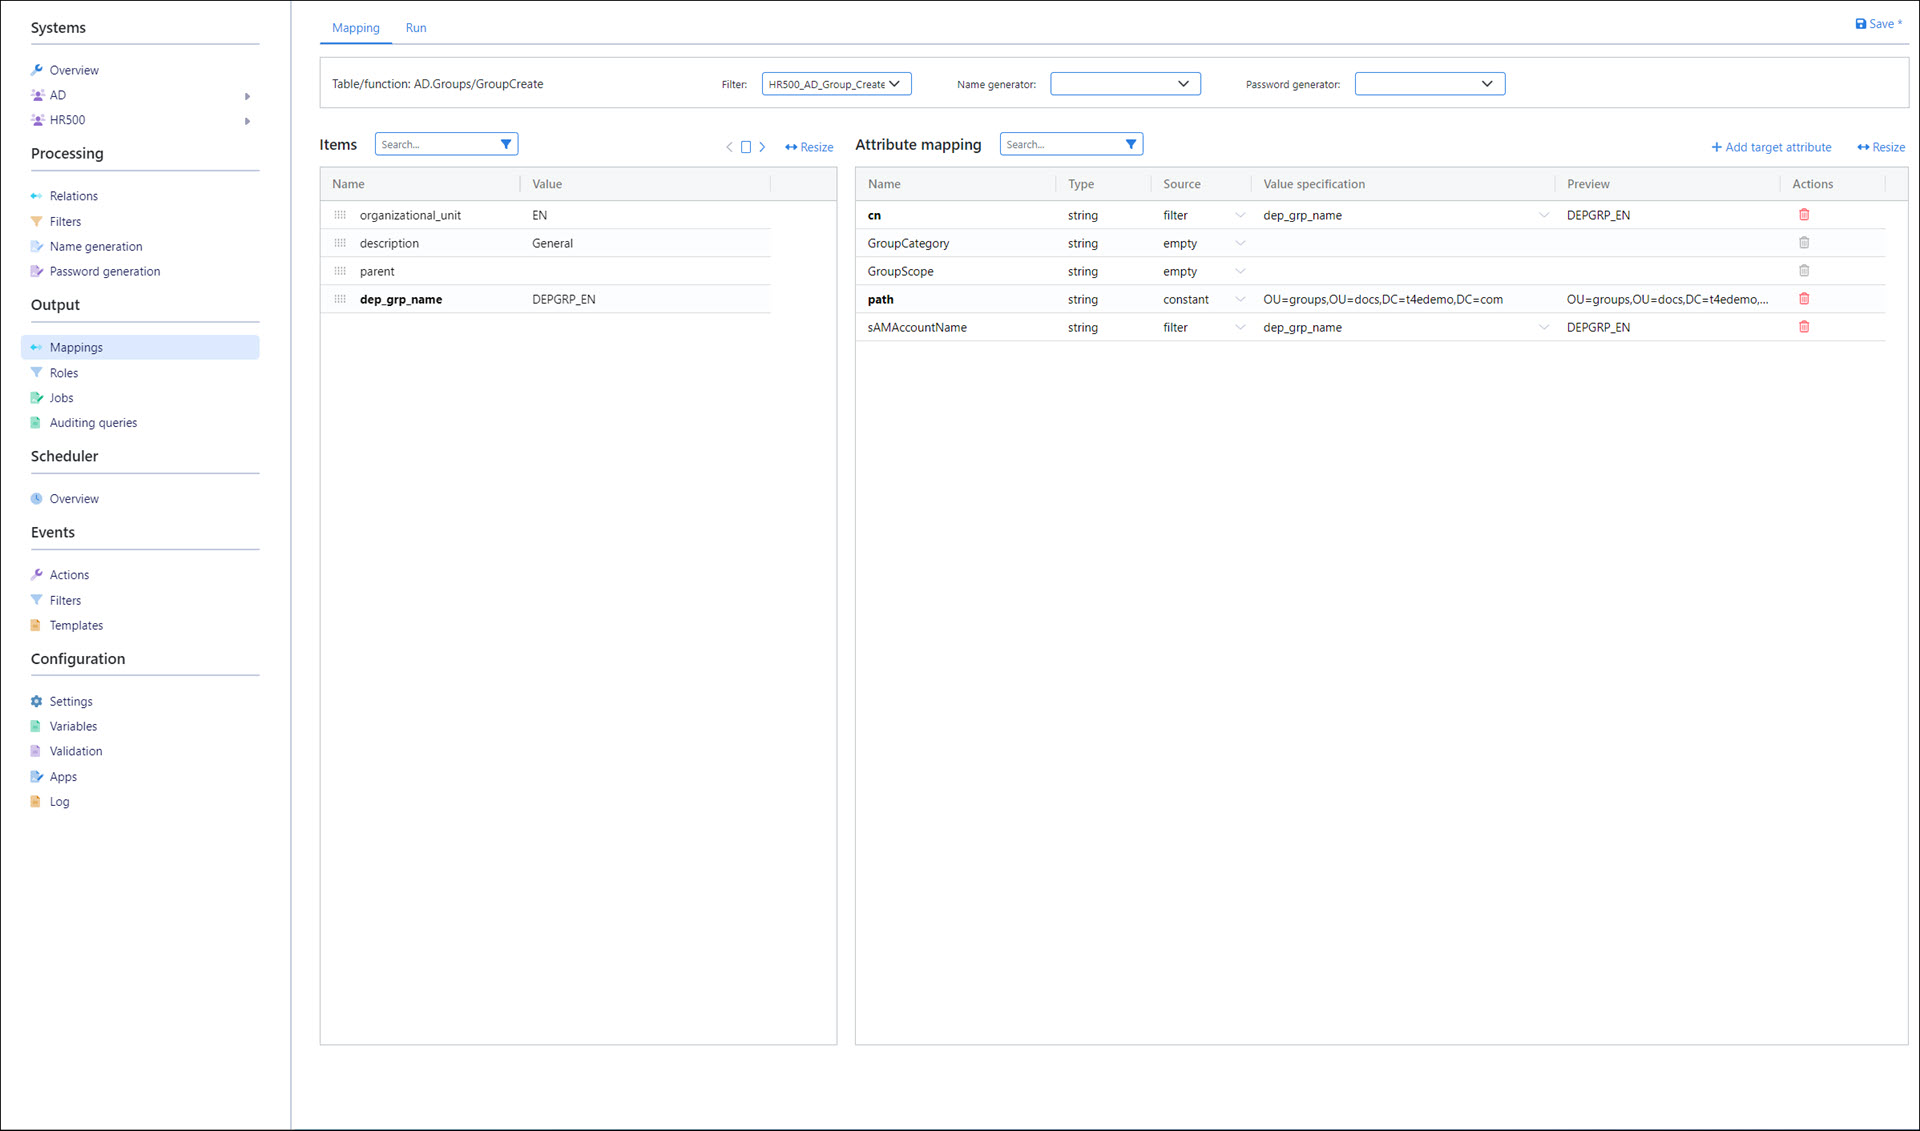
Configure the mapping
For the mapping's Filter, select HR500_AD_Group_Create[group_exclude]. Its columns are populated into the Items pane.
Tip
We feed the exclude lookup into the group create mapping because it returns the groups that don't already exist in the target system, i.e., the groups that need to be created.
In the Items pane, click the > button to preview the first record.
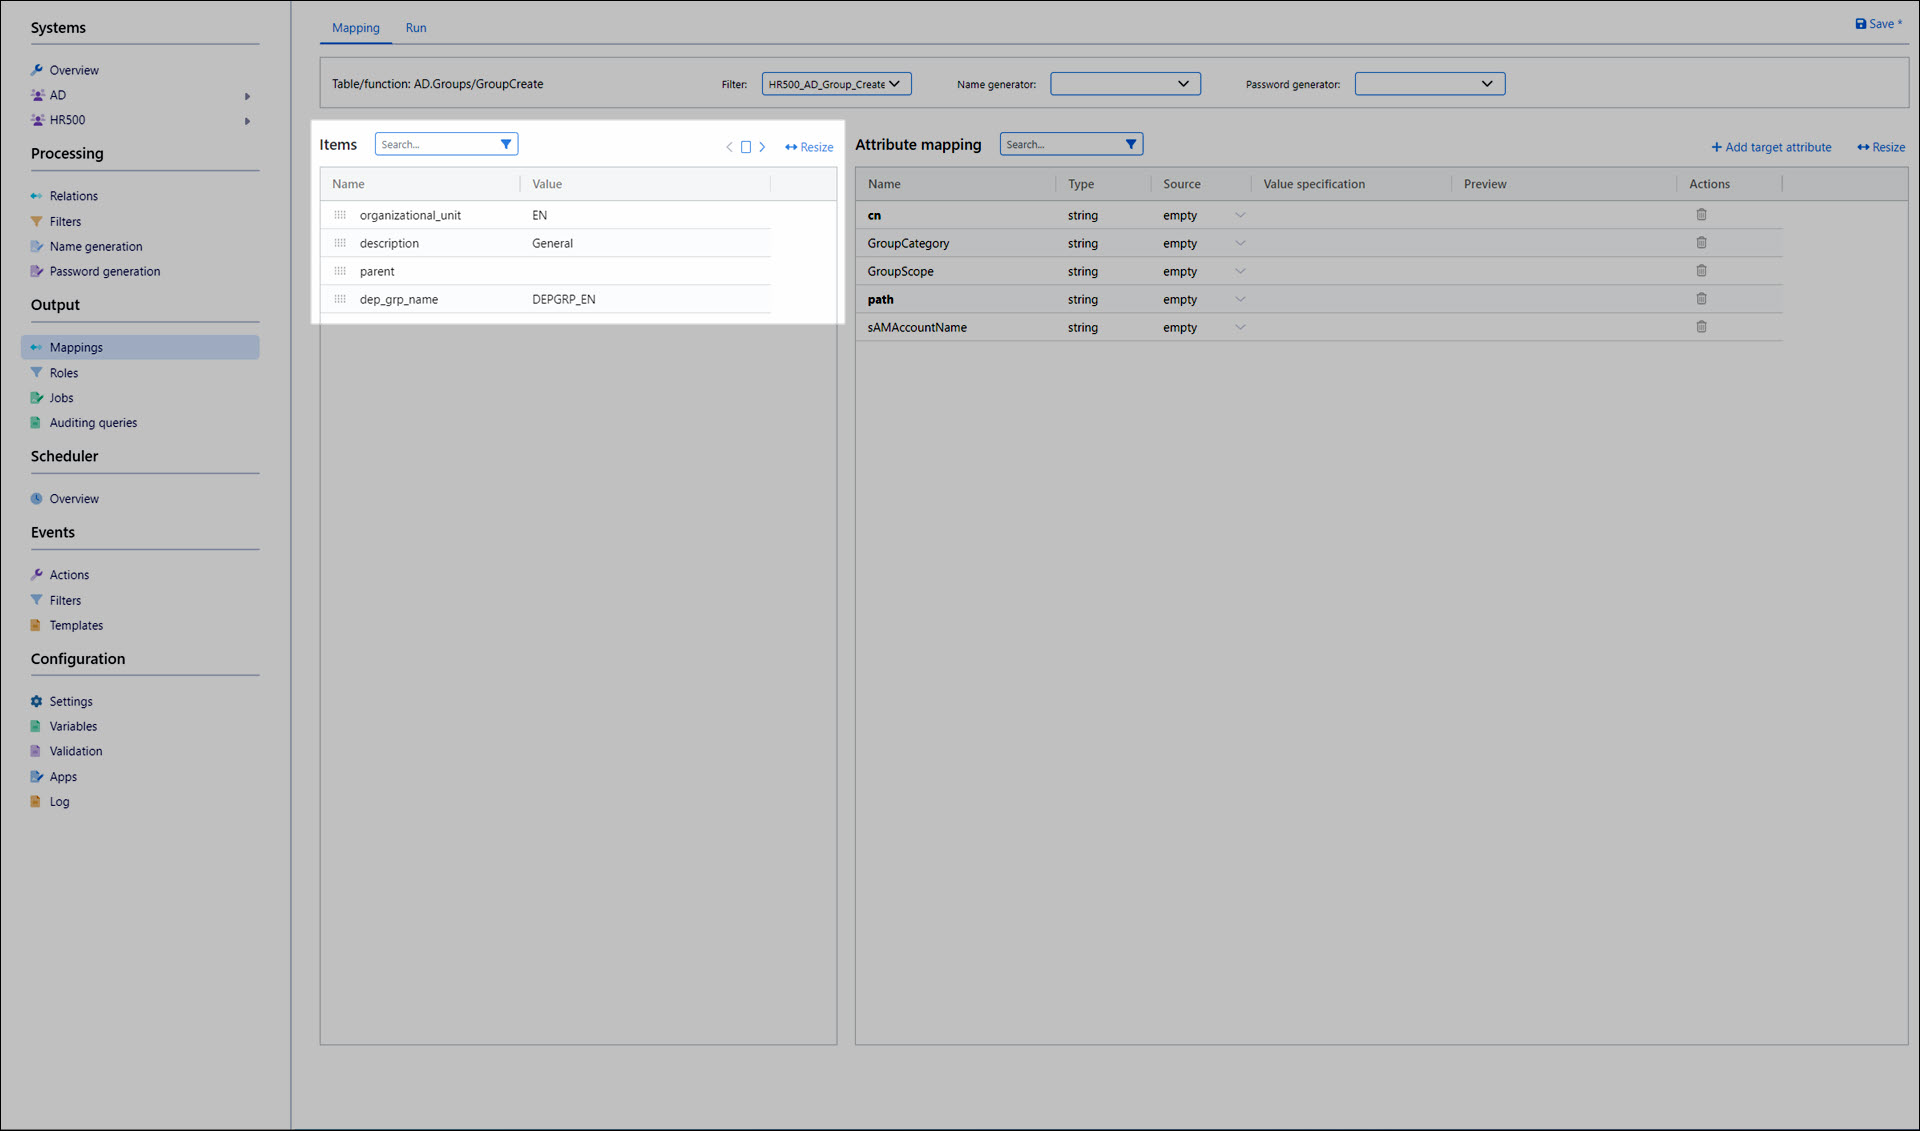
For this example, we'll map the following attributes:
Attribute
Item
Note
cn
dep_grp_name
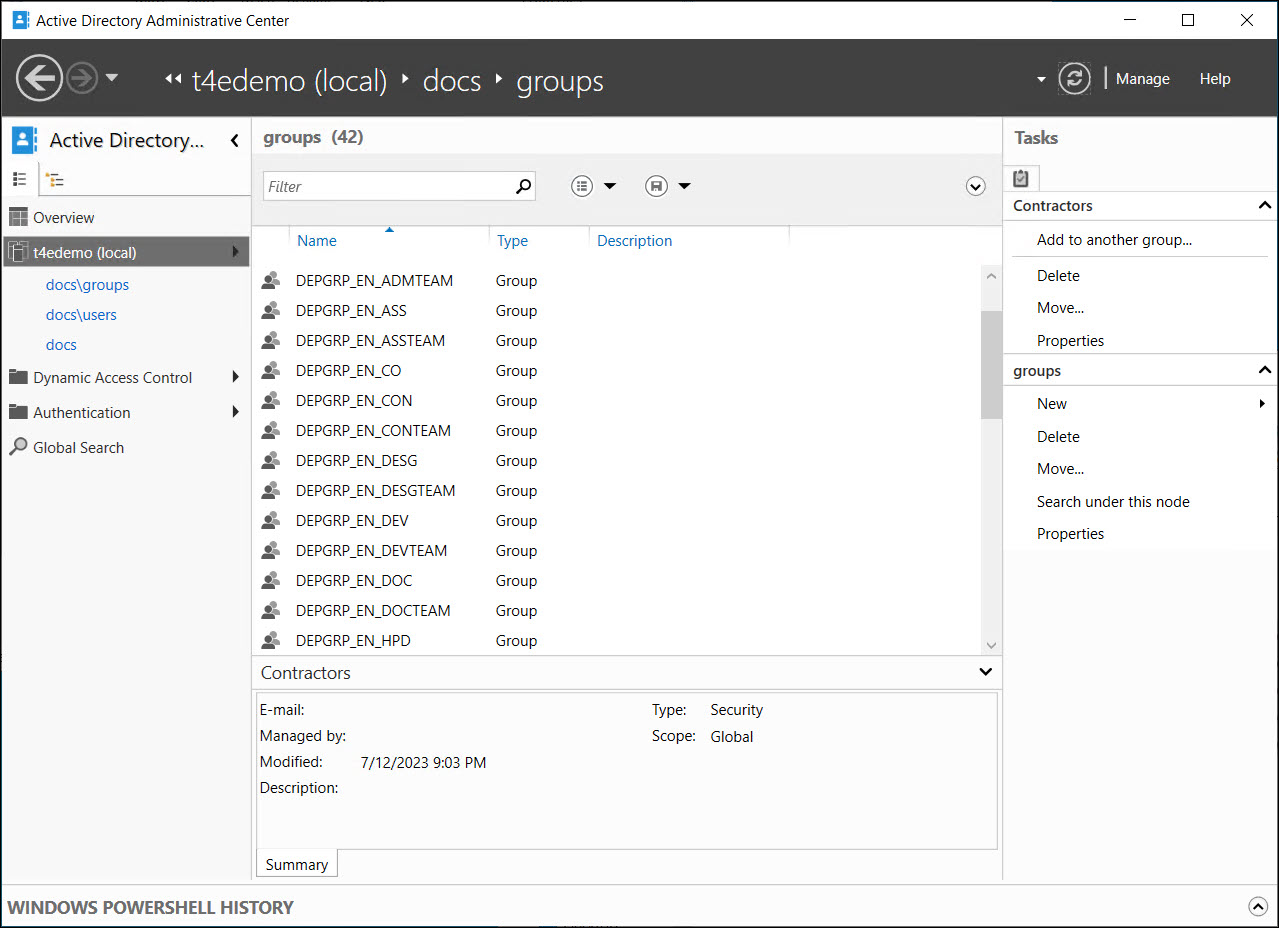
path
OU=groups,OU=docs,DC=t4edemo,DC=com
You must manually type in the path.
sAMAccountName
dep_grp_name
Click Save.
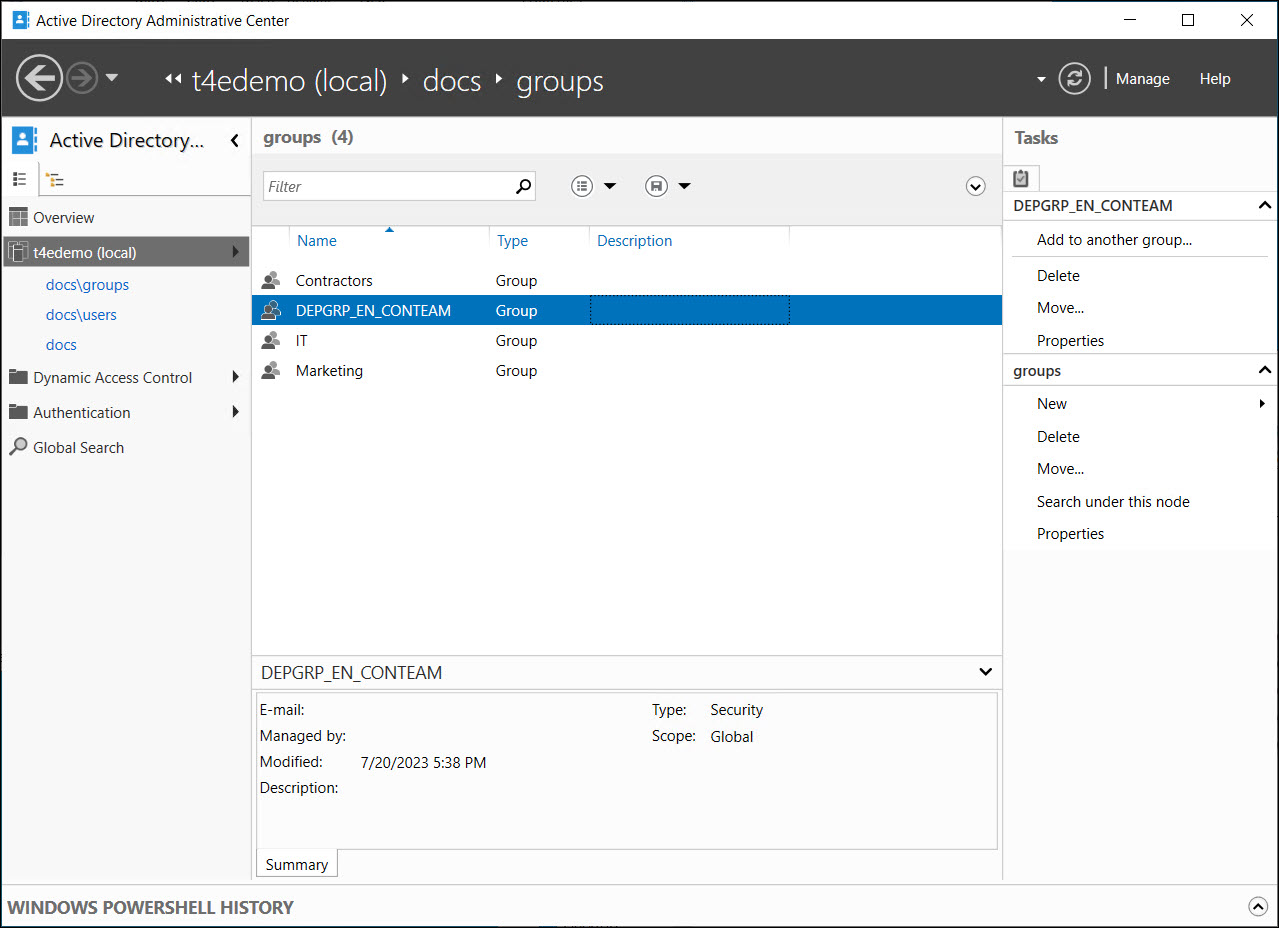
Now, we'll manually test a single group create operation. Go to the Run tab. Select one of the rows in the Operation pane and click Run Selected Item.
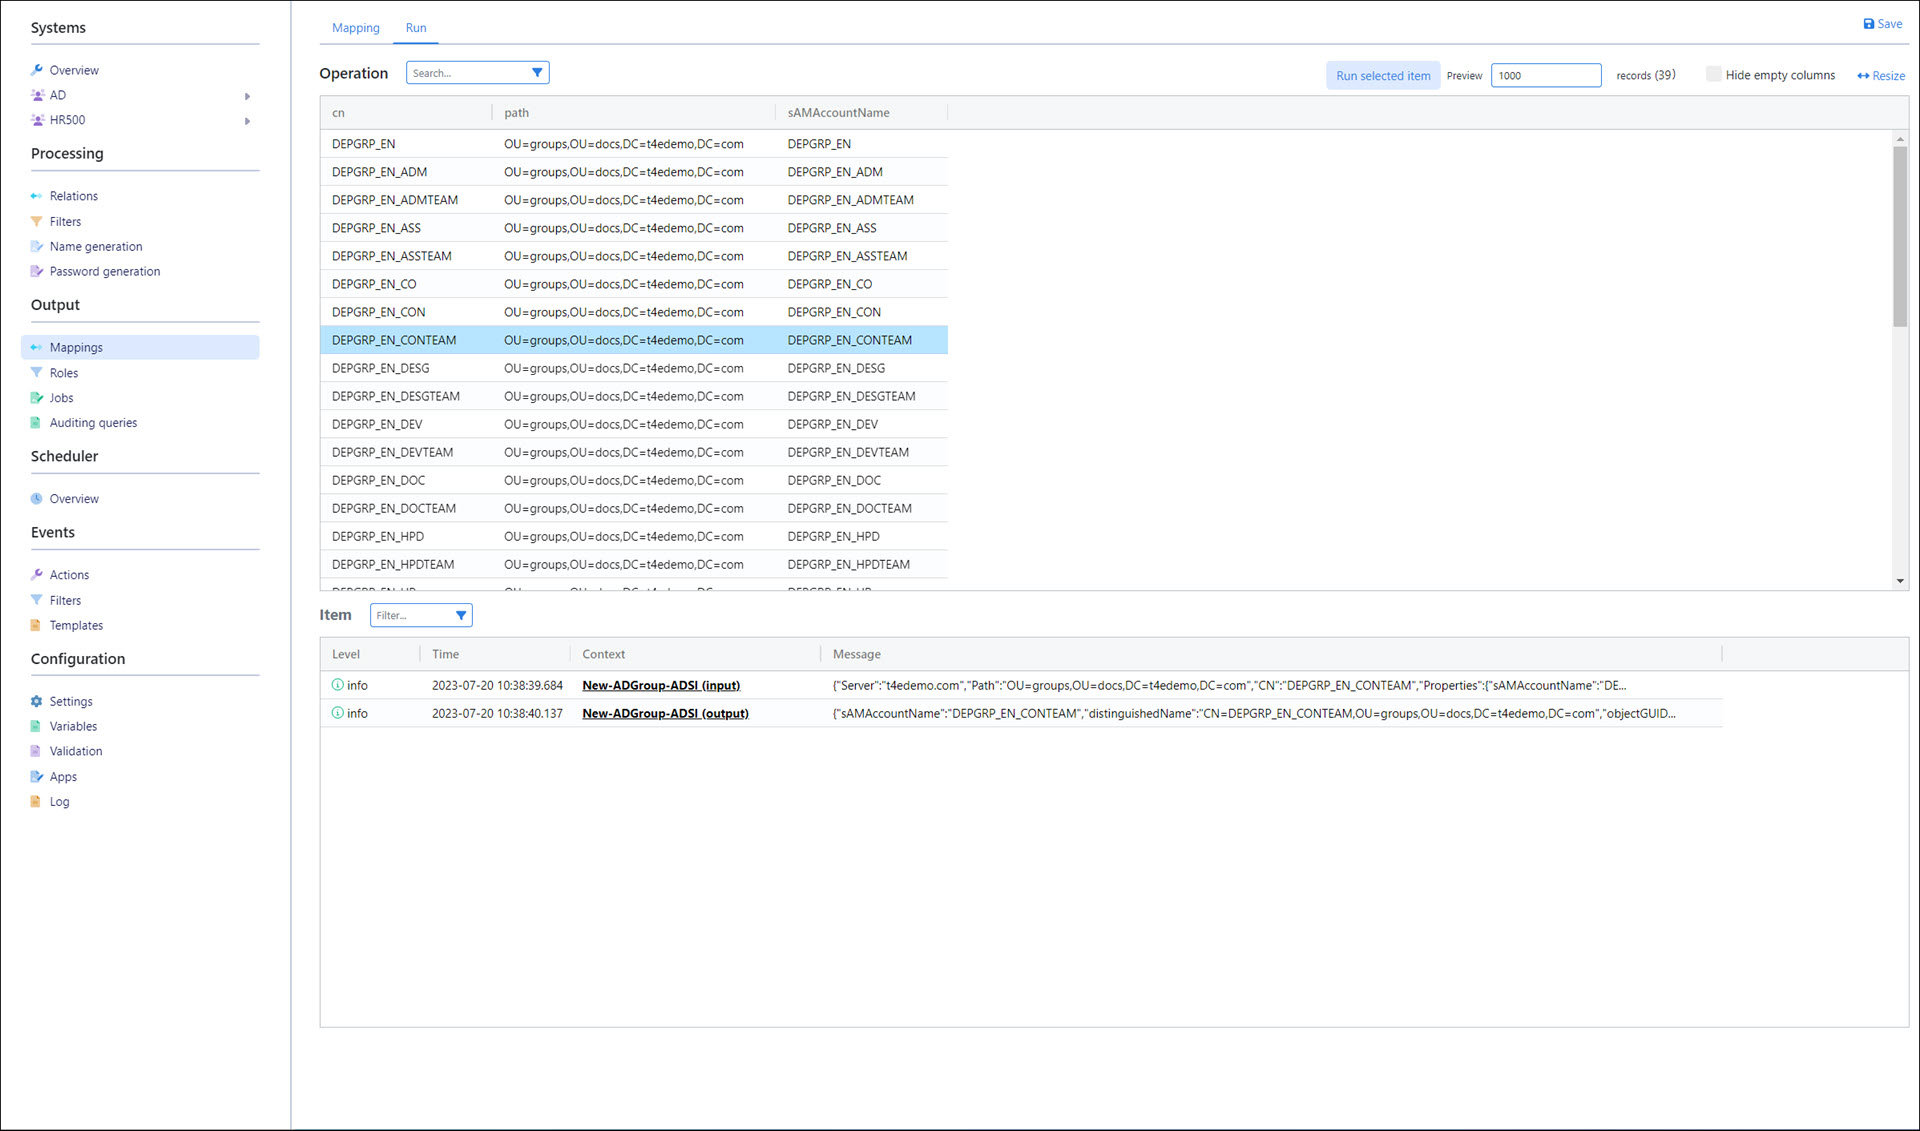
The group should be successfully created in the target AD system.
Update the HR500_AD job
Go to Output > Jobs.
For the HR500_AD job, click
 Edit Job.
Go to the Configuration tab.
Click Add.
For this job item, we'll select a type of crud, and for the Name, we'll select the HR500_AD_GroupCreate mapping. We'll set the Threshold to
1000.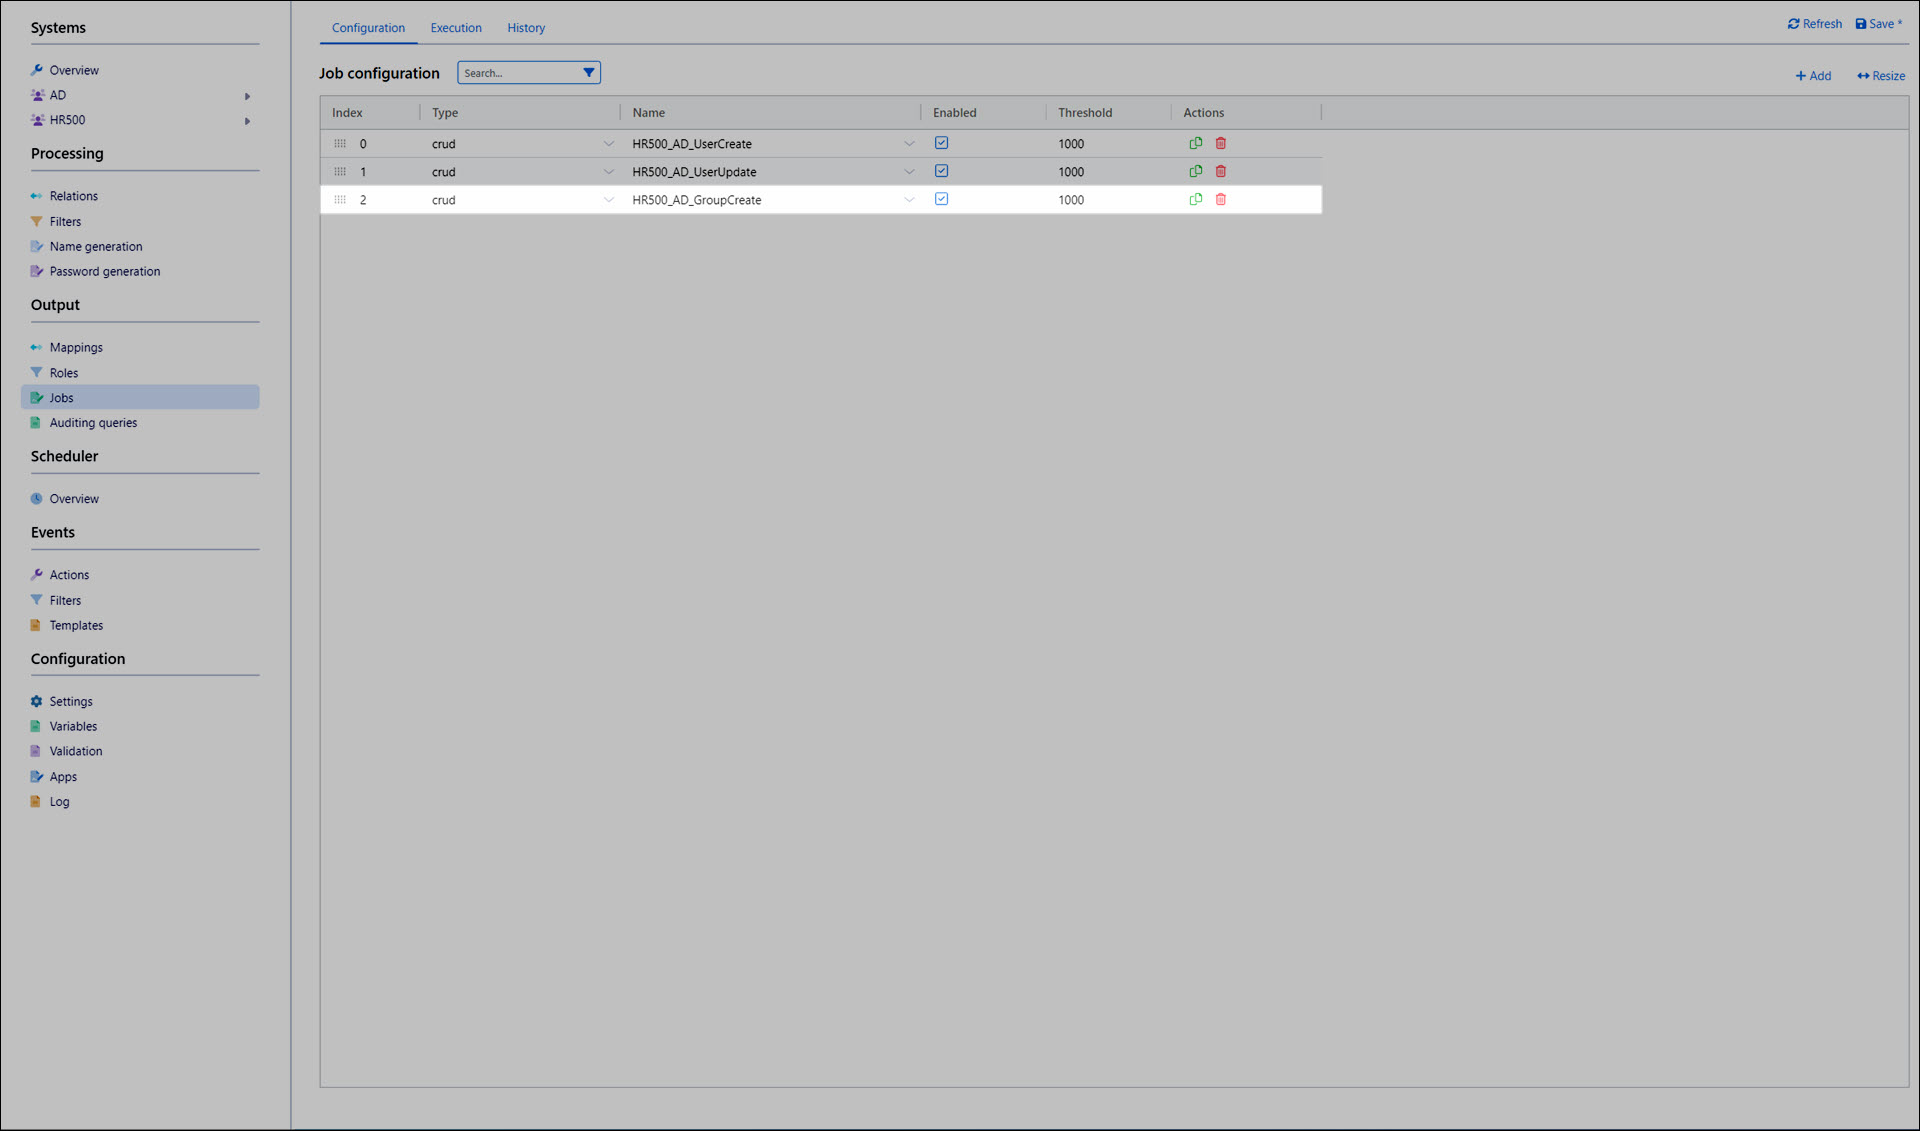
Click Save.
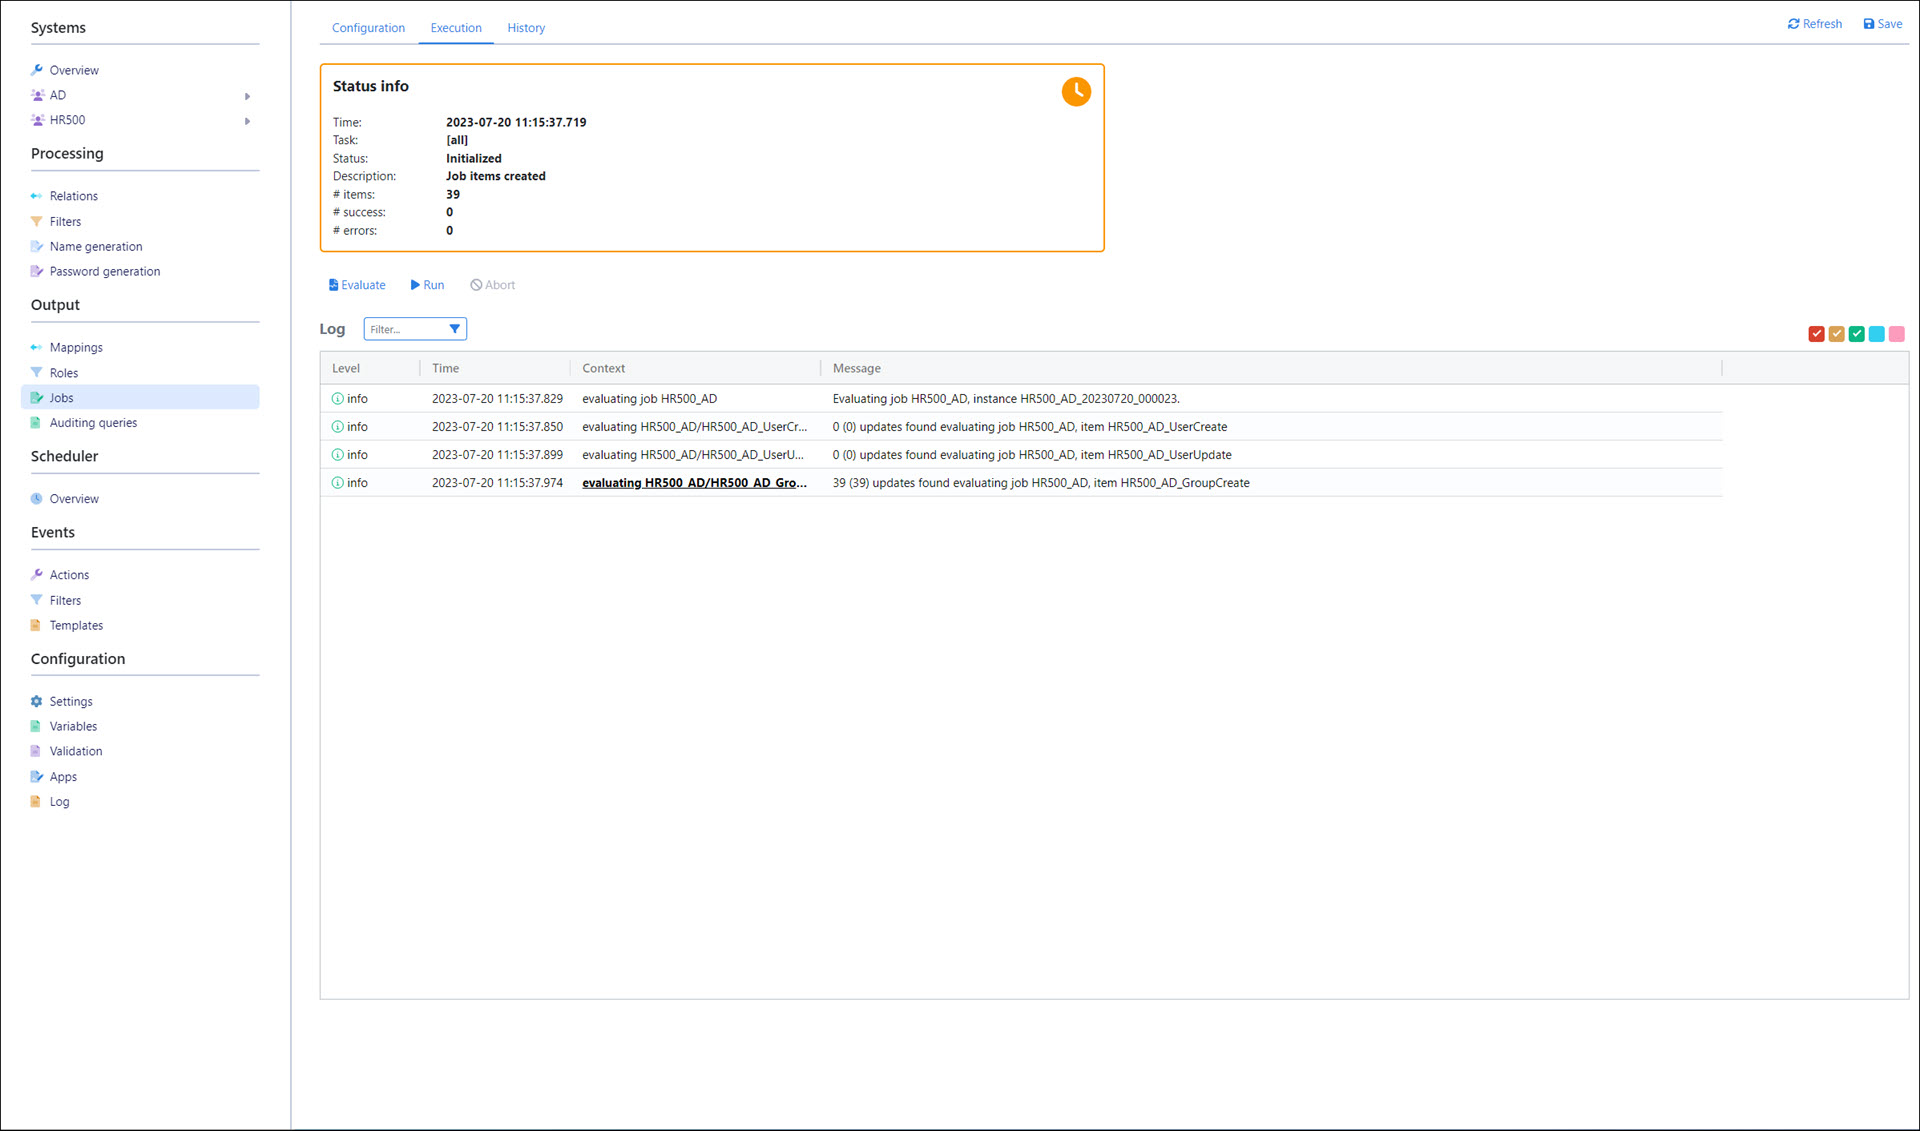
Evaluate the job
Go to the Execution tab.
Click Evaluate.
After a few moments, the Status changes to Initialized. This job will perform 39 group create operations.
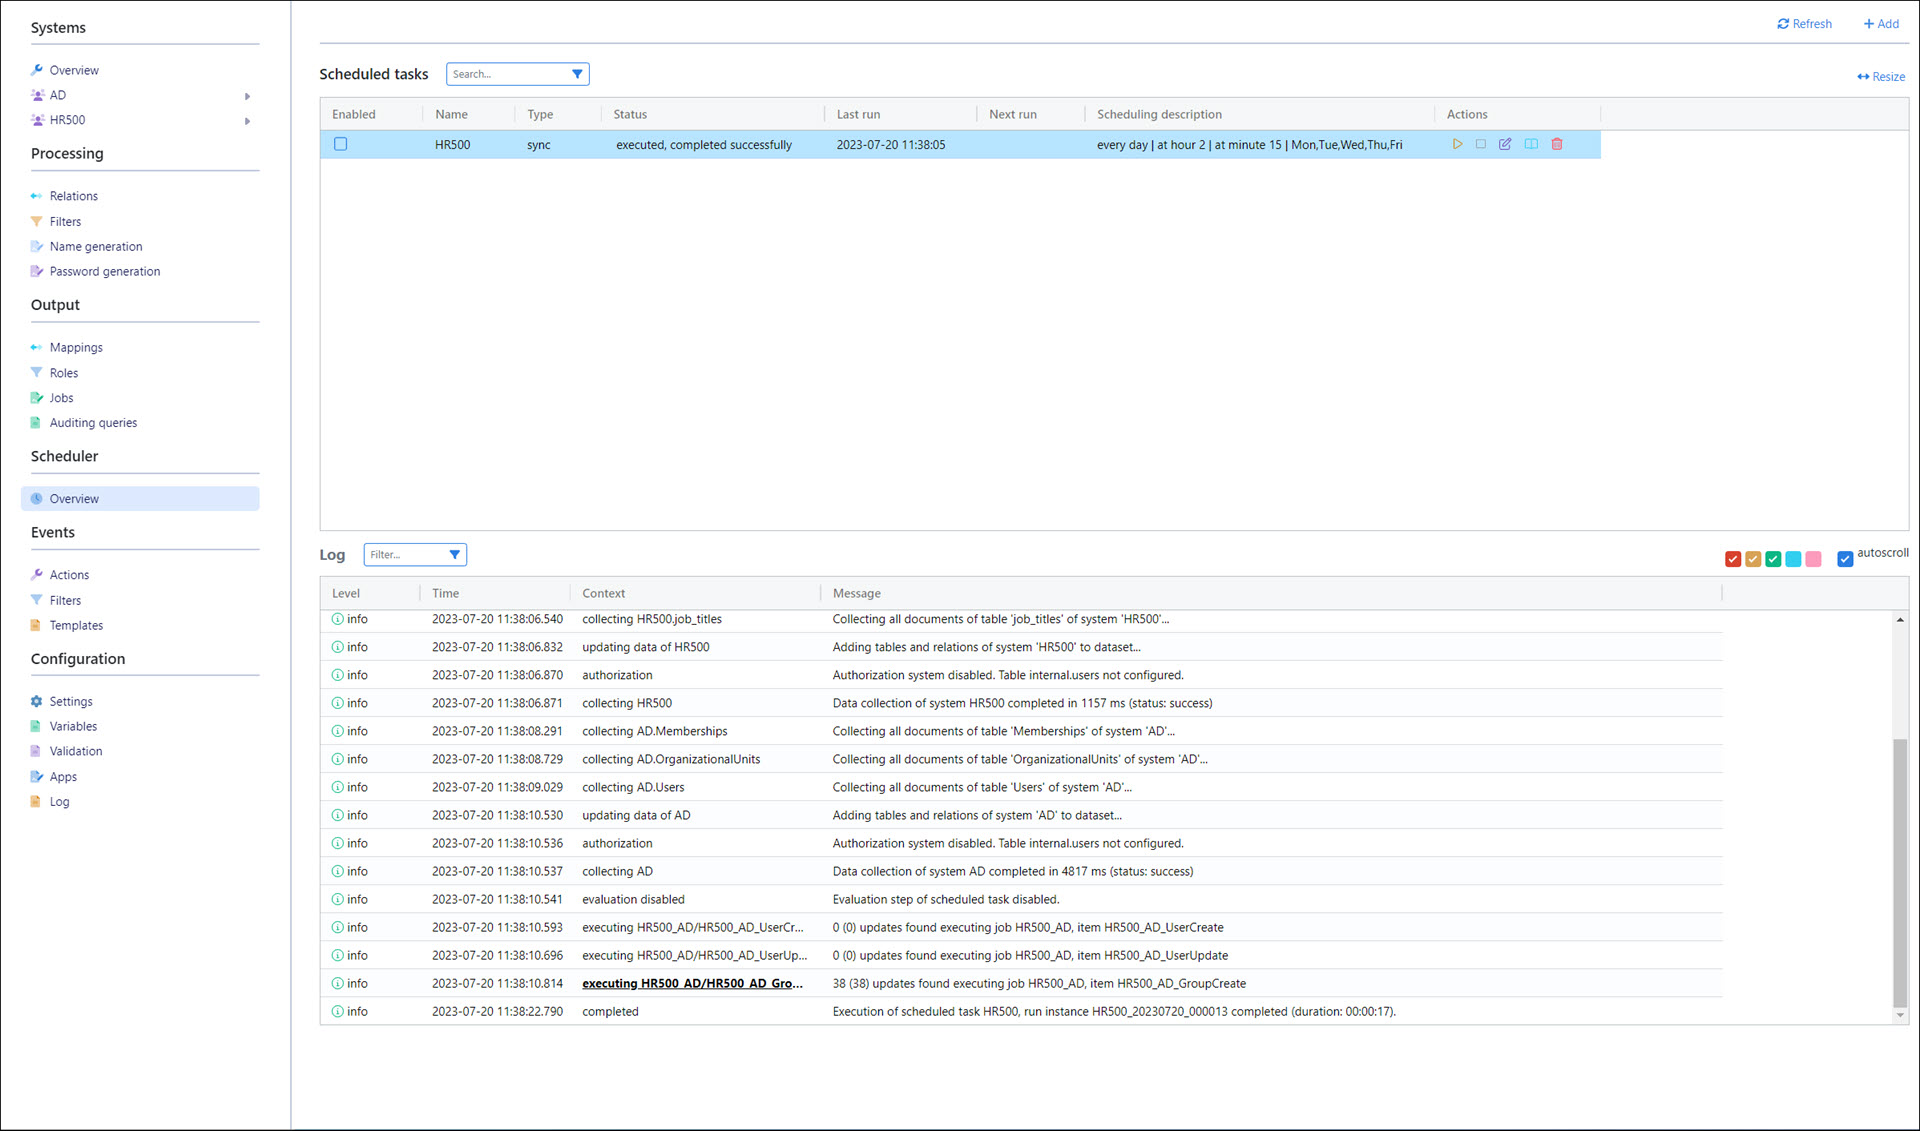
Run the job from the schedule
Go back to Scheduler > Overview.
Click
Manual Run for the HR500 schedule.Ideally, the schedule executes successfully, and 38 groups (minus the one we created during our test run) are created in AD.