Microsoft Azure AD / Entra ID
Overview of Azure Active Directory, a cloud-based identity management service by Microsoft, detailing its features and configuration steps.
Microsoft Entra ID is a cloud-based identity and access management service provided by Microsoft. It serves as a comprehensive solution for managing and securing user identities and ensuring seamless access to various applications and resources. Entra ID enables organizations to centralize user authentication, implement single sign-on (SSO), and enforce multi-factor authentication for enhanced security. It supports integration with a wide range of applications, both on-premises and in the cloud, facilitating secure access from anywhere and on any device. Additionally, Entra ID offers features such as identity protection, conditional access policies, and advanced reporting to help organizations monitor and manage identity-related activities effectively. Overall, Entra ID plays a crucial role in modernizing identity and access management practices for businesses in the digital era.
About

Table | Key | Read | Create | Update | Delete |
|---|---|---|---|---|---|
Groups | id |  | | | |
Licenses | id | |  | | |
Members | -- | | | | |
Owners | -- | | | | |
Teams | id | | | | |
Risky Users | id | | | | |
Users | id | | | | |
Referencing Table | Foreign Key | Parent table | Primary Key |
|---|---|---|---|
Go to Systems > Overview.
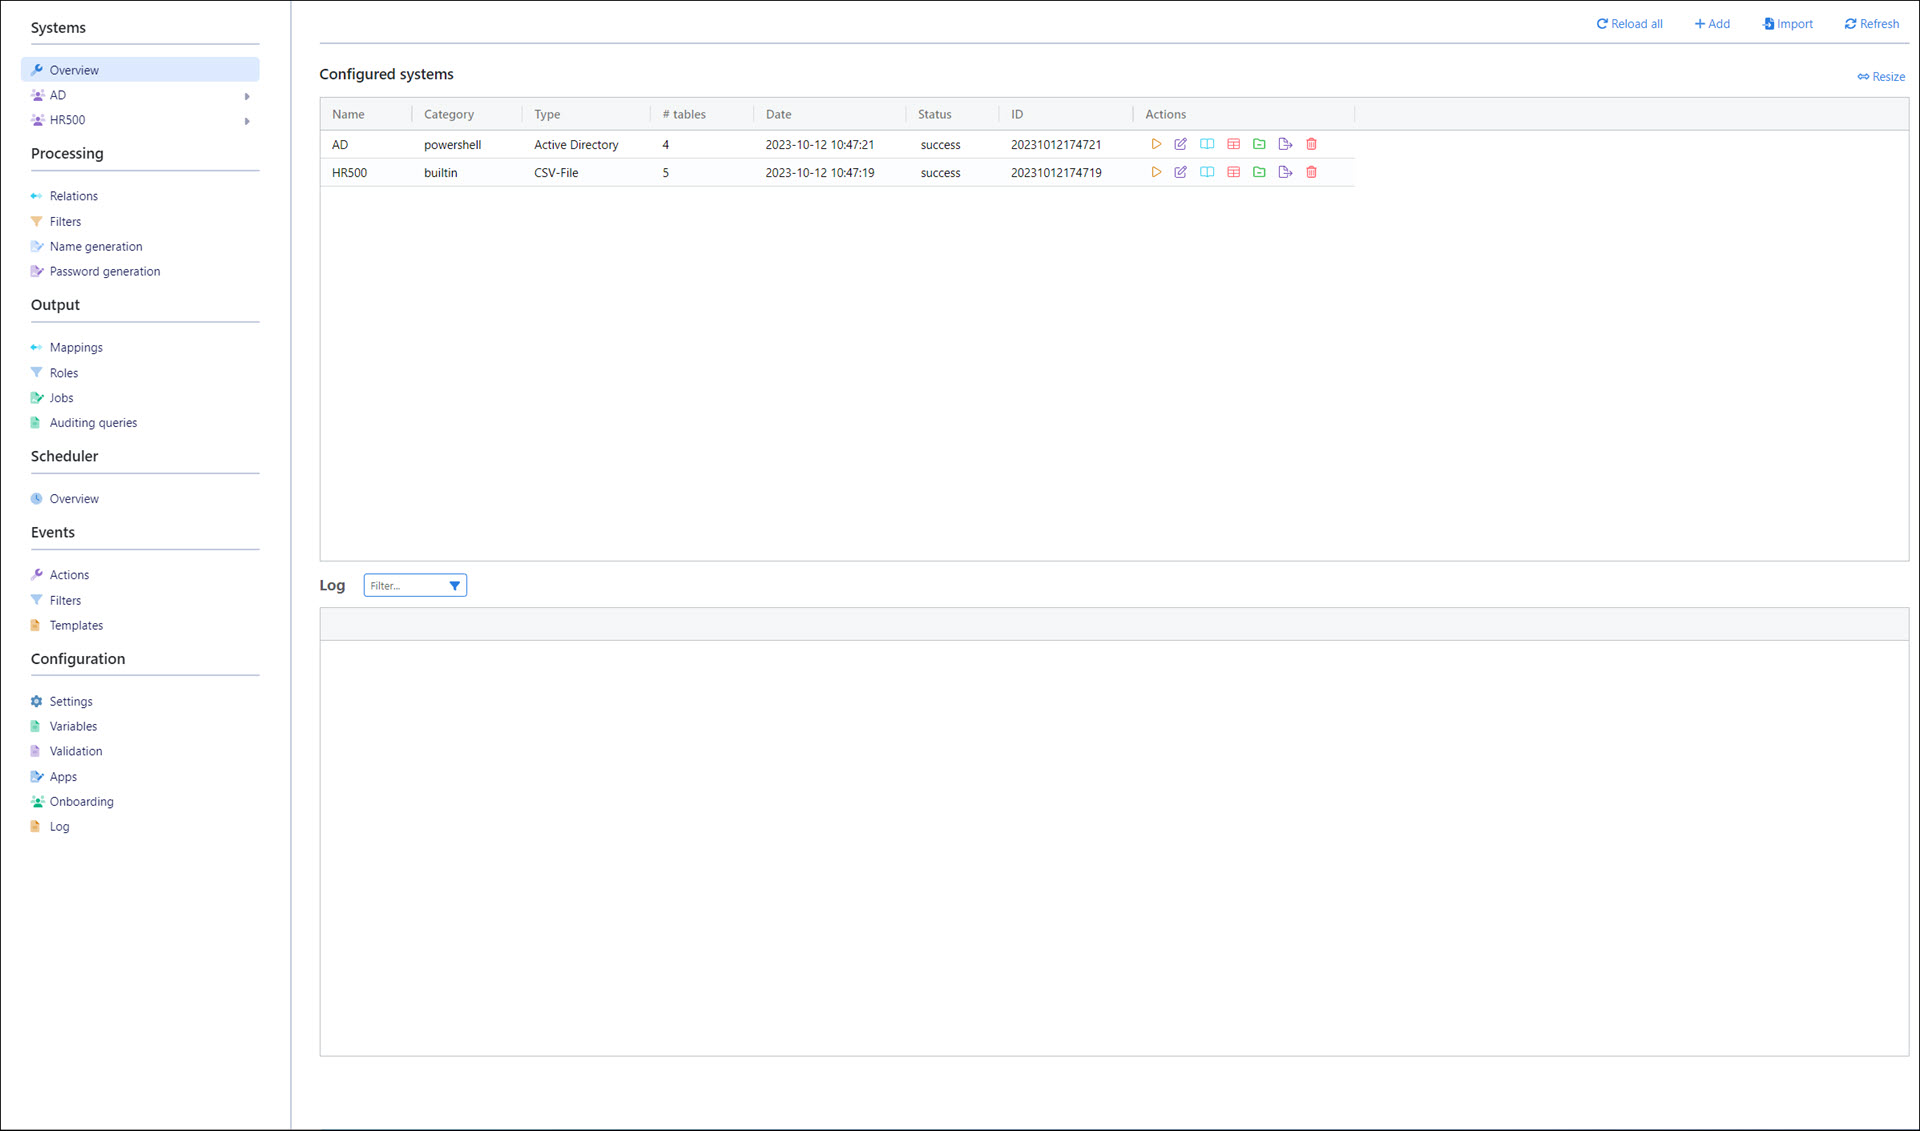
Click Add.
Select Azure AD for System Type.
Enter a System Name.
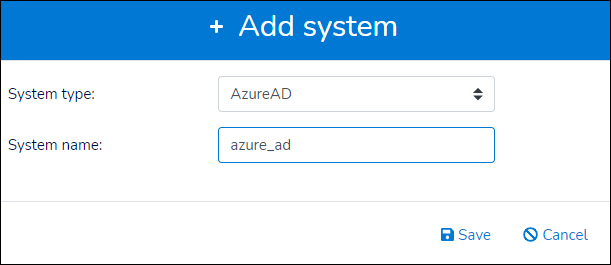
Click Save.
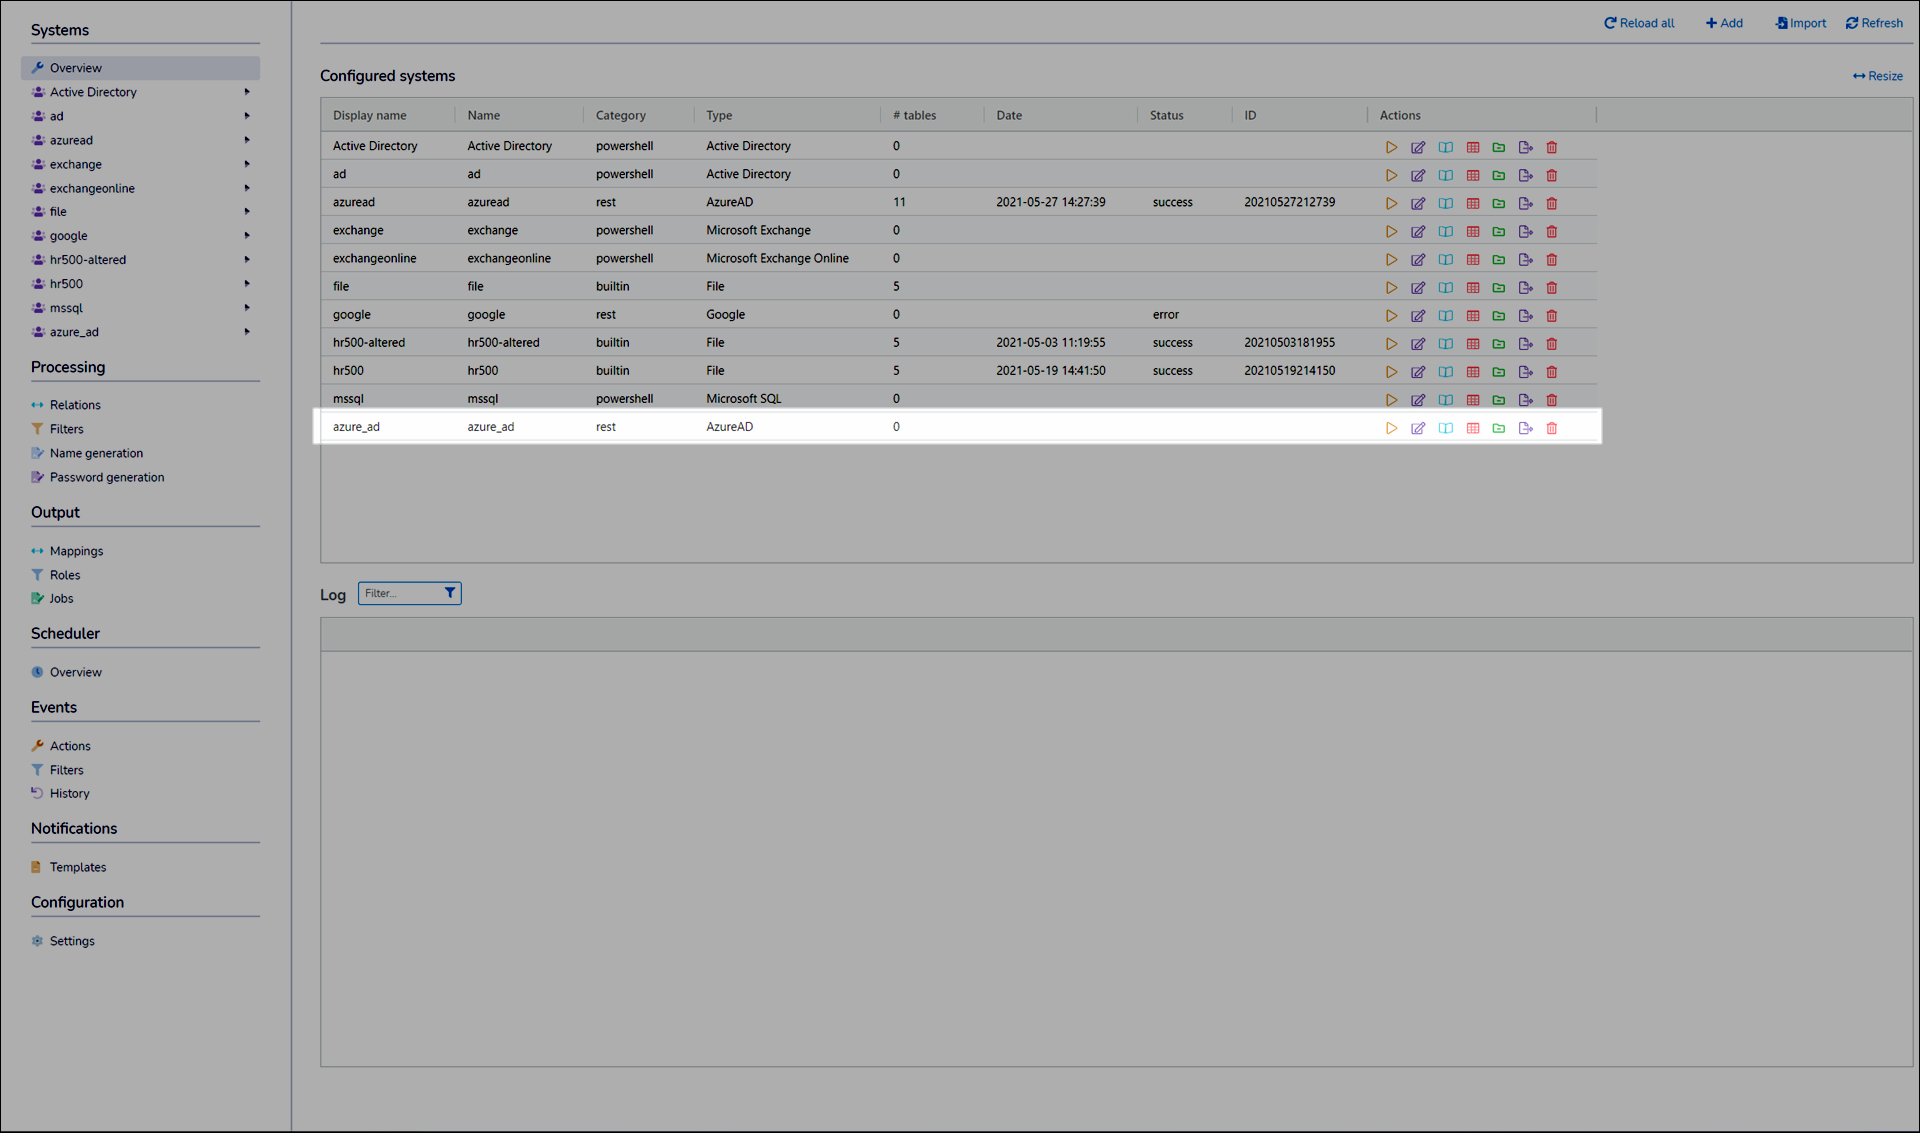
The new system is added to the Configured Systems pane.
Click
 Configure for the system.
Go to your Azure AD portal at https://portal.azure.com/.
Click Azure Active Directory under Azure Services.
Go to App Registrations.
Click New Registration.
Enter a Name. For example,
NIM.Click Register.
You are taken to the new app registration.
Create and upload your certificate in NIM and Azure.
Outside of Azure, use your preferred method to generate a self-signed certificate. Create both
X.509 encoded binary .cerand.pfxformats.In Azure, go to Certificates & Secrets. Click Upload Certificate. Use the
.cerformat. Click Add. The certificate is uploaded.In NIM, Add a certificate. Use the
.pfxformat.
In Azure, go to the new app's Overview.
Copy and paste the Application (Client) ID and Directory (Tenant) ID fields into the corresponding fields of the Connection tab in NIM.
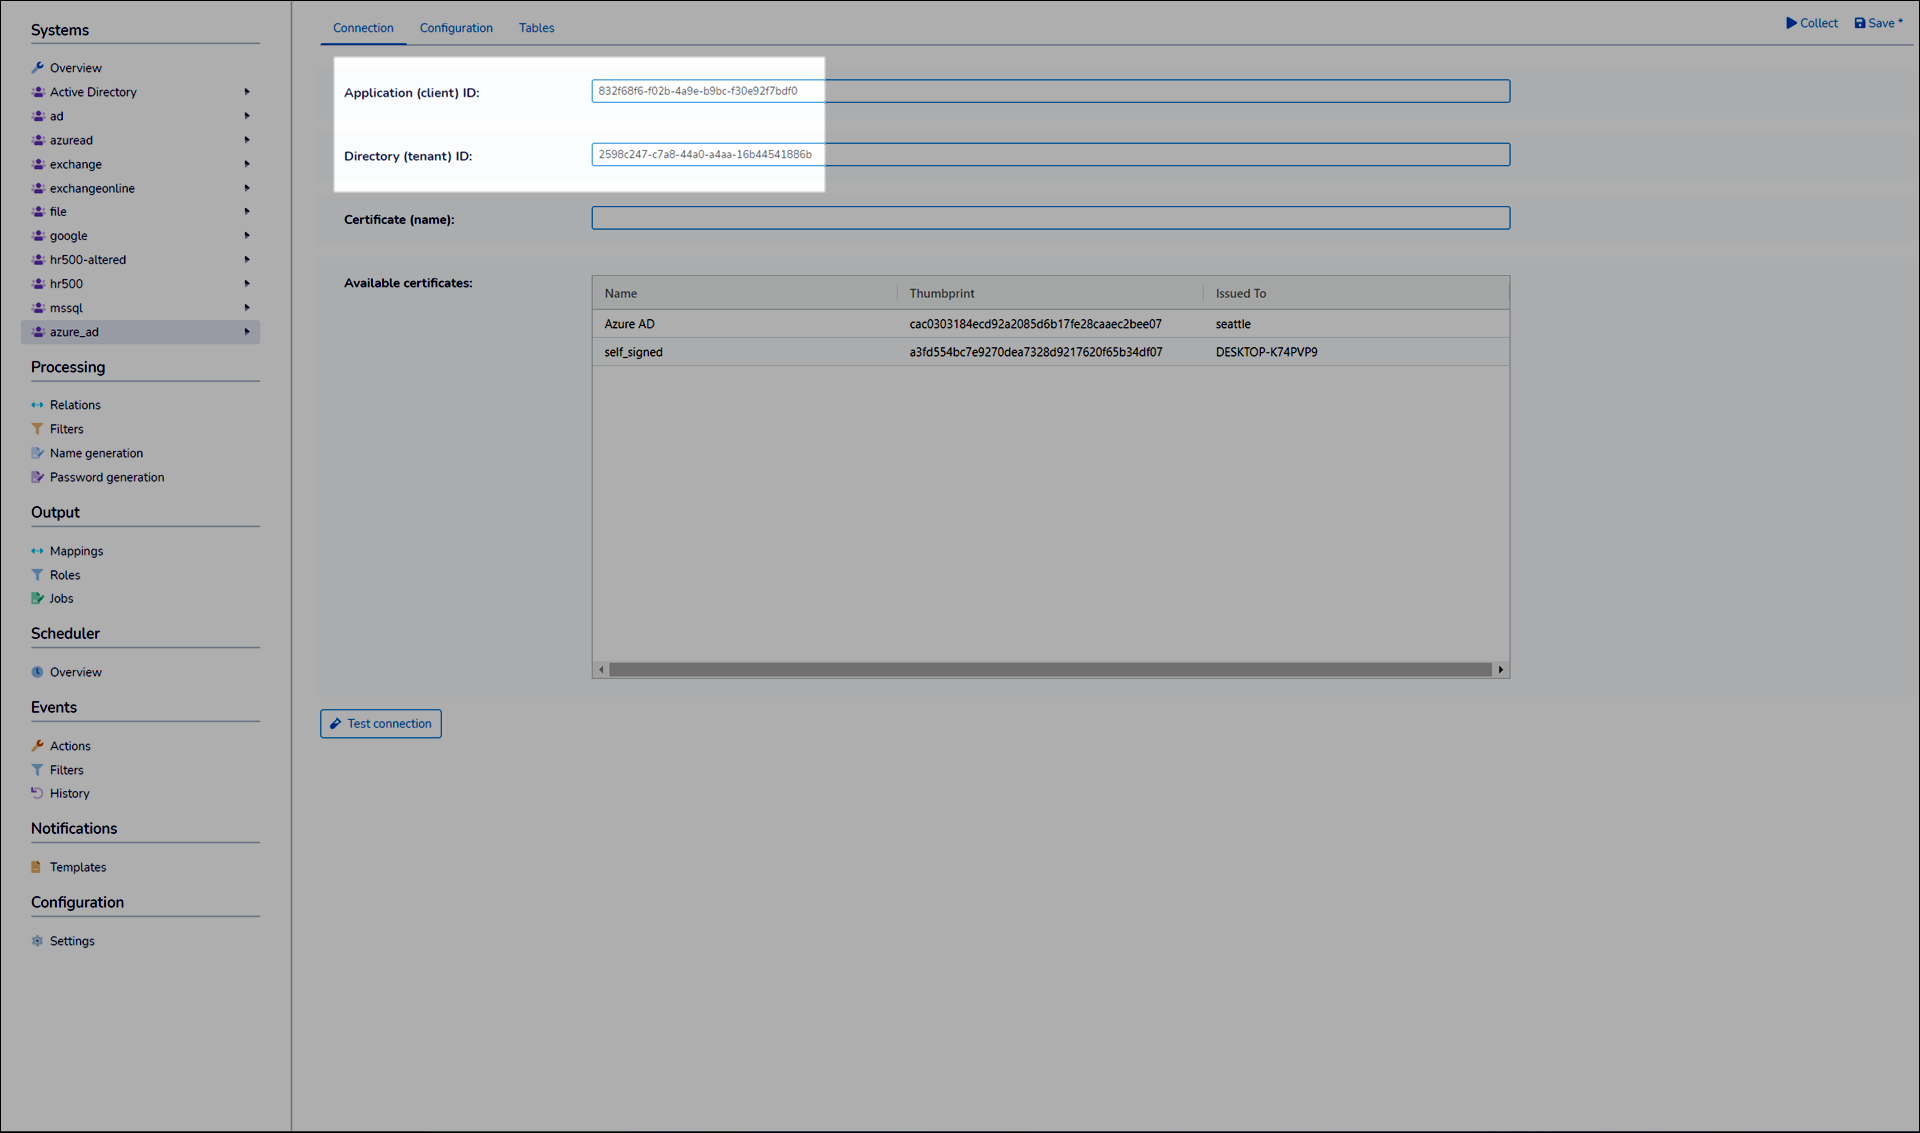
In NIM, select the newly uploaded certificate in the Certificates pane. The Certificate (Name) field is automatically populated.
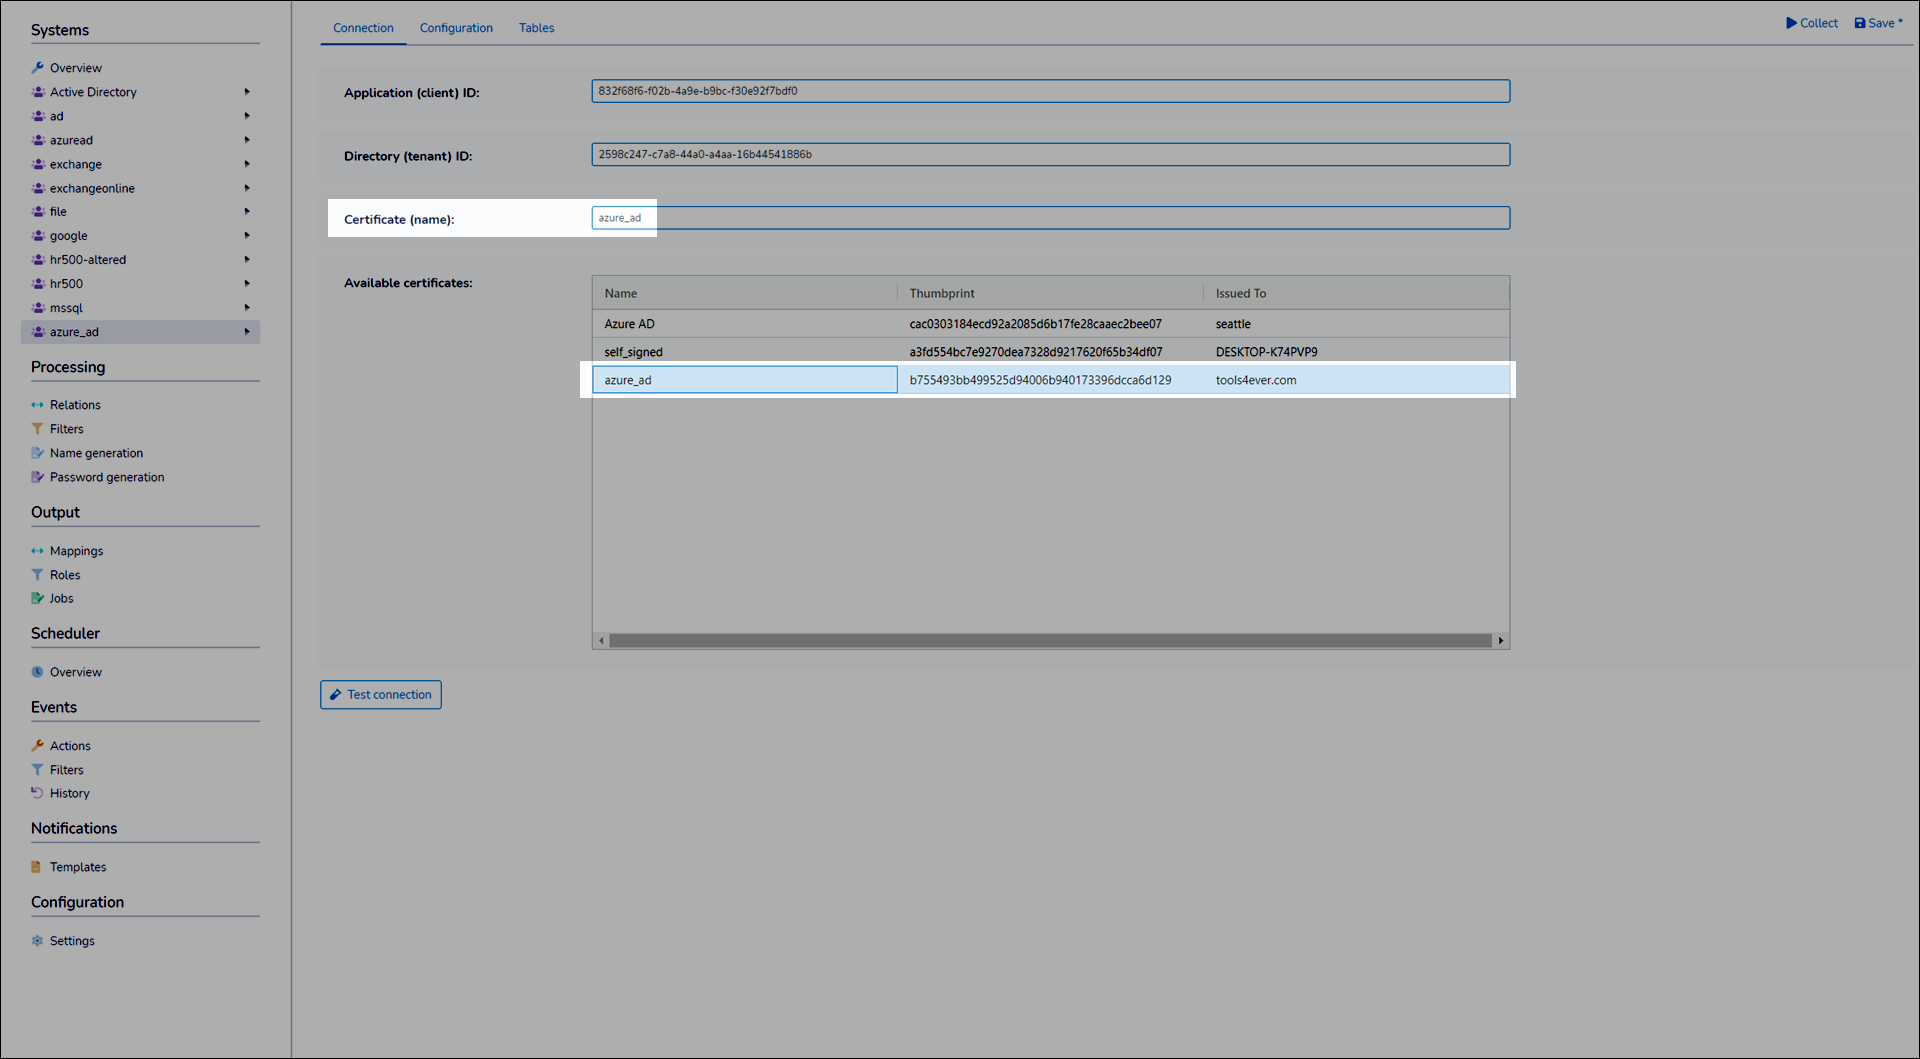
Click Save.
In Azure, go to API Permissions.
Click Add a Permission.
Click Microsoft Graph.
Click Application Permissions.
Select the following permissions:
AdministrativeUnit.Read.All
AdministrativeUnit.ReadWrite.All
Bitlocker.Read.All
Device.Read.All
Device.ReadWrite.All
Directory.Read.All
Directory.ReadWrite.All
Group.Read.All
Group.ReadWrite.All
IdentityRiskEvent.Read.All
IdentityRiskyUser.Read.All
IdentityRiskyUser.ReadWrite.All
Organization.Read.All
Reports.Read.All
Team.Read.All
Team.ReadBasic.All
TeamSettings.ReadWrite.All
User.Read.All
User.ReadWrite.All
UserAuthenticationMethod.Read.All
UserAuthenticationMethod.ReadWrite.All
Click Add Permissions.
Click Grant Admin Consent for <app name>. Click Yes to confirm.
Return to NIM.
Click Test Connection. A success message is returned.

Administrators of Entra can extend available attributes on objects by creating directory extensions via one of two methods outside of NIM.
These directory extensions then can be read and updated via NIM by extending the REST schema.
Here is an example of an additional extension created for users
Add file C:\ProgramData\Tools4ever\NIM\config\rest\systems\<systemname>.json (e.g. "C:\ProgramData\Tools4ever\NIM\config\rest\systems\Azure.json")
Insert the following JSON into the file, modifying the field name as necessary.
{
 "schema": {
  "crud_objects": {
   "users": {
    "resources": {
     "extension_46fd3ad18be2497aa1459db1226a4b5c_T4ETestField1": "string*"
    }
   }
  }
 }
}
Note
extension_46fd3ad18be2497aa1459db1226a4b5c_T4ETestField1is the name of the field in Entra ID. You will need to update it to match what is in your environment.Save the file.
Inside of NIM, the custom field should be displayed in the system configuration, as shown below.
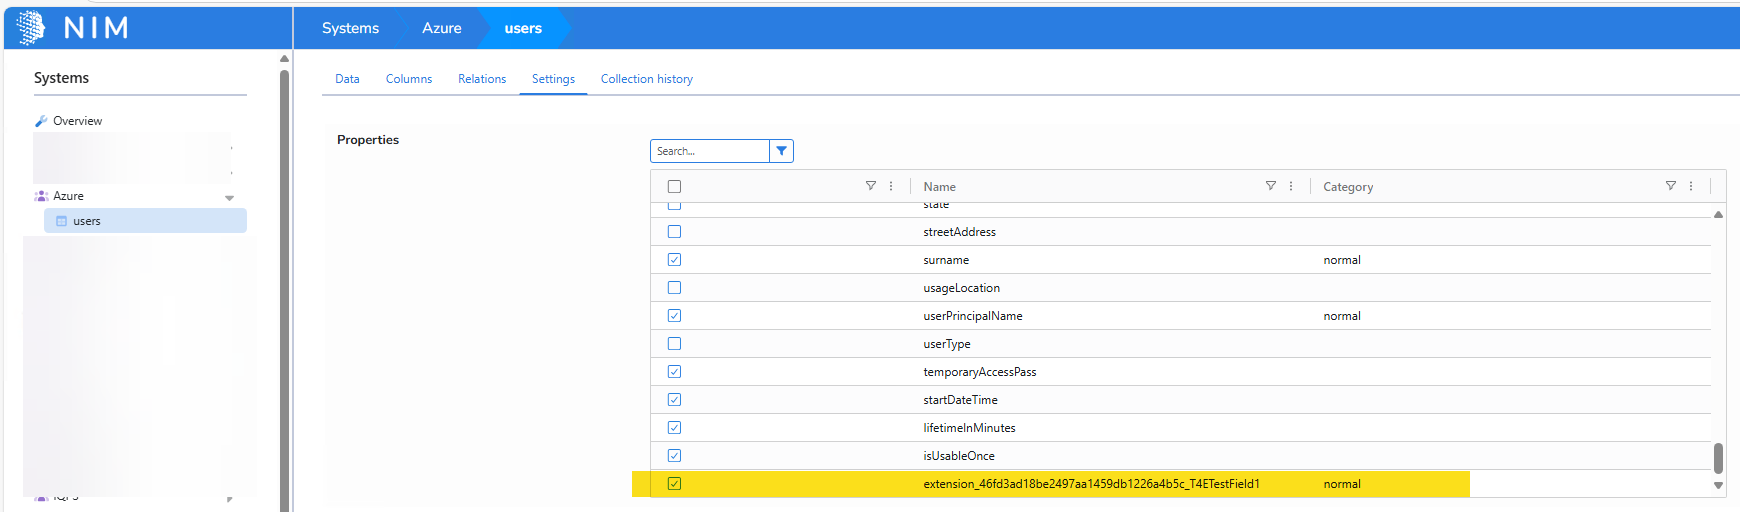
The new field can now be used in a mapping like any other attribute.