SAML
NIM supports SAML for authentication, providing a versatile and secure method for user verification. This capability allows NIM to authenticate users from a range of external systems that support SAML, including Microsoft Entra, Google Workspace and Okta. The advantage of using SAML for authentication in NIM is the convenience it offers; users can access NIM applications without the need for creating separate passwords within NIM itself. This feature simplifies the process of deploying NIM Apps, as it integrates with existing user credentials from these external systems, streamlining access and maintaining security.
Requirements
User must exist in NIM's internal user table with matching email address or username.
Internal users' authmethod property must be
saml<Name>Note
For example, if your SAML configuration in NIM is named "Azure", users' authmethod should be
samlAzure.
Configure Microsoft Azure (Entra) SAML
Select Create you own application
Enable SAML
Ensure that Verification Certificates - Required is set to
No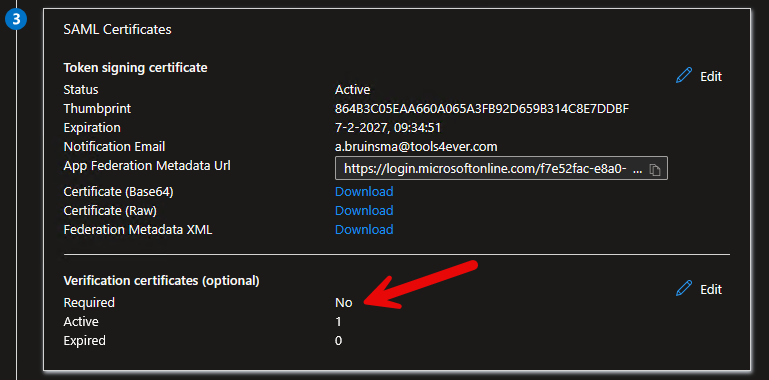
Under the Sp tab, uncheck the
Signed authn requests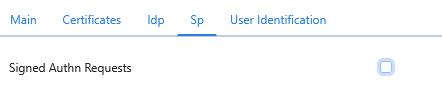
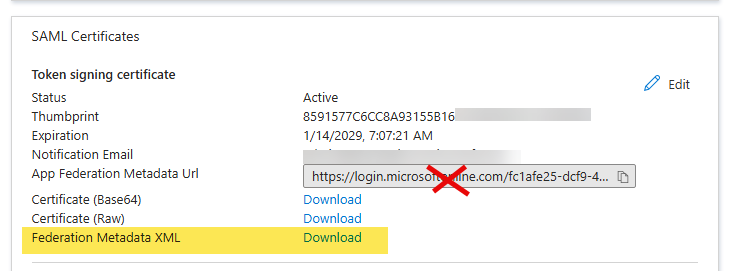
Download metadata from Federation Metadata XML under SAML Certificates
Warning
DO NOT copy the URL from the App Federation Metadata XML entry. That has a different certificate which does not match the assigned cert for the app. You must download the Federation Metadata XLM, as shown below.
In the Users and groups section of your app, assign the users and groups that should be able to log into NIM.

Open NIM Studio
Go to Configuration > SAML
Click
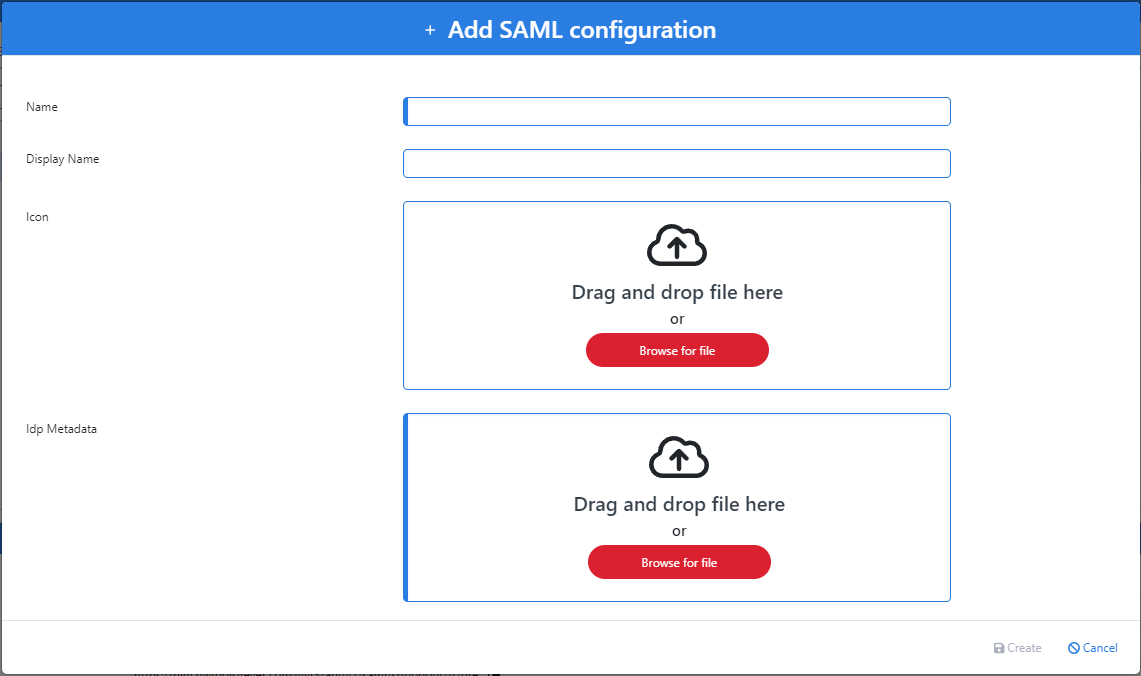
 Add Button
Enter a Name for the configuration (e.g. Azure)
The metadata downloaded from Entra should now be uploaded to the Idp Metadata field. Then click Create
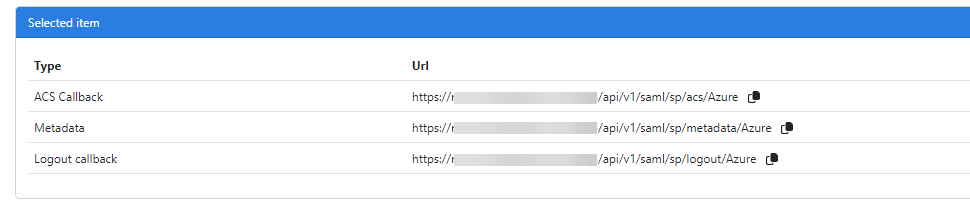
Click on the newly created configuration in the grid to select it. A metadata URL is then provided to upload to Azure. Download the metadata file and upload it to your Azure app. This will automatically fill in the app's required fields.
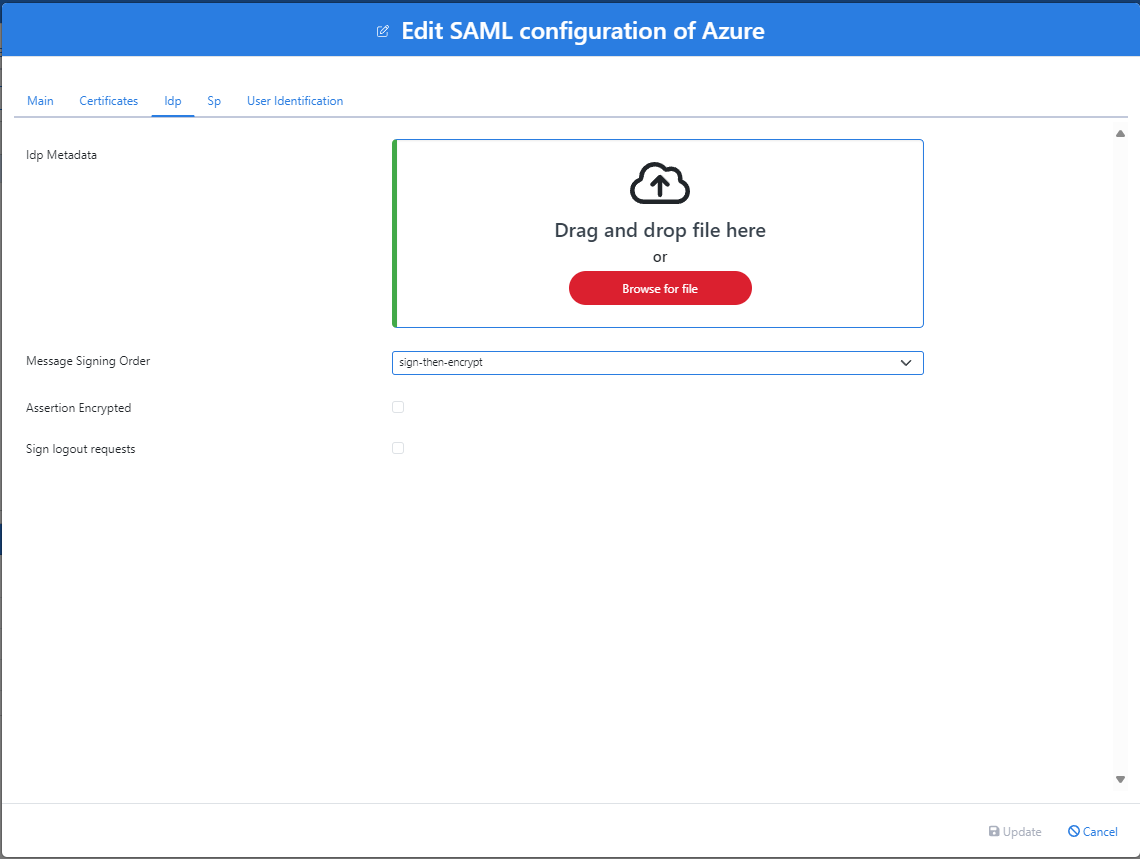
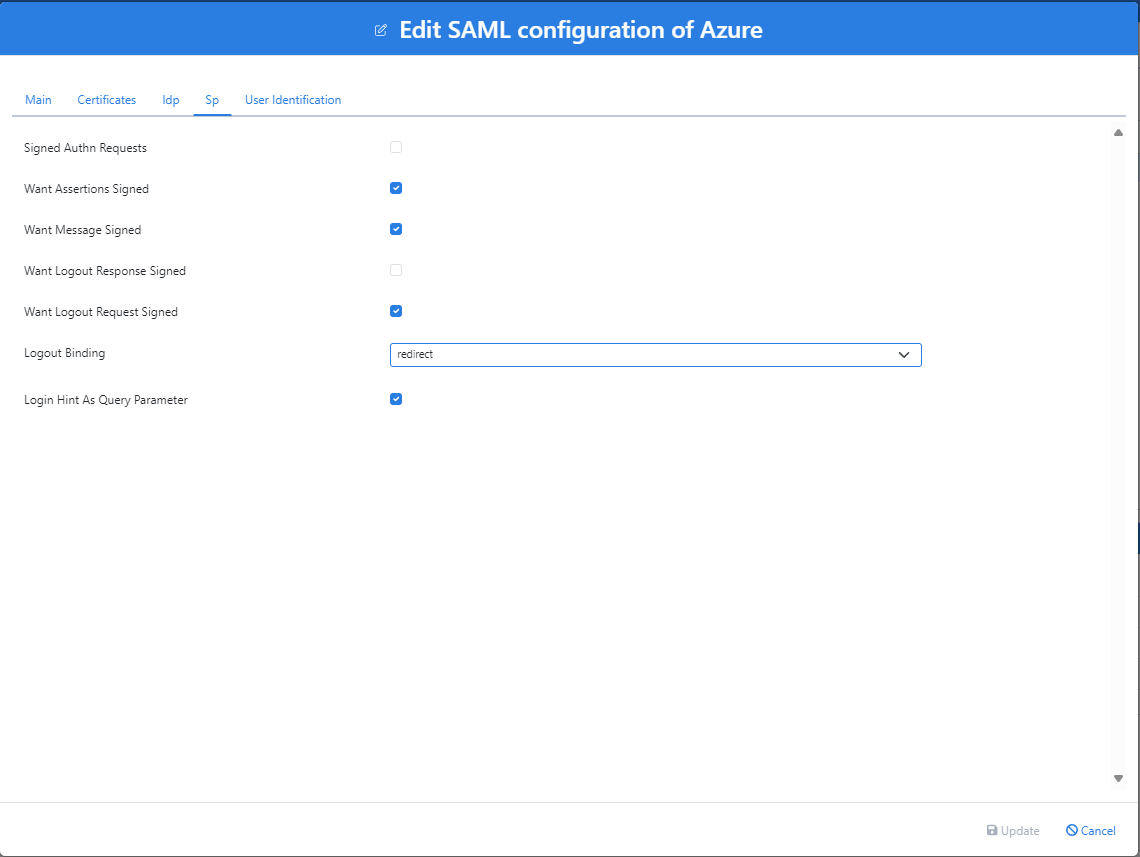
Click the
 button next to your SAML app to modify its settings. Ensure the settings in the Idp and Sp tabs resemble the following screenshots:
Idp
Sp
Configure Google Workspace SAML
Setup your own custom SAML app in Google Workspace
Download IDP Metdata
Open NIM Studio
Go to Configuration > SAML
Click
Add ButtonEnter a Name for the configuration (e.g. Google)>
The metadata downloaded from Google should now be uploaded to the Idp Metadata field. Then click Create
Click on the newly created configuration in the grid to select it. URL's a given to be added to Google
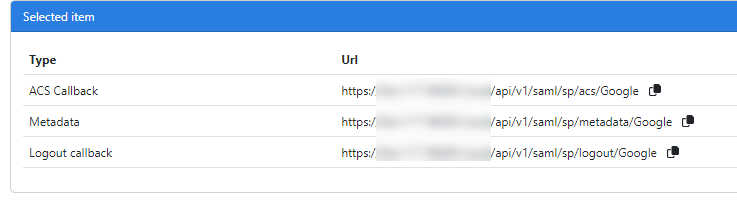
Return to Google and configure the following URL's
ACS URL: <NIM ACS Callback URL>
Entity ID: <NIM Metadata URL>
Signed Response: Enabled/Checked>
Name ID Format: EMAIL
Name ID: Basic Information > Primary Email