Create a table notification task
For more information, see Table notification tasks.
Create a filter or Create an auditing query that outputs the data whose rows you want to individually send by email.
For this example, we'll use a simple filter named
azure_usersthat outputs all users in our HR source system who have accounts in our Azure AD target system. The columns in this filter are the columns that will be available to insert into the notification template. Note that the filter must include a column with the users' email addresses.
Go to Scheduler > Overview.
Click Add.
Select
table-notificationfor the Type.Enter a Name.
For example,
azure_user_details.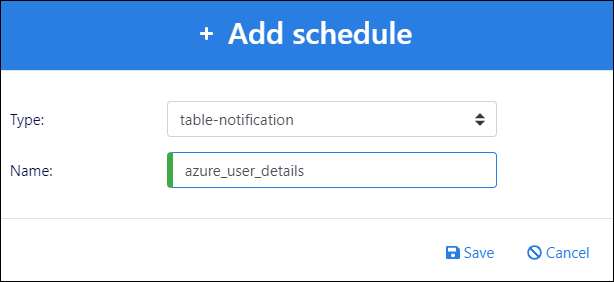
Click Save.
For the Table, select the filter or auditing query that you created in step (1).
For this example,
filter.azure_users.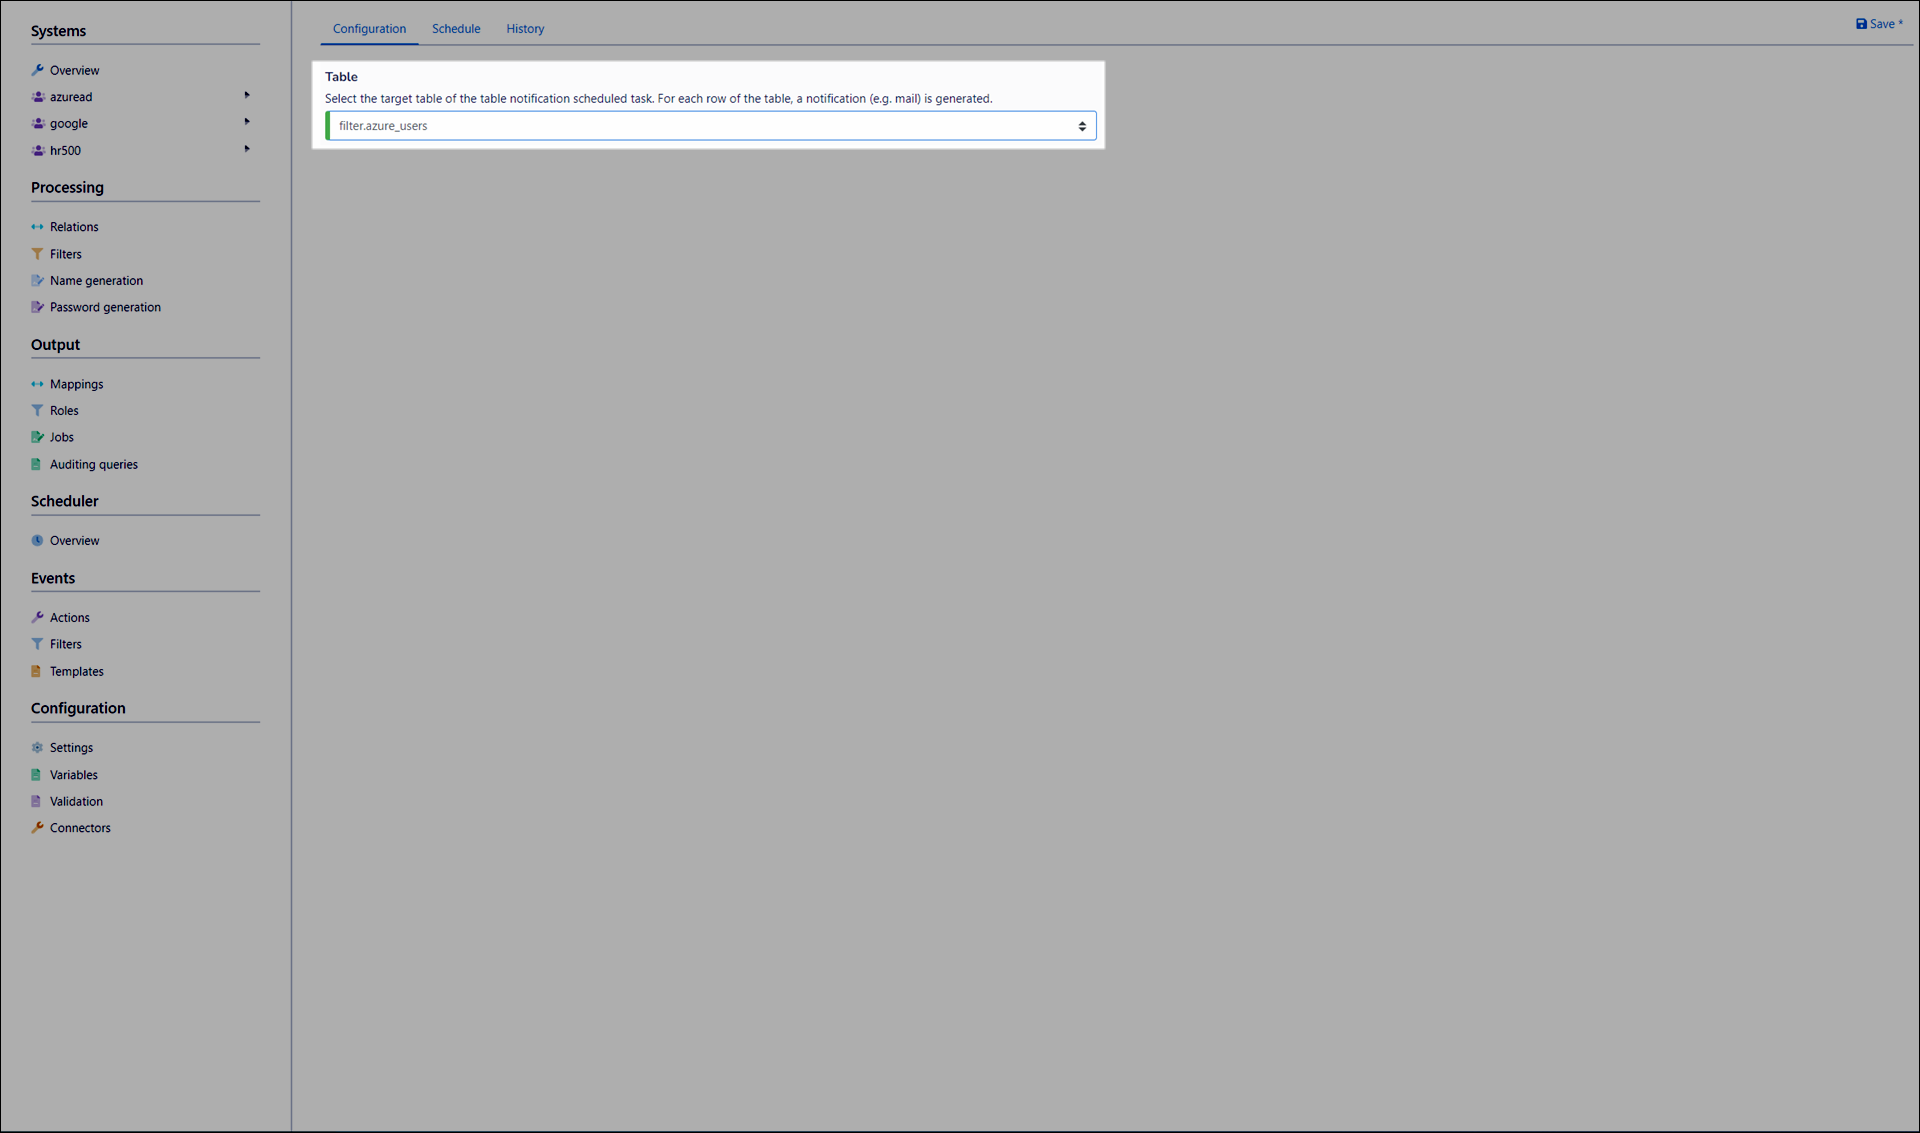
Click Save.
Create a notification template.
For this example, we'll create one named
azure_user_details_template.For the Notification Event, we'll select the
azure_user_detailstable notification scheduled task created in step (3).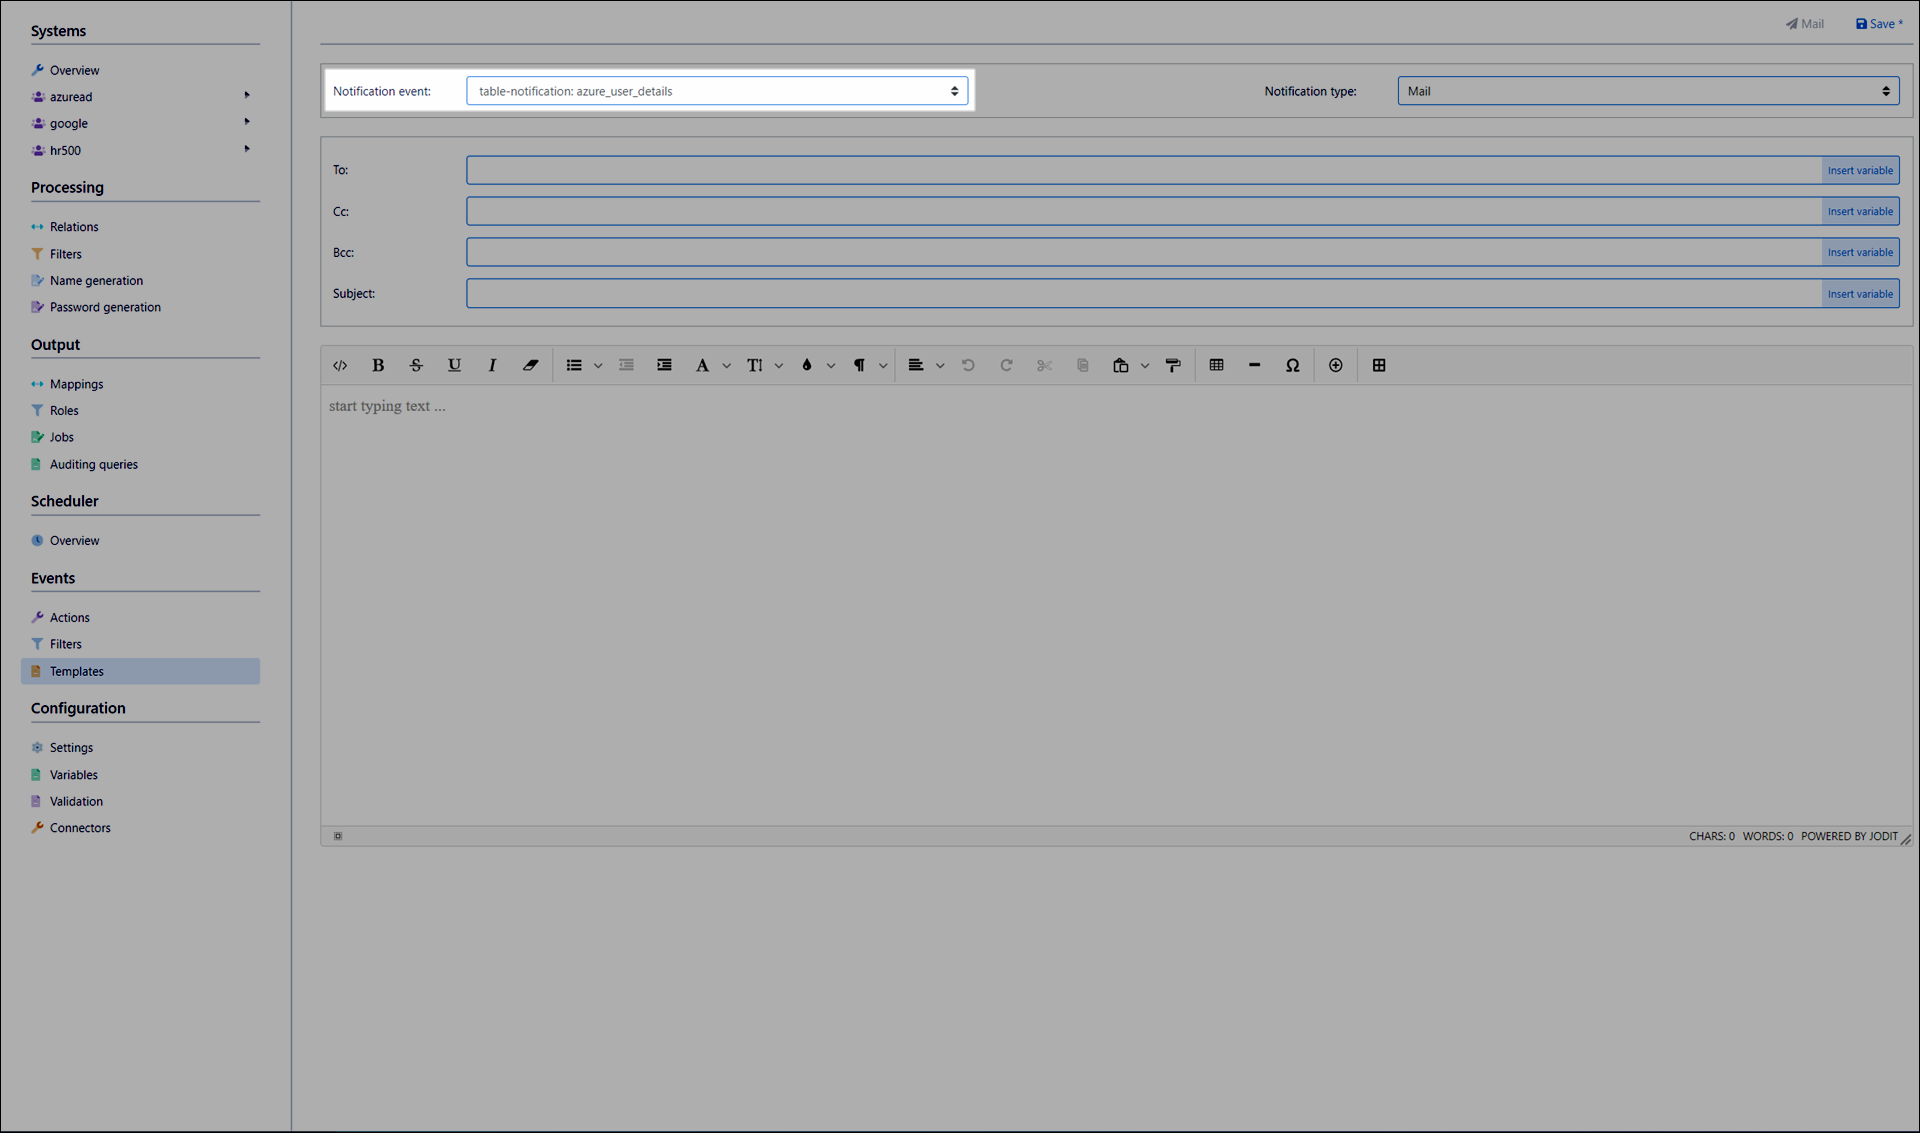
For the To field, click Insert Variable.
For this example, we'll select the
mailcolumn of the filter (the variabledata.mail).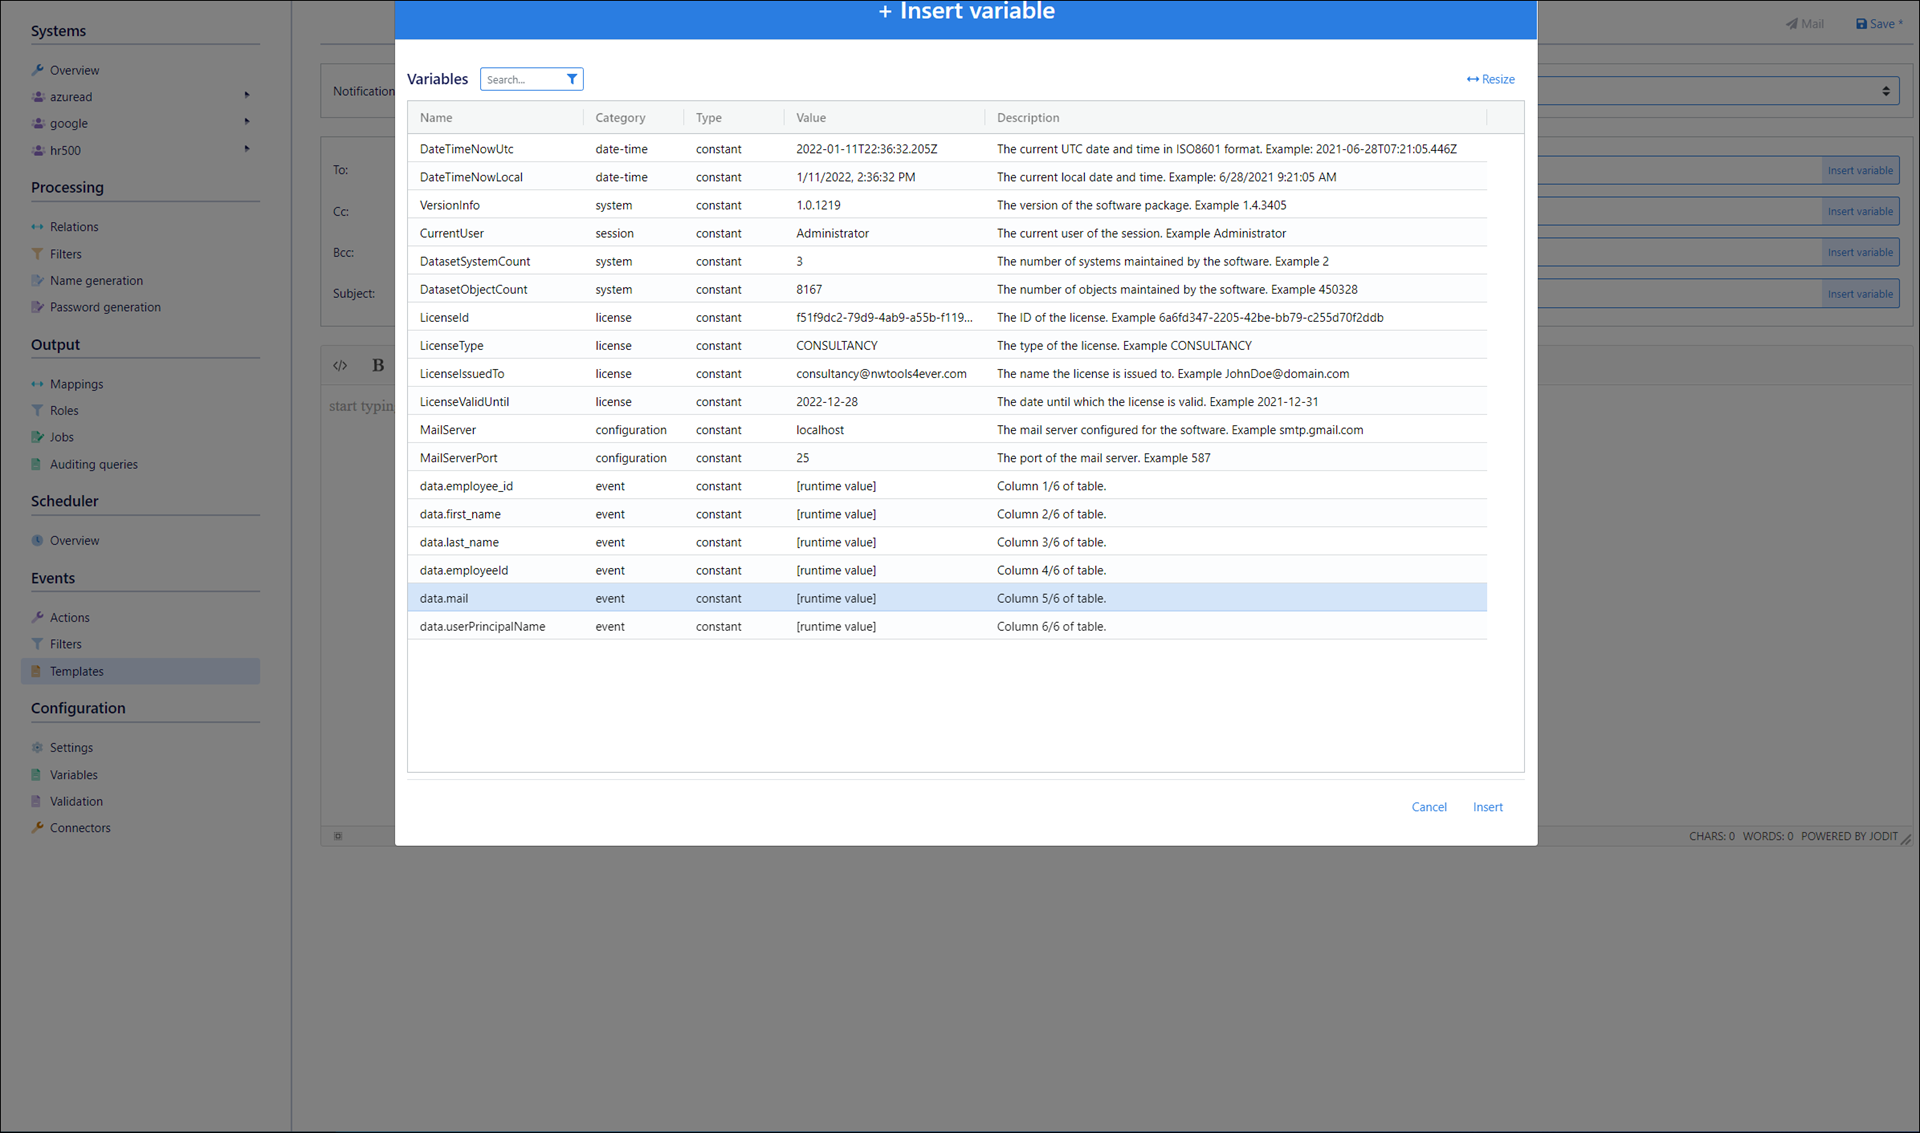
Click Insert.
Enter a Subject.
Compose the body of the notification template.
For example:
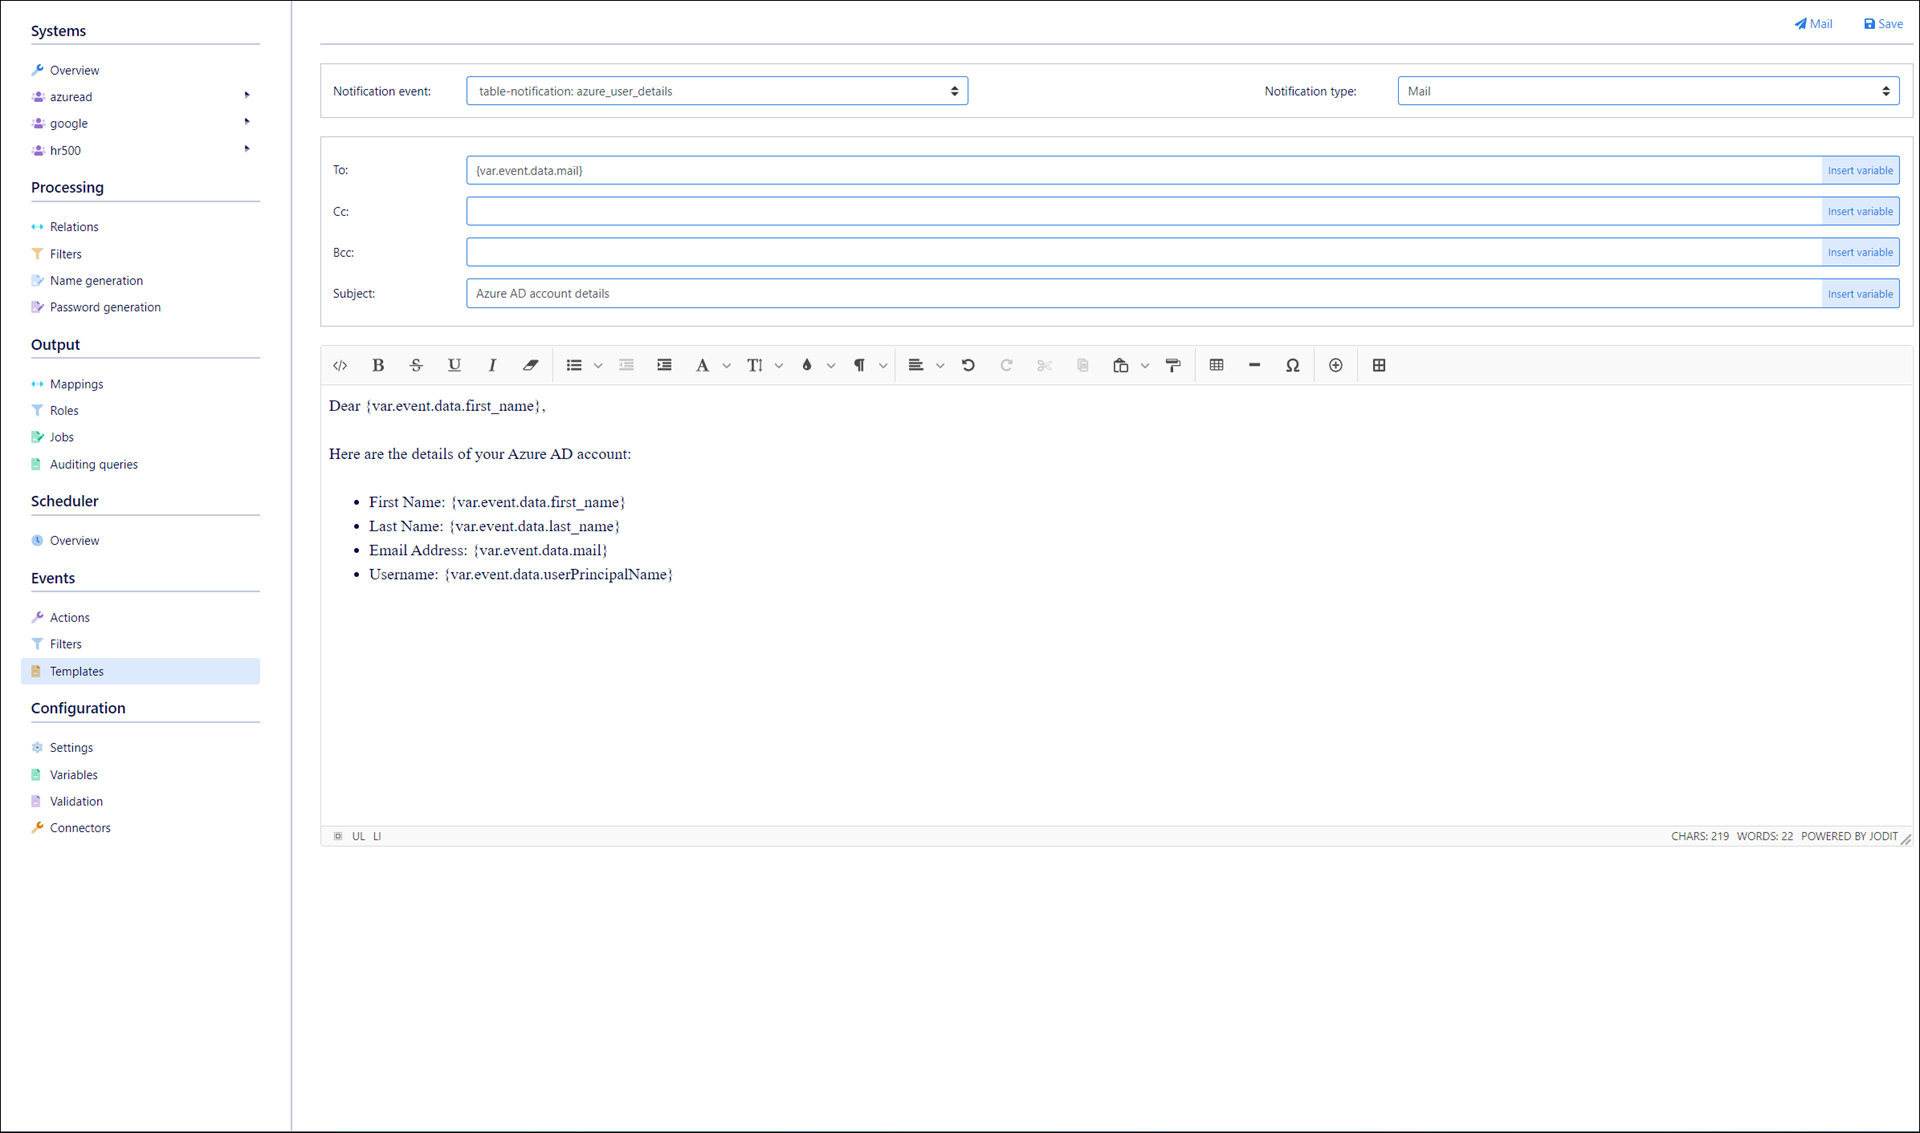
Click Save.
Go to Scheduler > Overview.
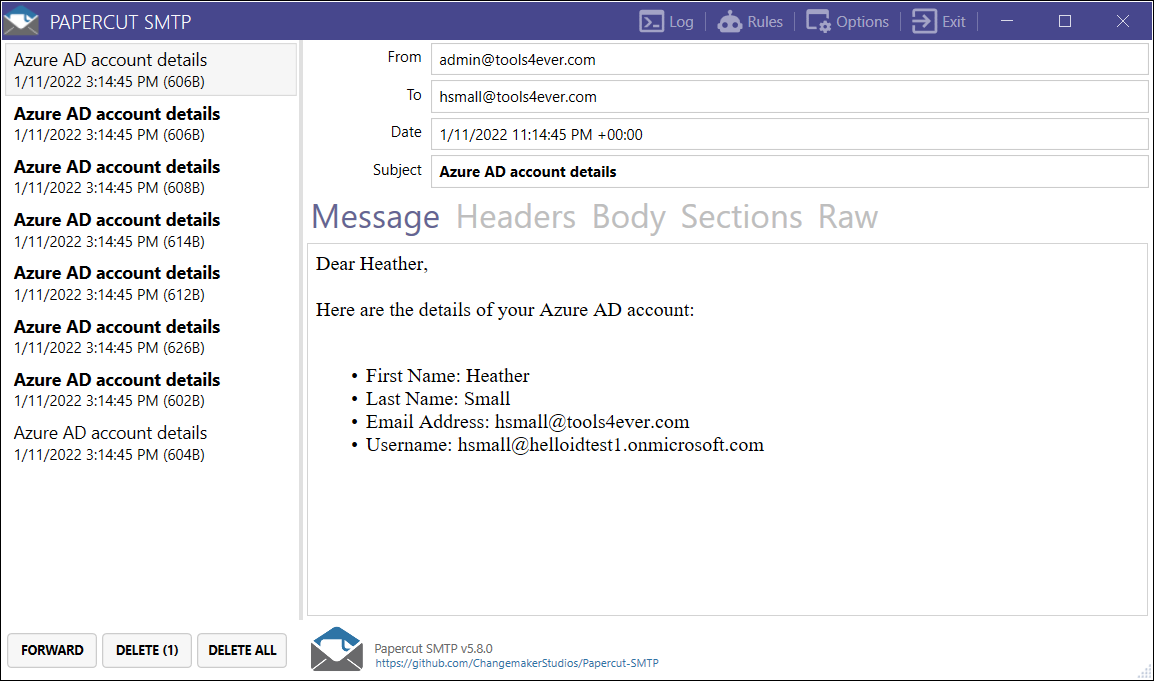
Edit a task for the
azure_user_detailstable notification scheduled task created in step (3).Ensure mail settings are configured. Then perform a Manual run for the
azure_user_detailstable notification scheduled task created in step (3).
One test email is sent per row in the filter's output.
For example:
Go to the Schedule tab to set up a Scheduled run, then click Save. Or, perform a Manual run.