Step 23: Set up the internal NIM system (tutorial)
Our app is finished and tested, but there is still one last thing to do—grant users access to it. In this step, we'll add & configure an Internal system and create some internal NIM users.
Add the internal system
Go to Systems > Overview.
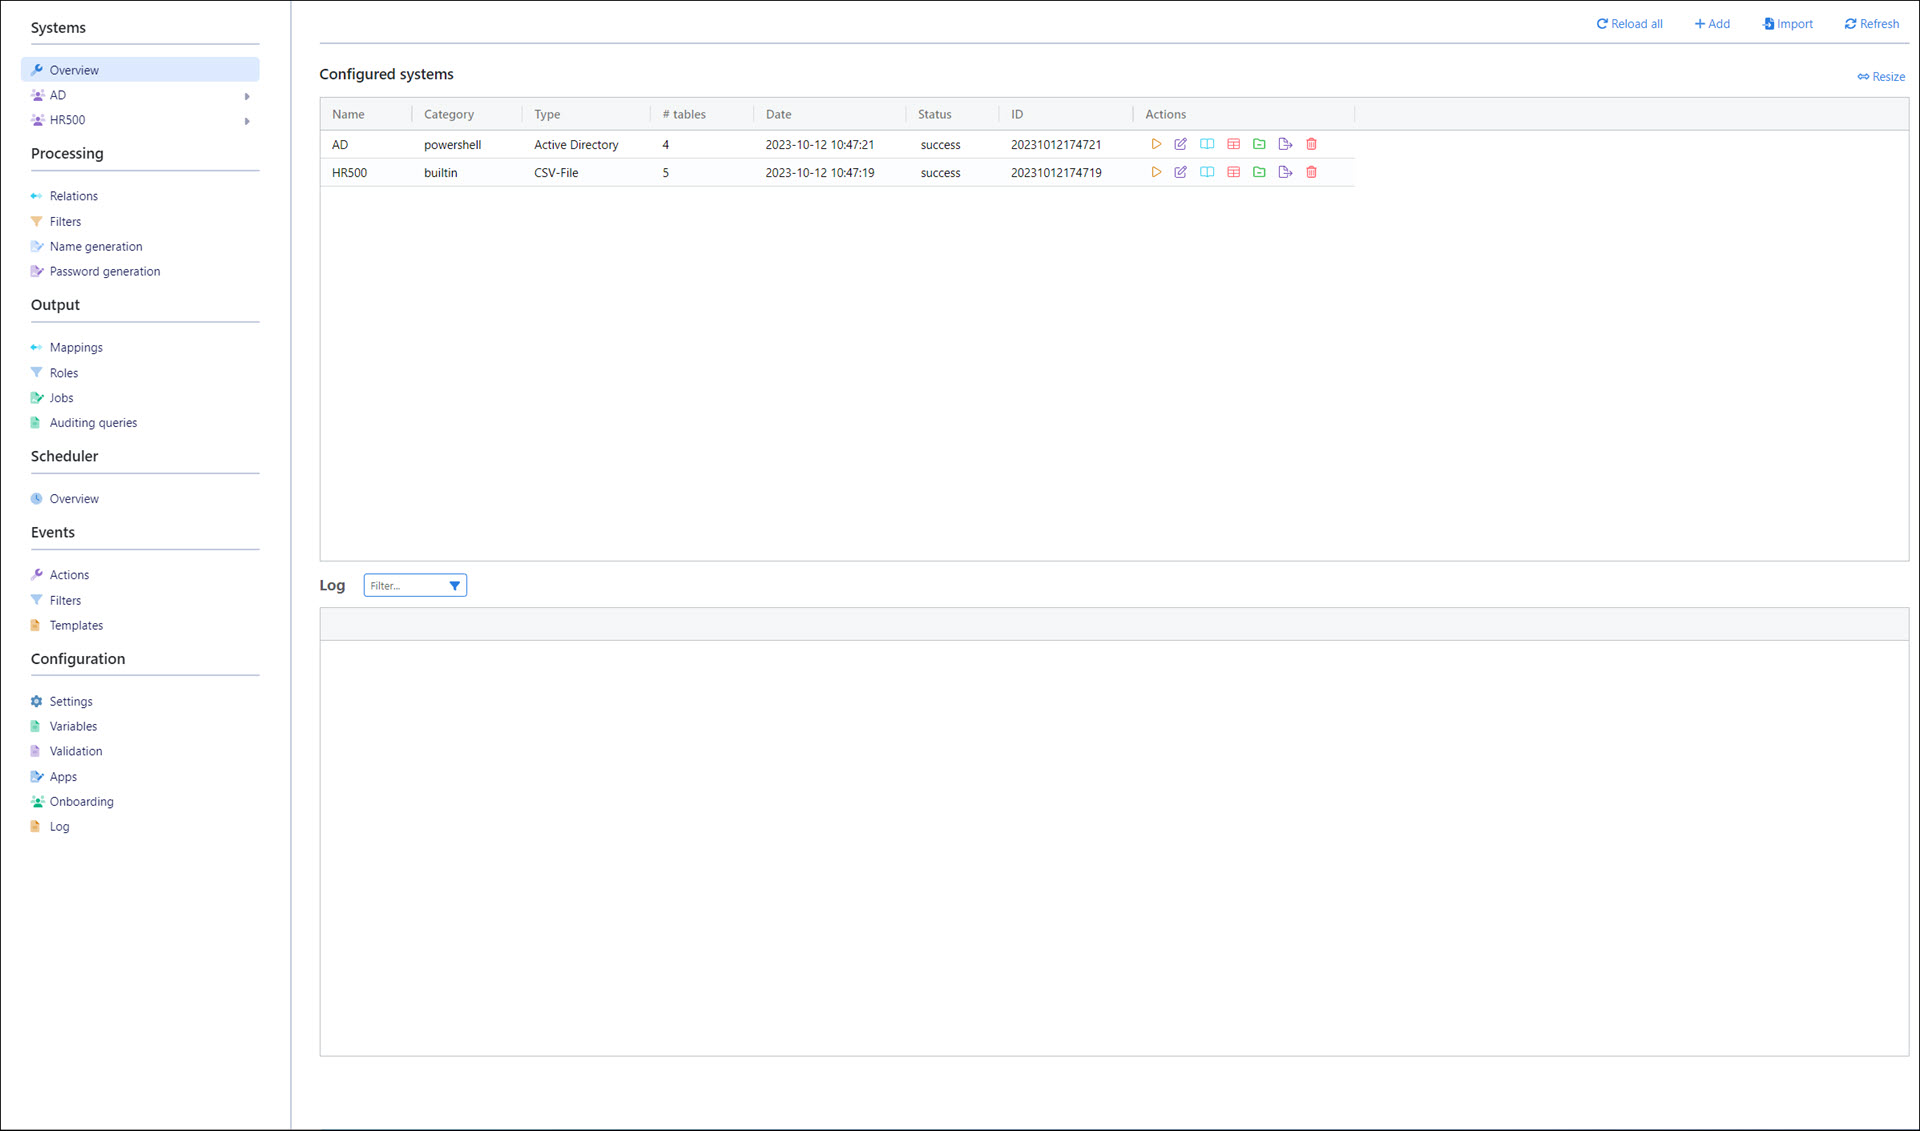
Click Add.
Accept the default System Name.
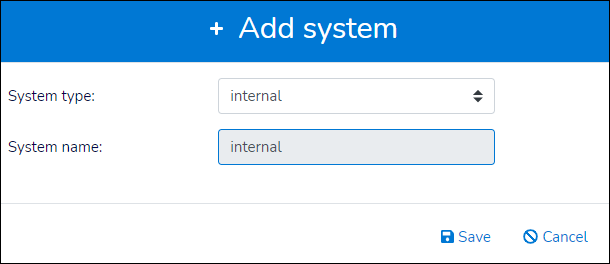
Click Save.
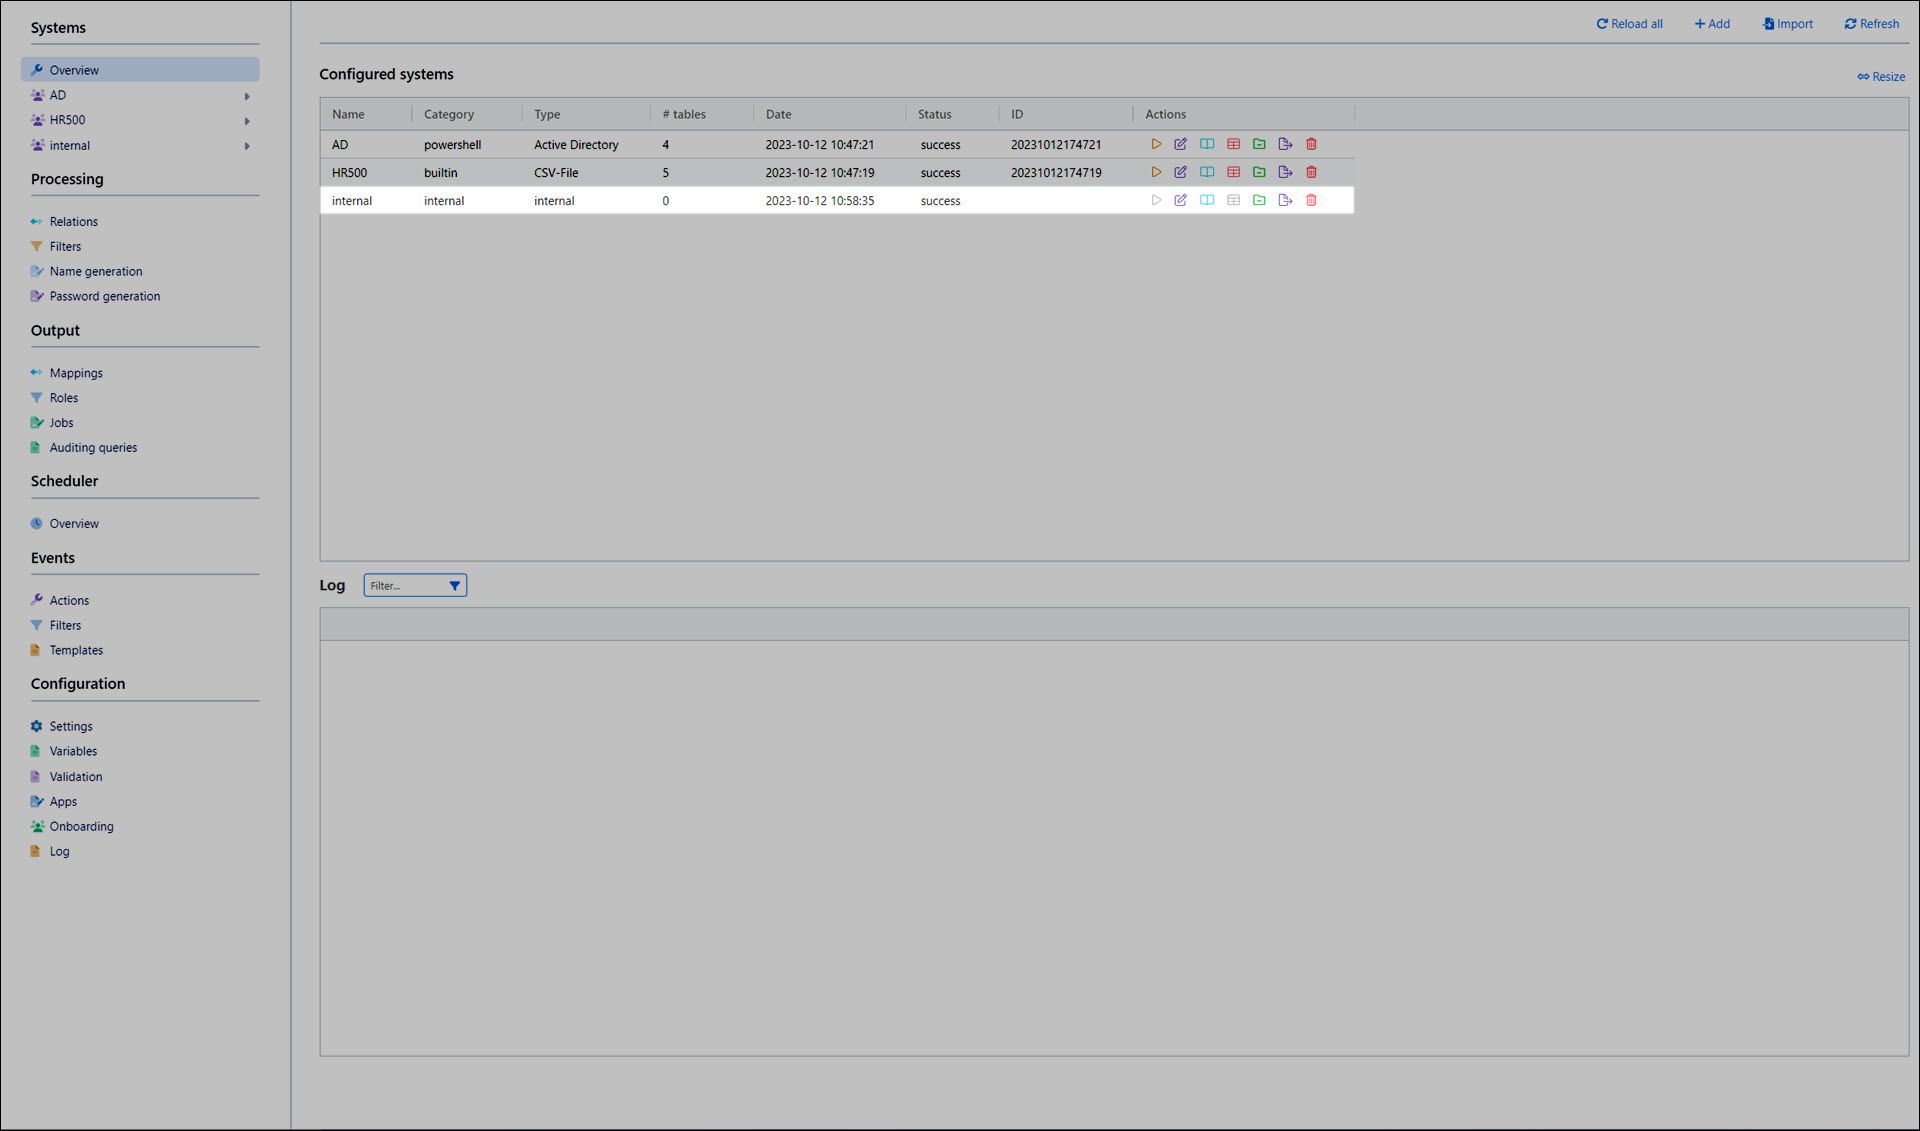
The new system is added to the Configured Systems pane.
Configure the internal system
Click
 Configure for the internal system.
Enable the Users, Groups, and Memberships tables.
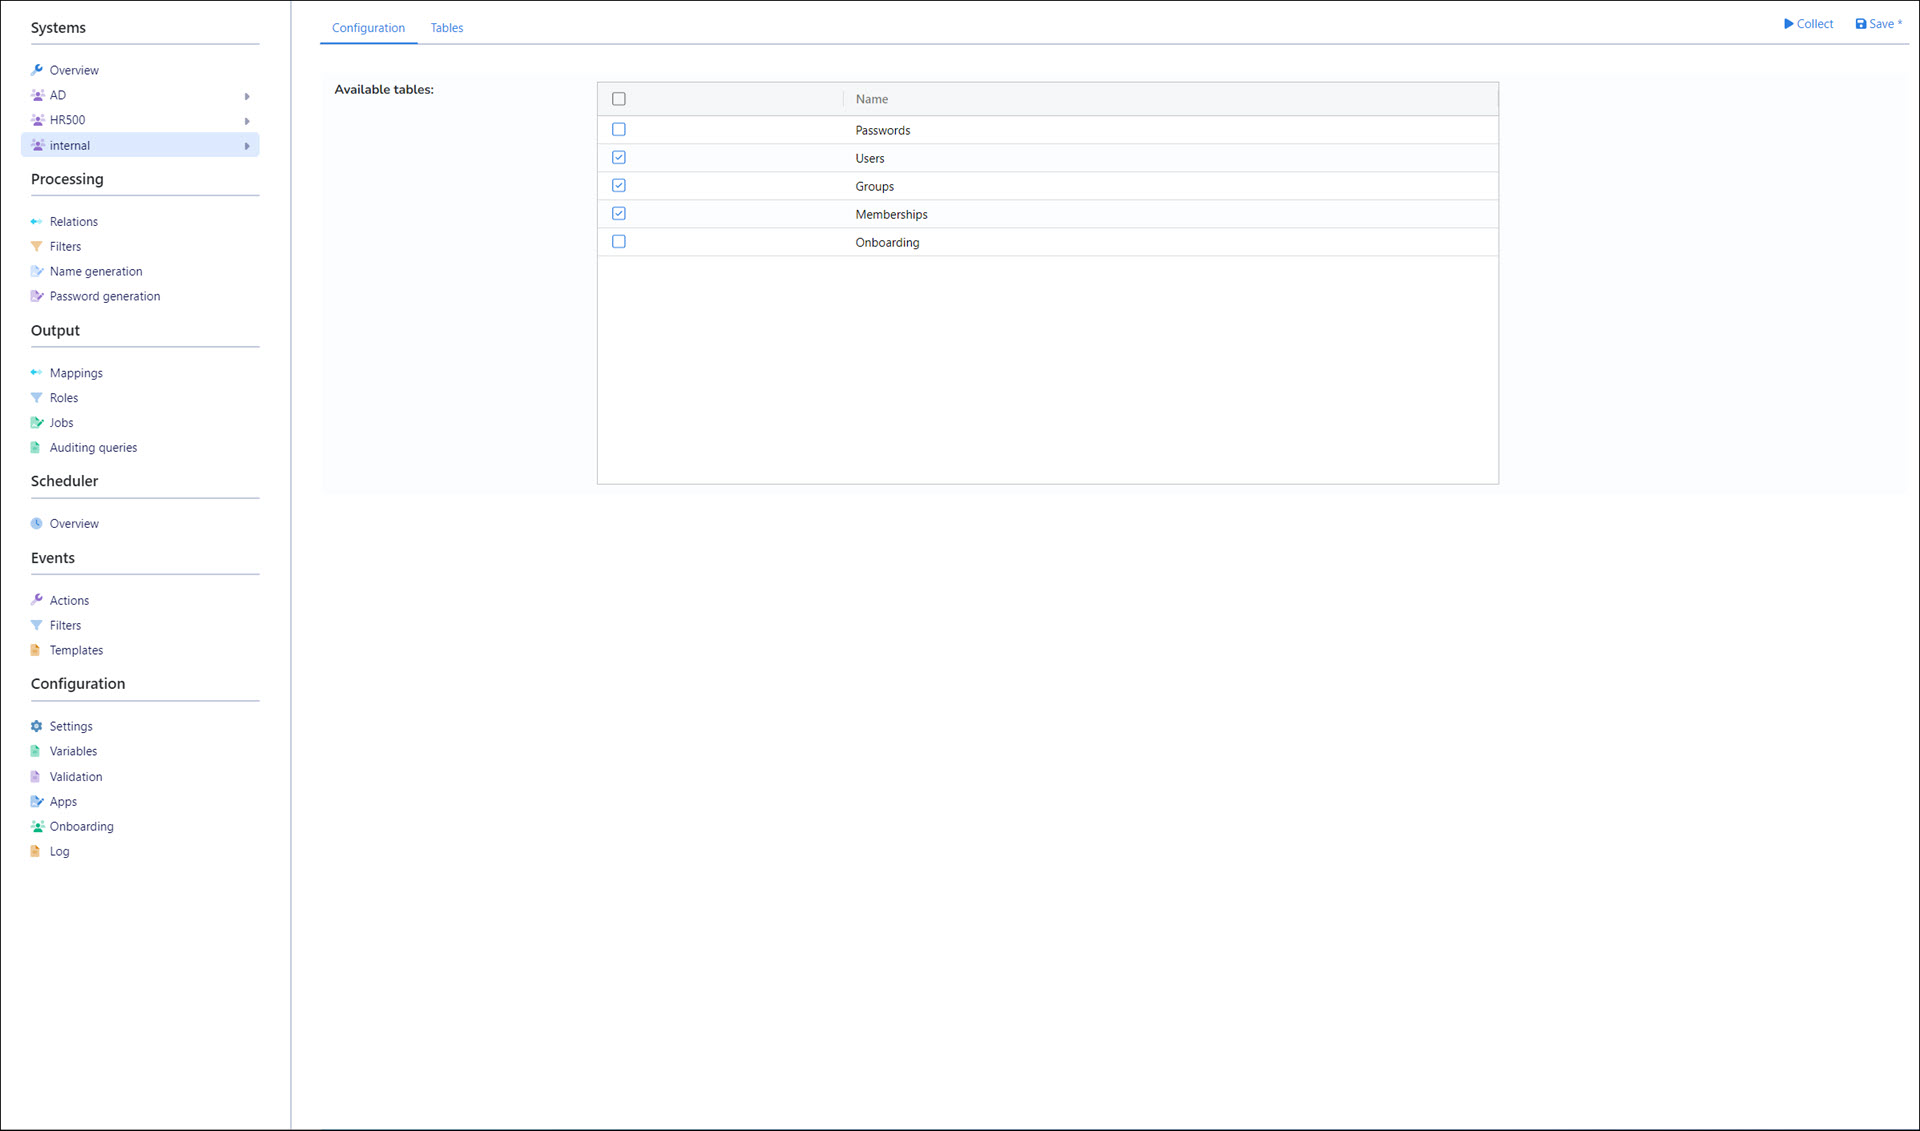
Click Save.
Expand the internal system's table list.
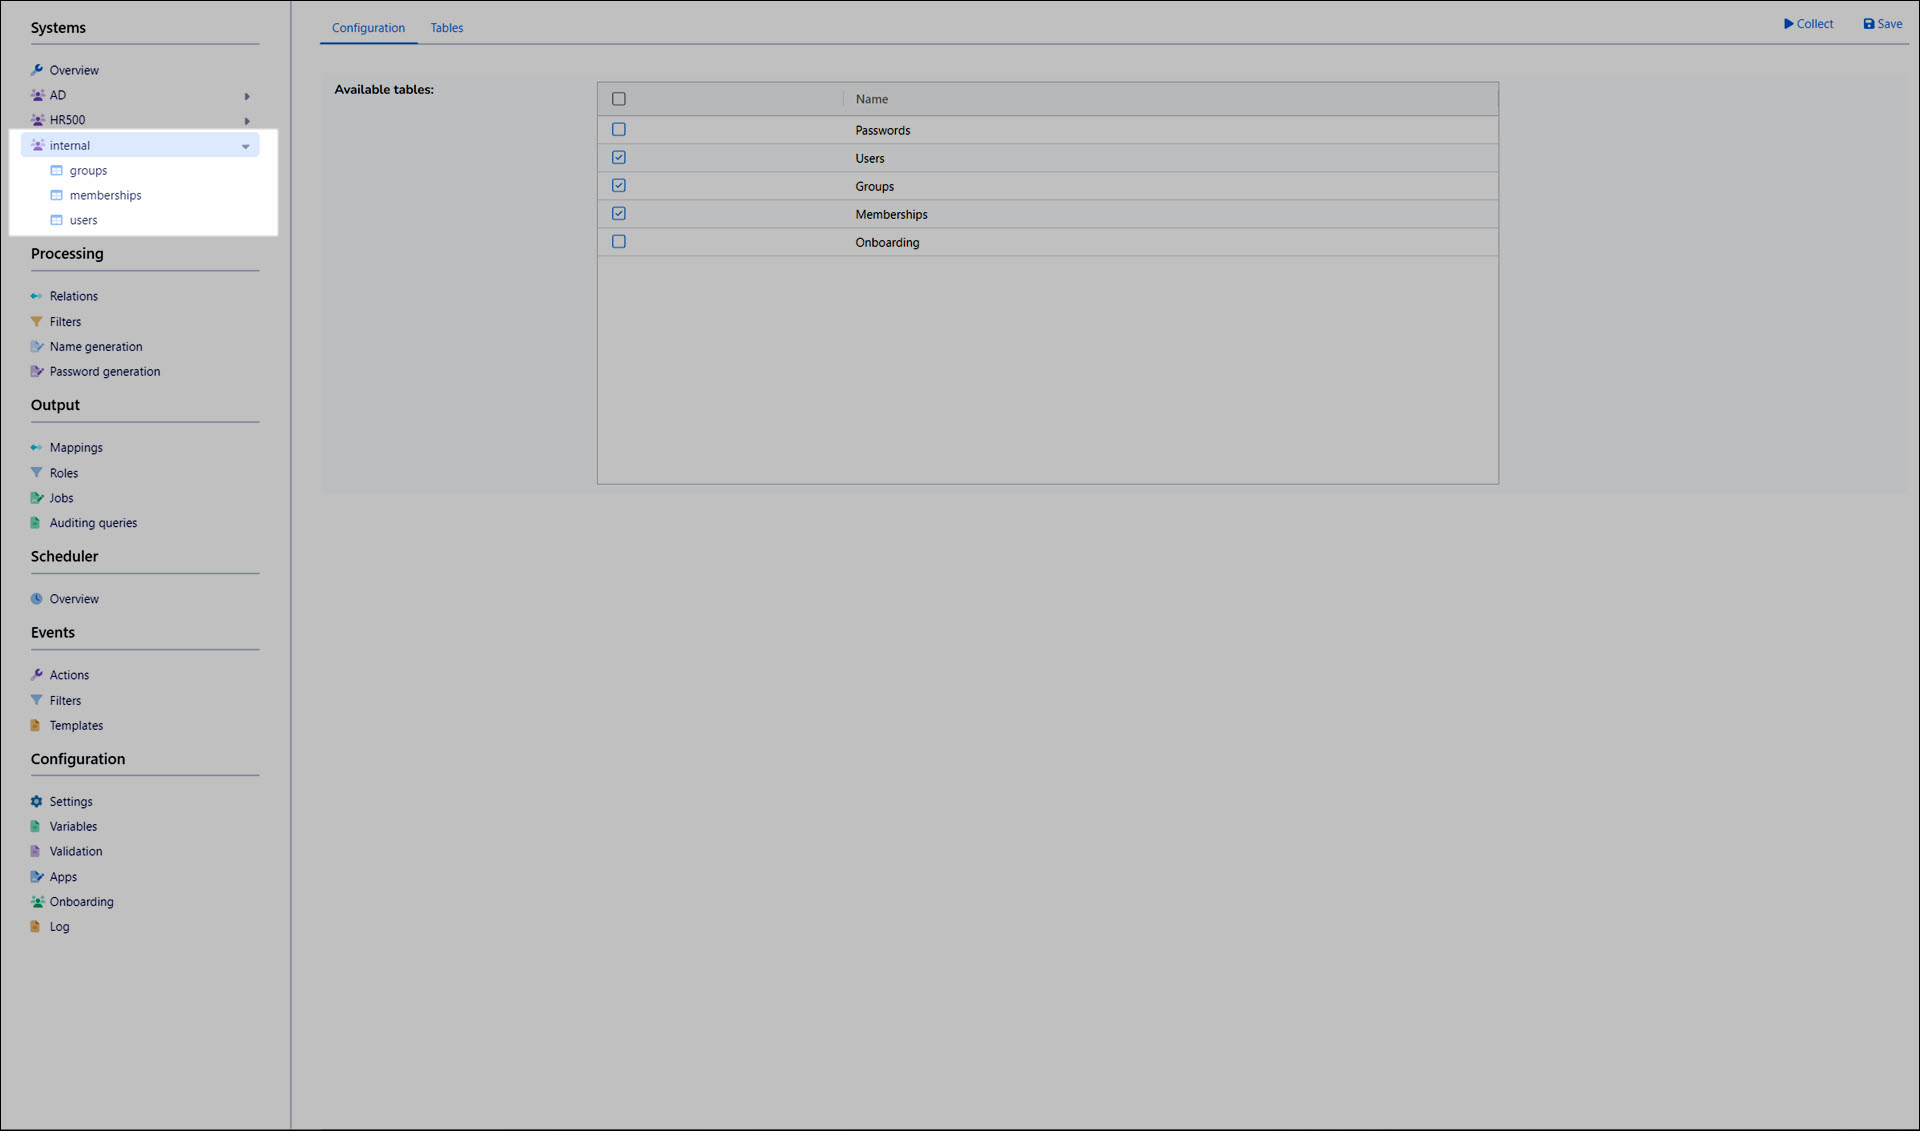
Go to the memberships table.
Go to the Relations tab.
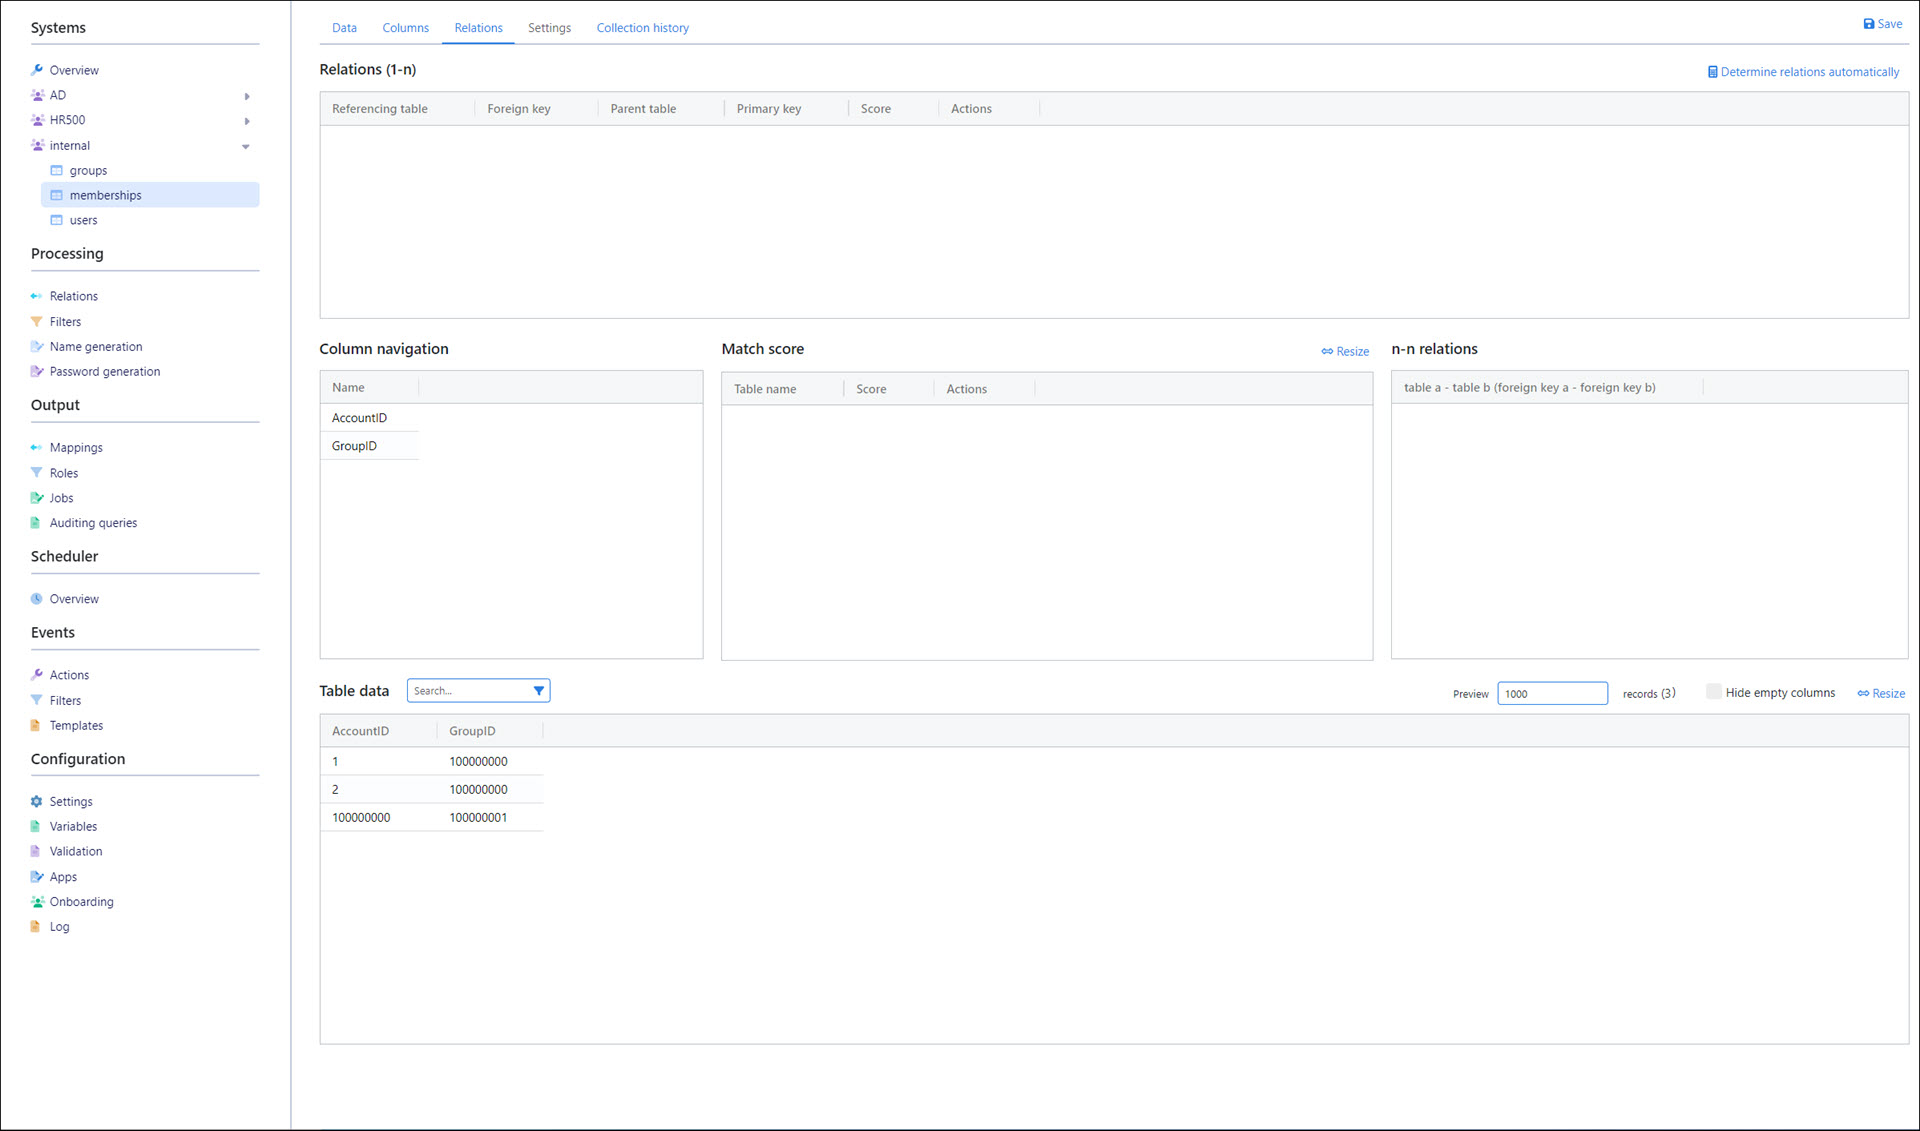
Manually add the following foreign-primary key relations:
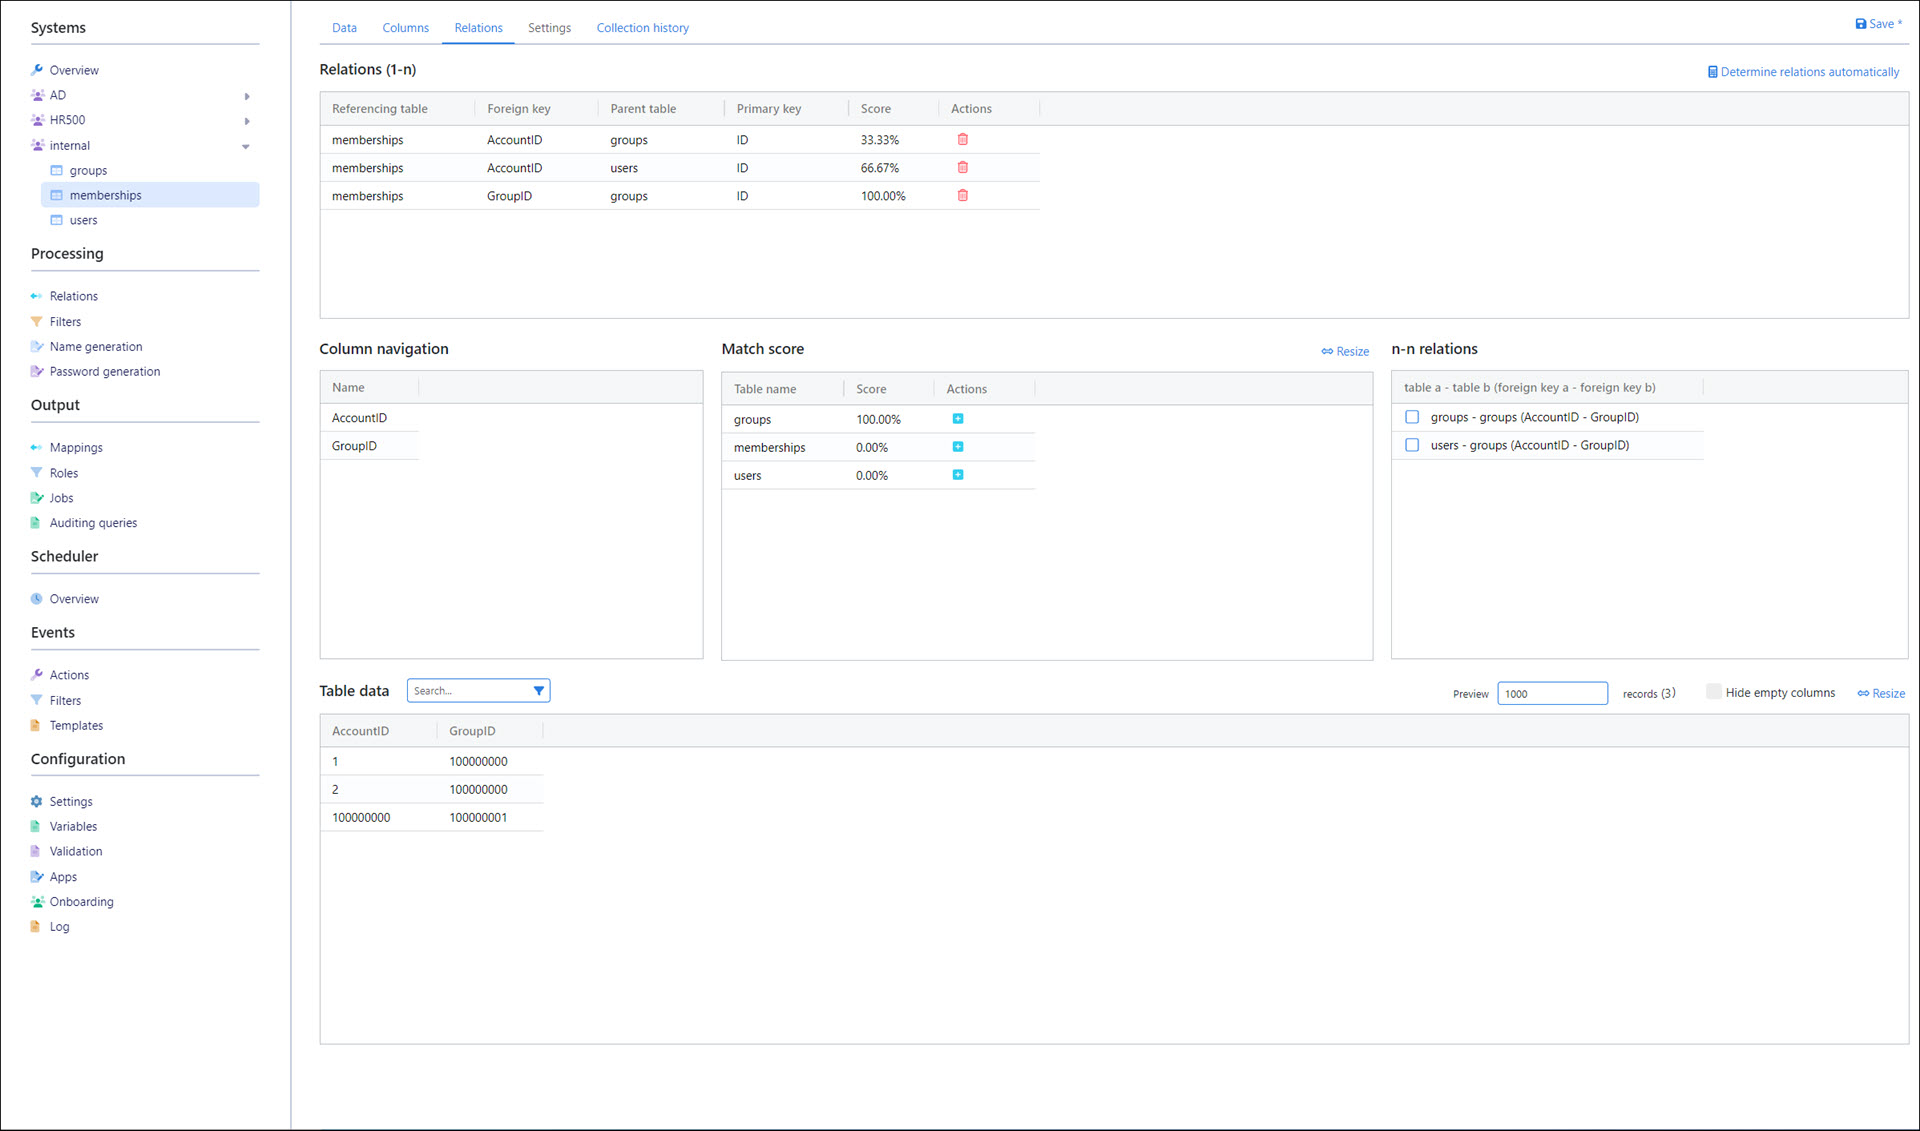
Foreign key
AccountIDofmembershipstable (N) → primary keyIDofgroupstable (1)Foreign key
AccountIDofmembershipstable (N) → primary keyIDofuserstable (1)Foreign key
GroupIDofmembershipstable (N) → primary keyIDofgroupstable (1)
Enable all the checkboxes in the N-N Relations pane.
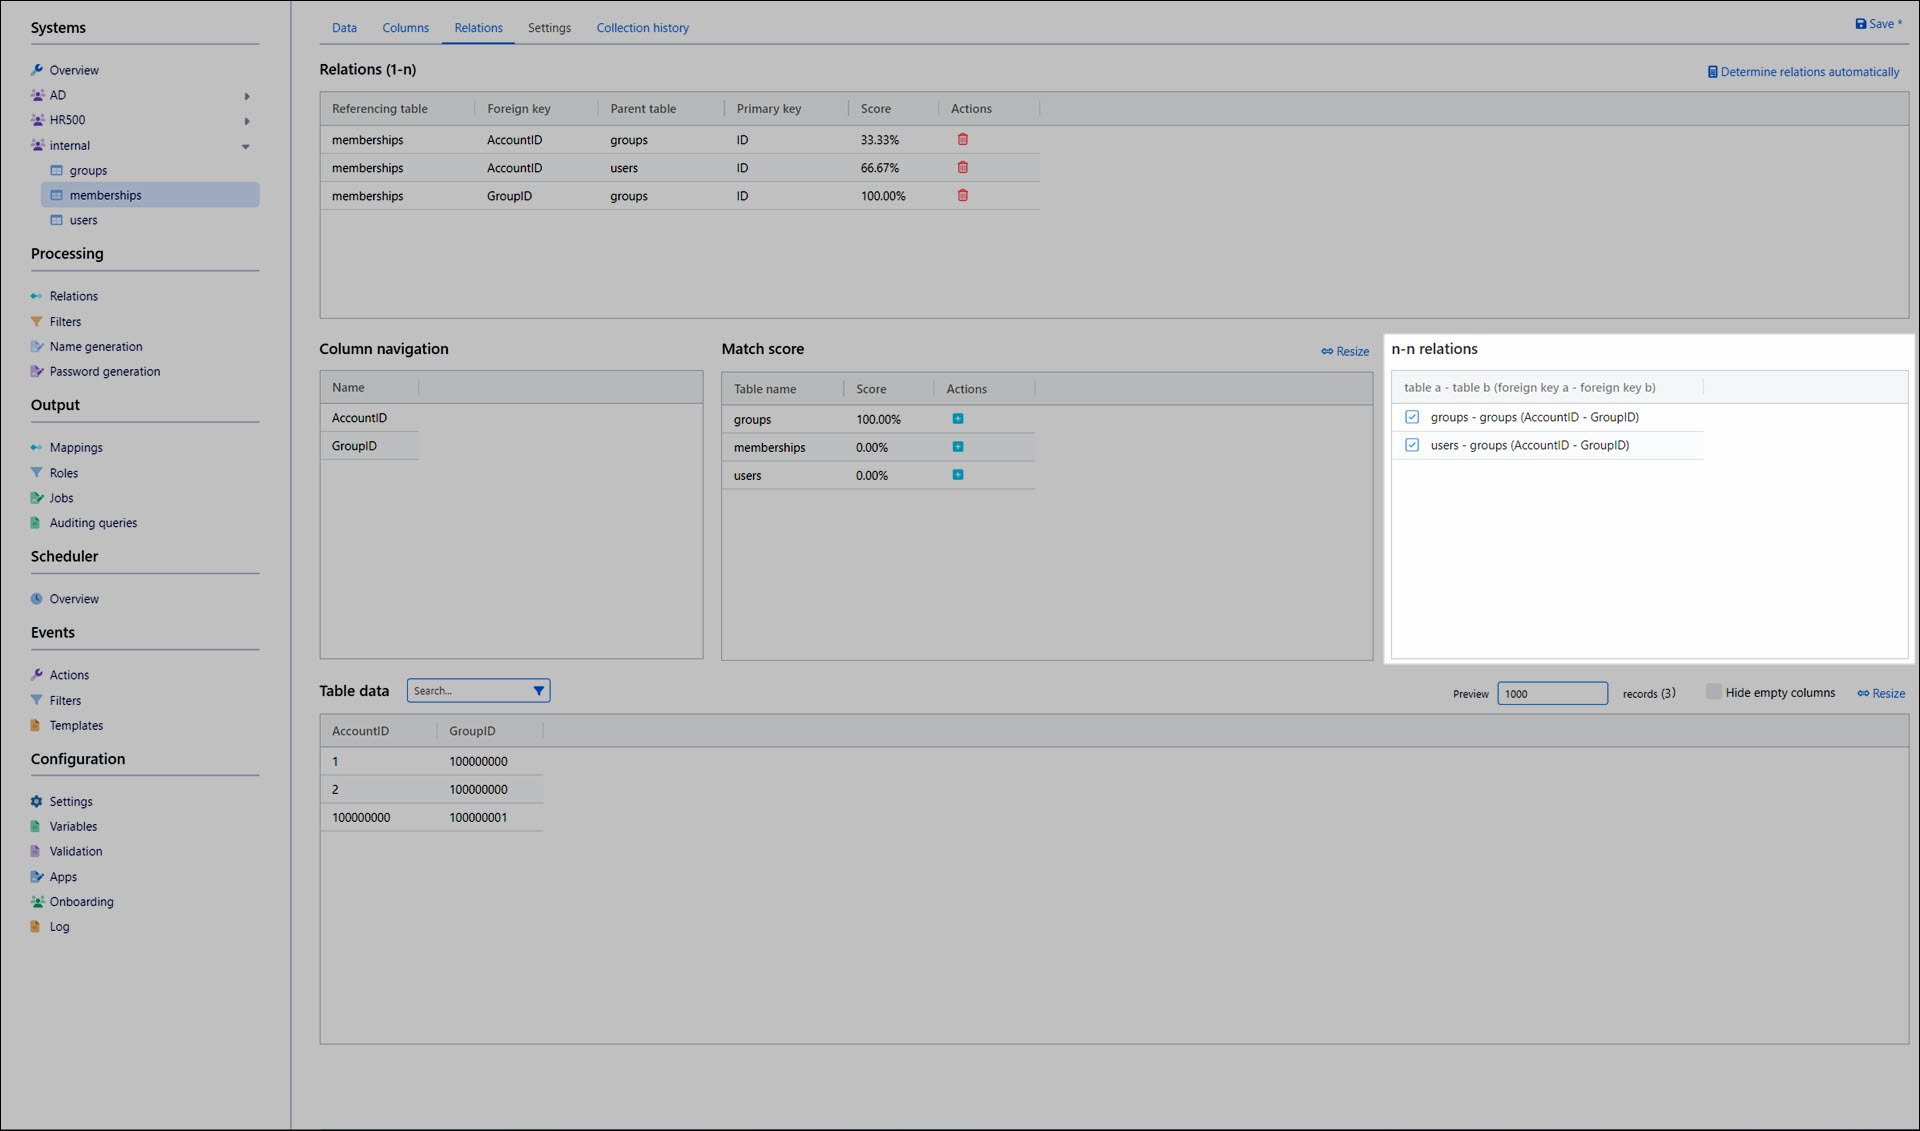
Click Save.
Add an inter-system relation between the HR500 and internal systems
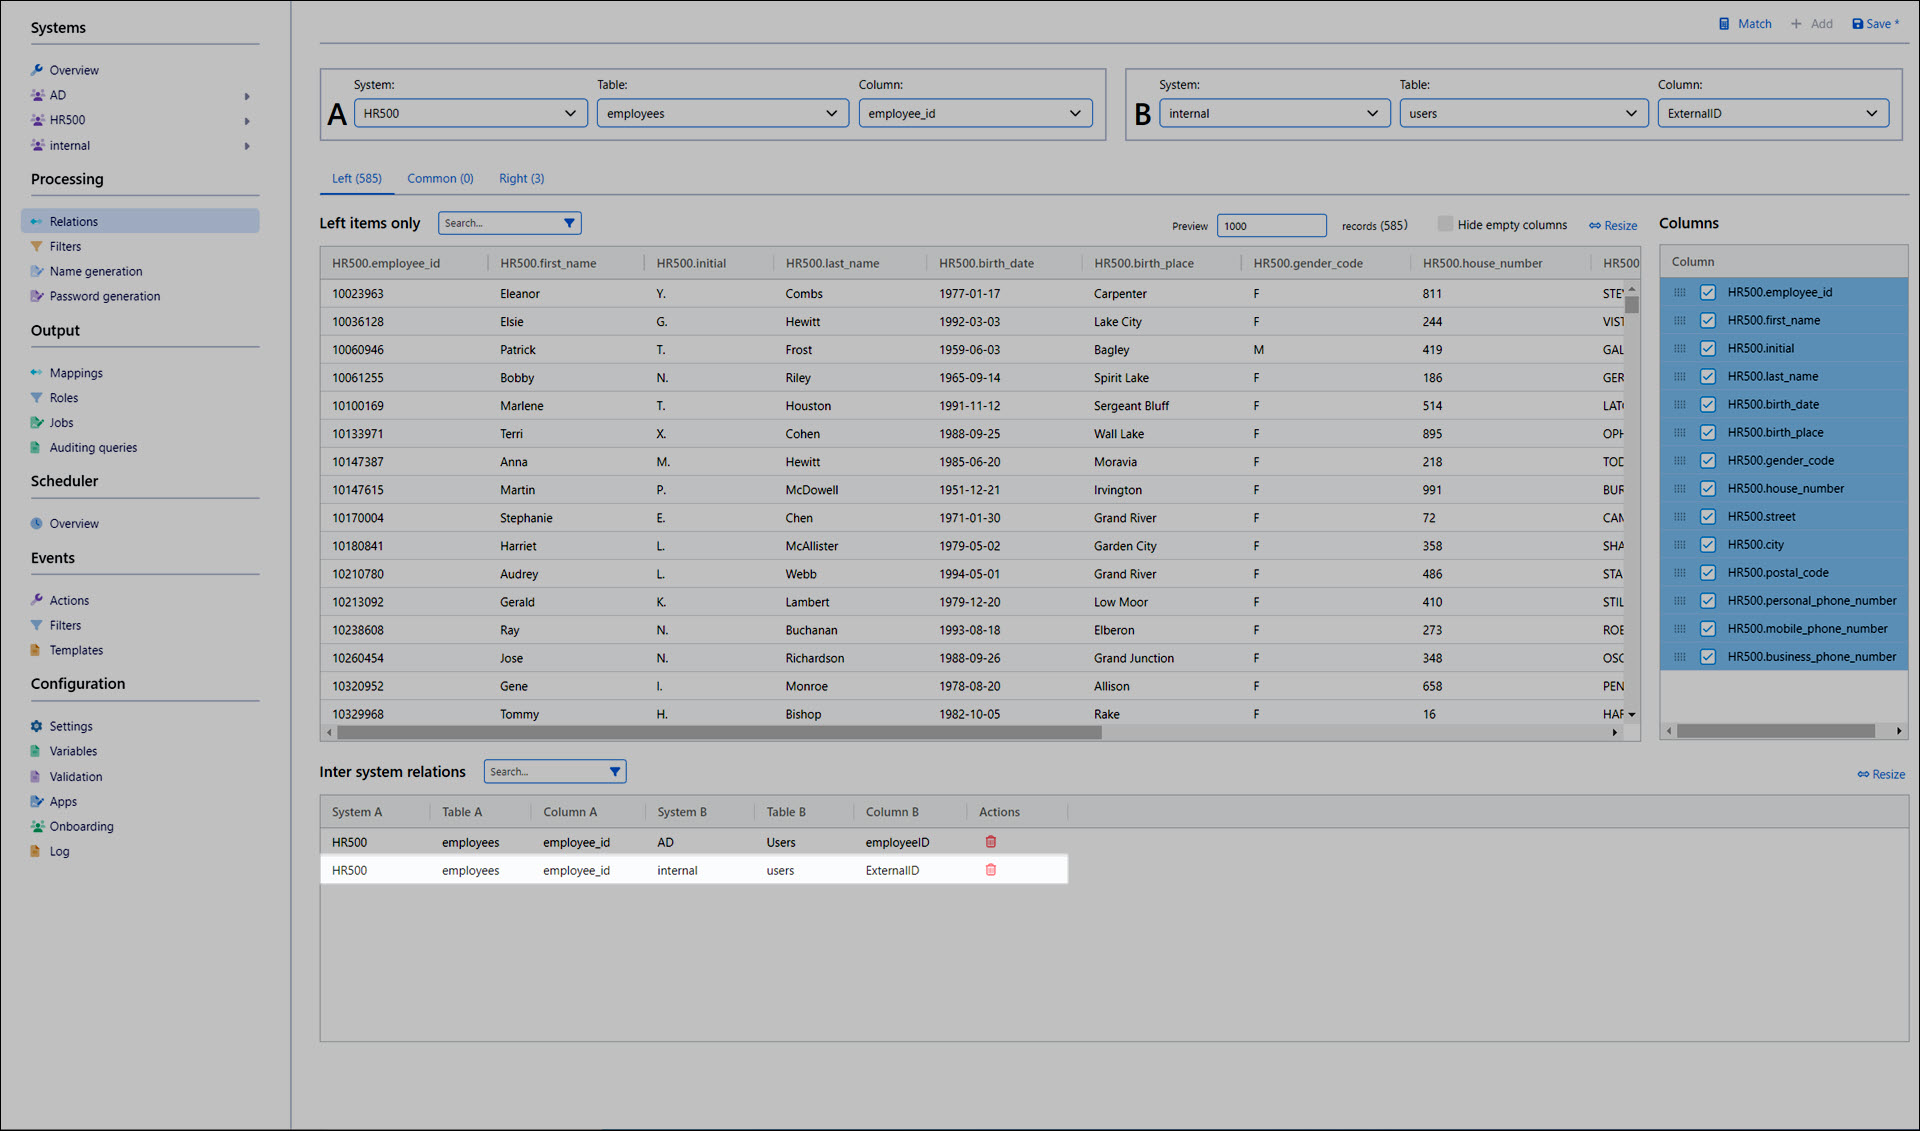
Go to Processing > Relations.
In the A pane, select the HR500 system, the employees table, and the employee_id column.
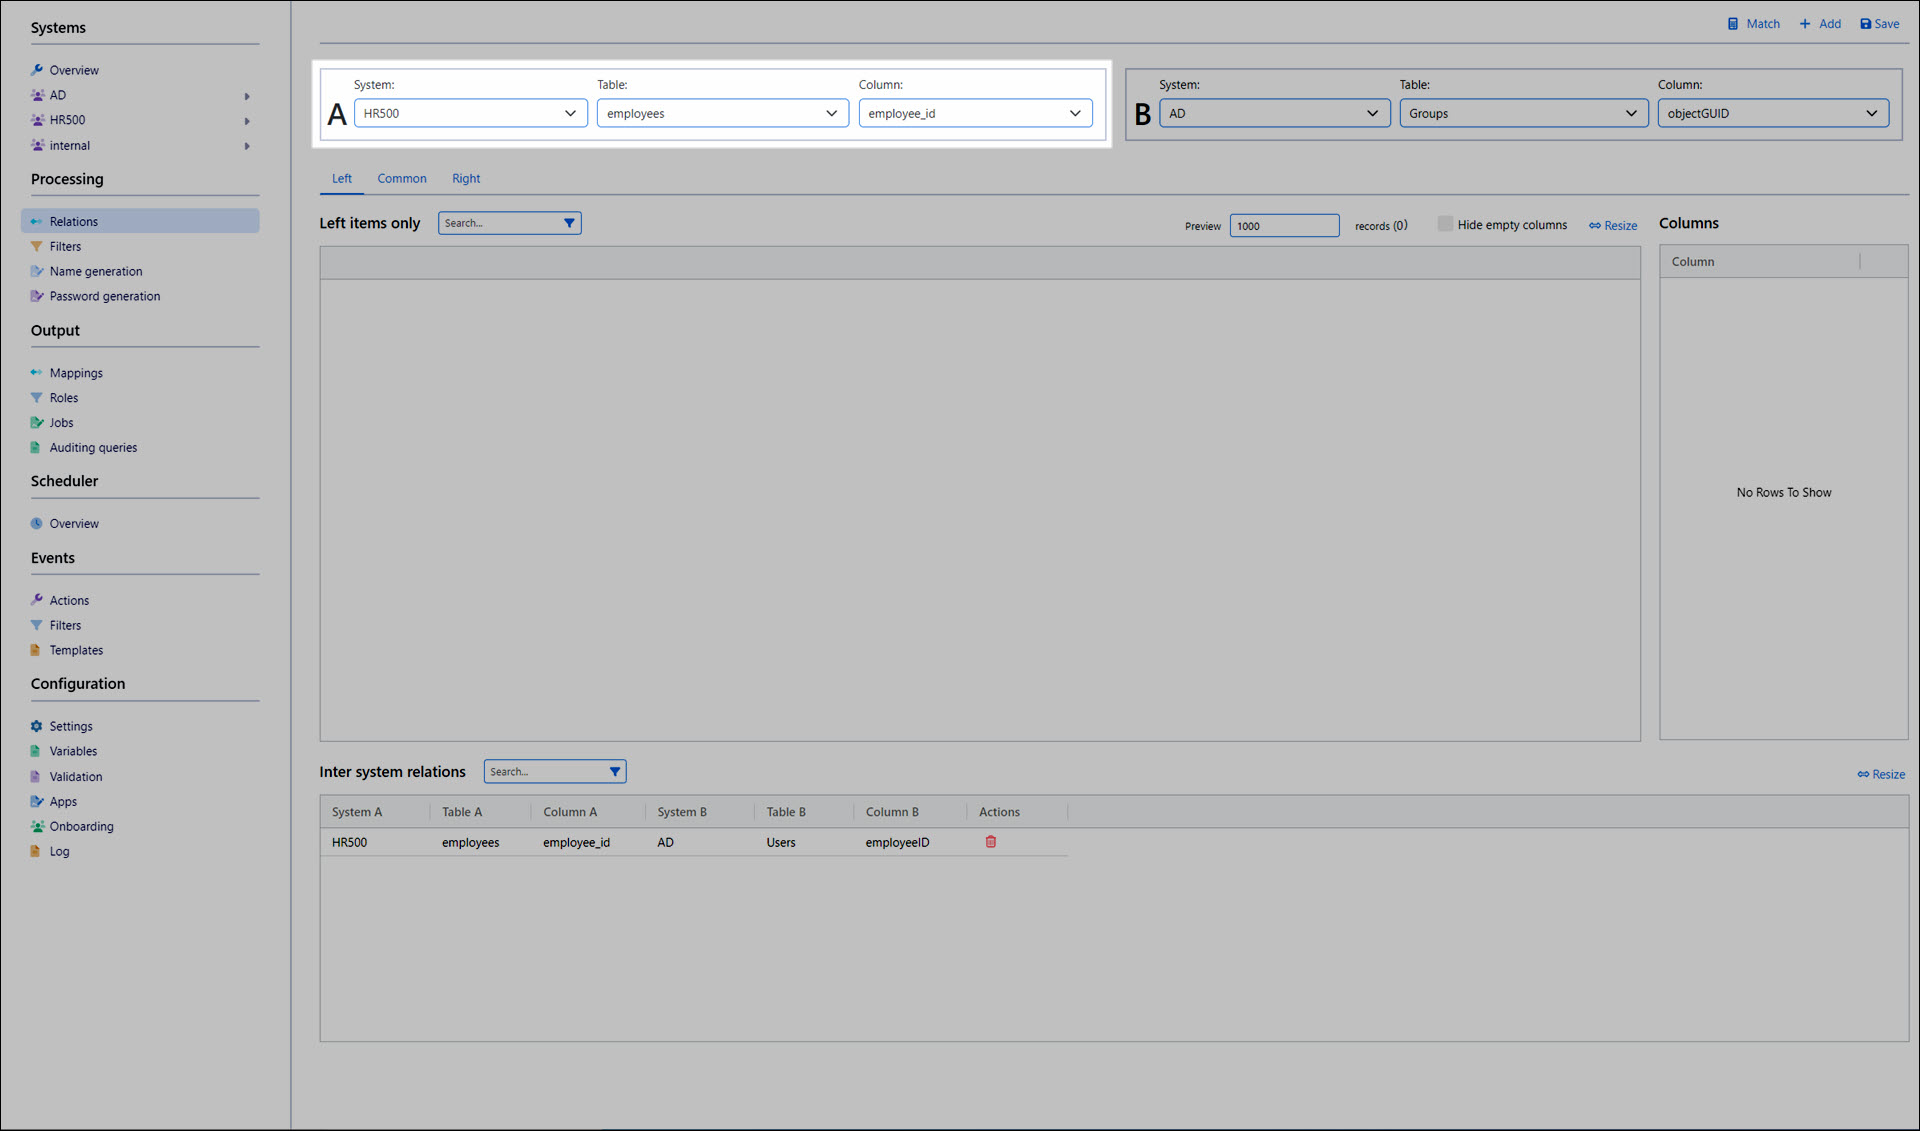
In the B pane, select the internal system, the users table, and the ExternalID column.
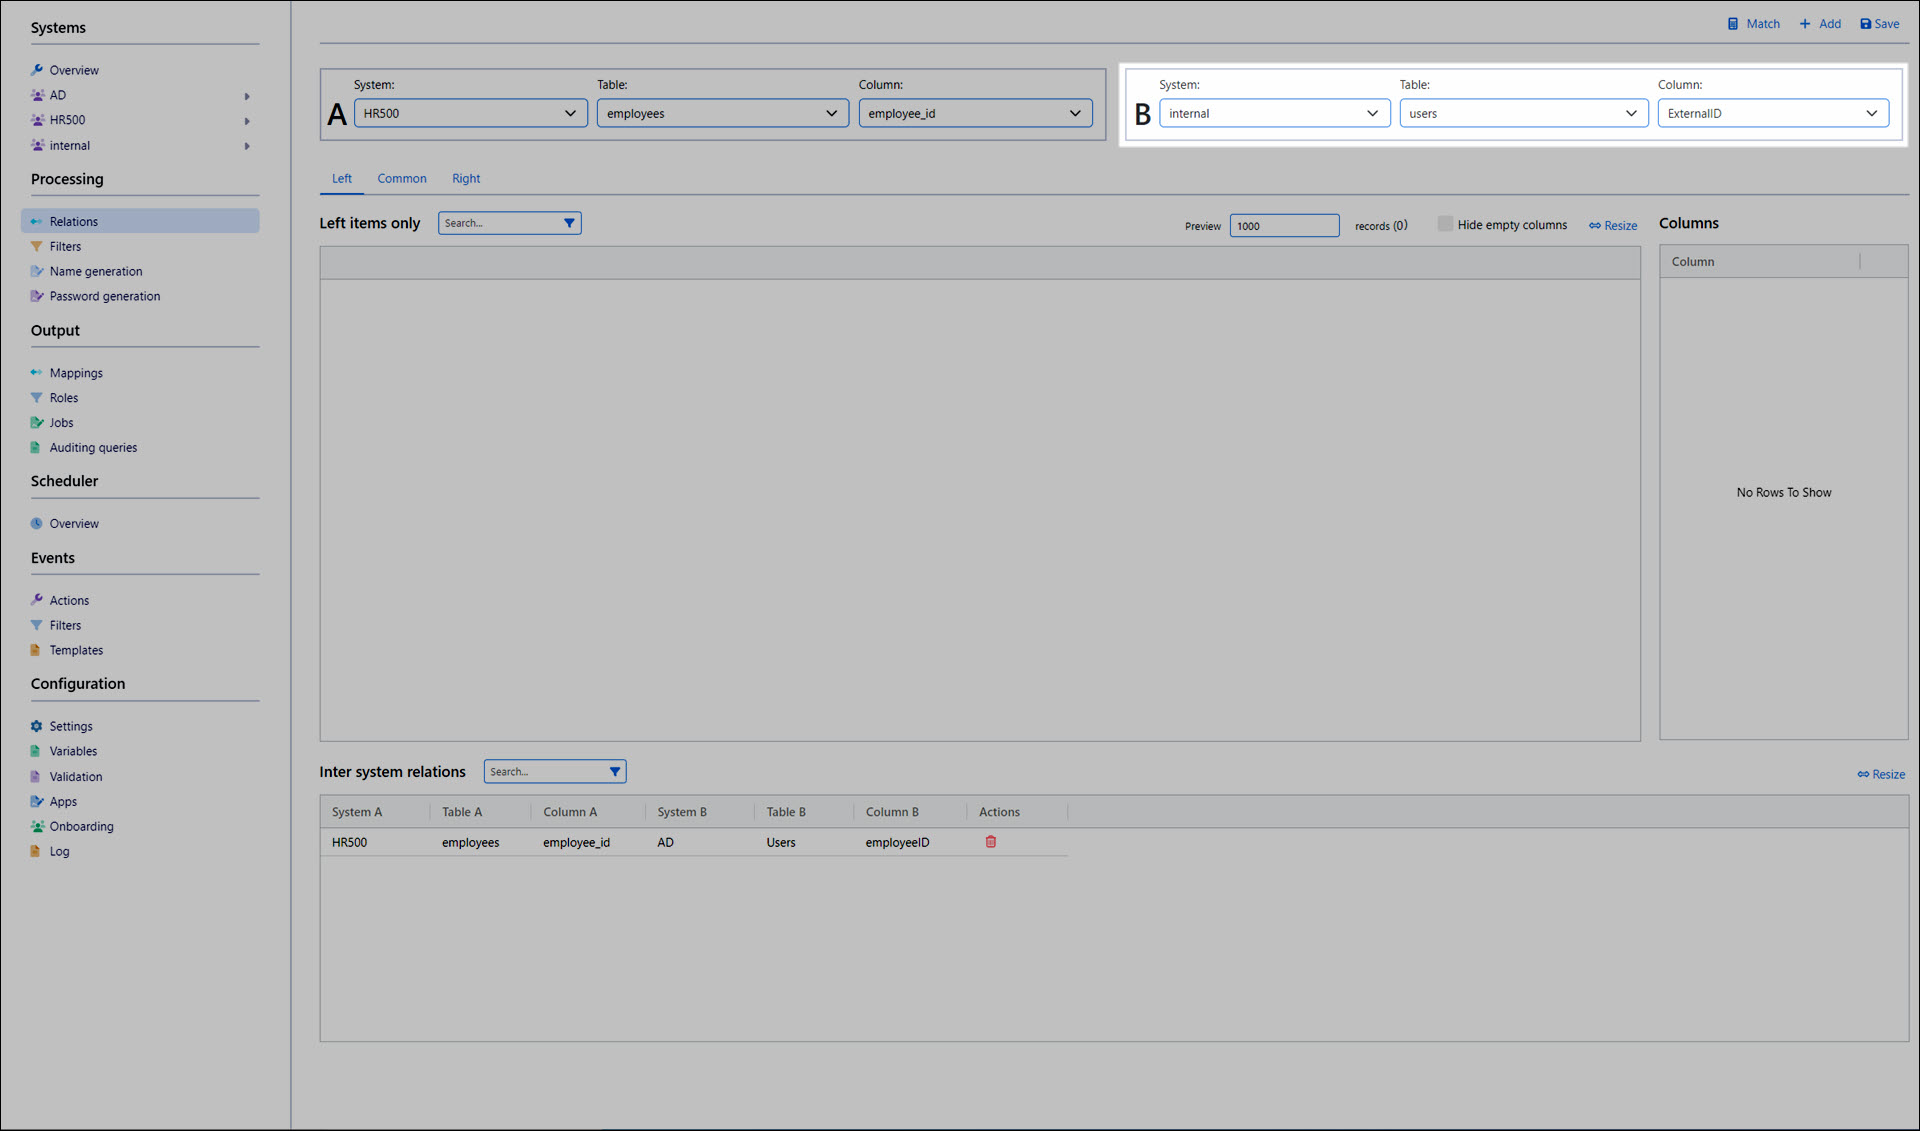
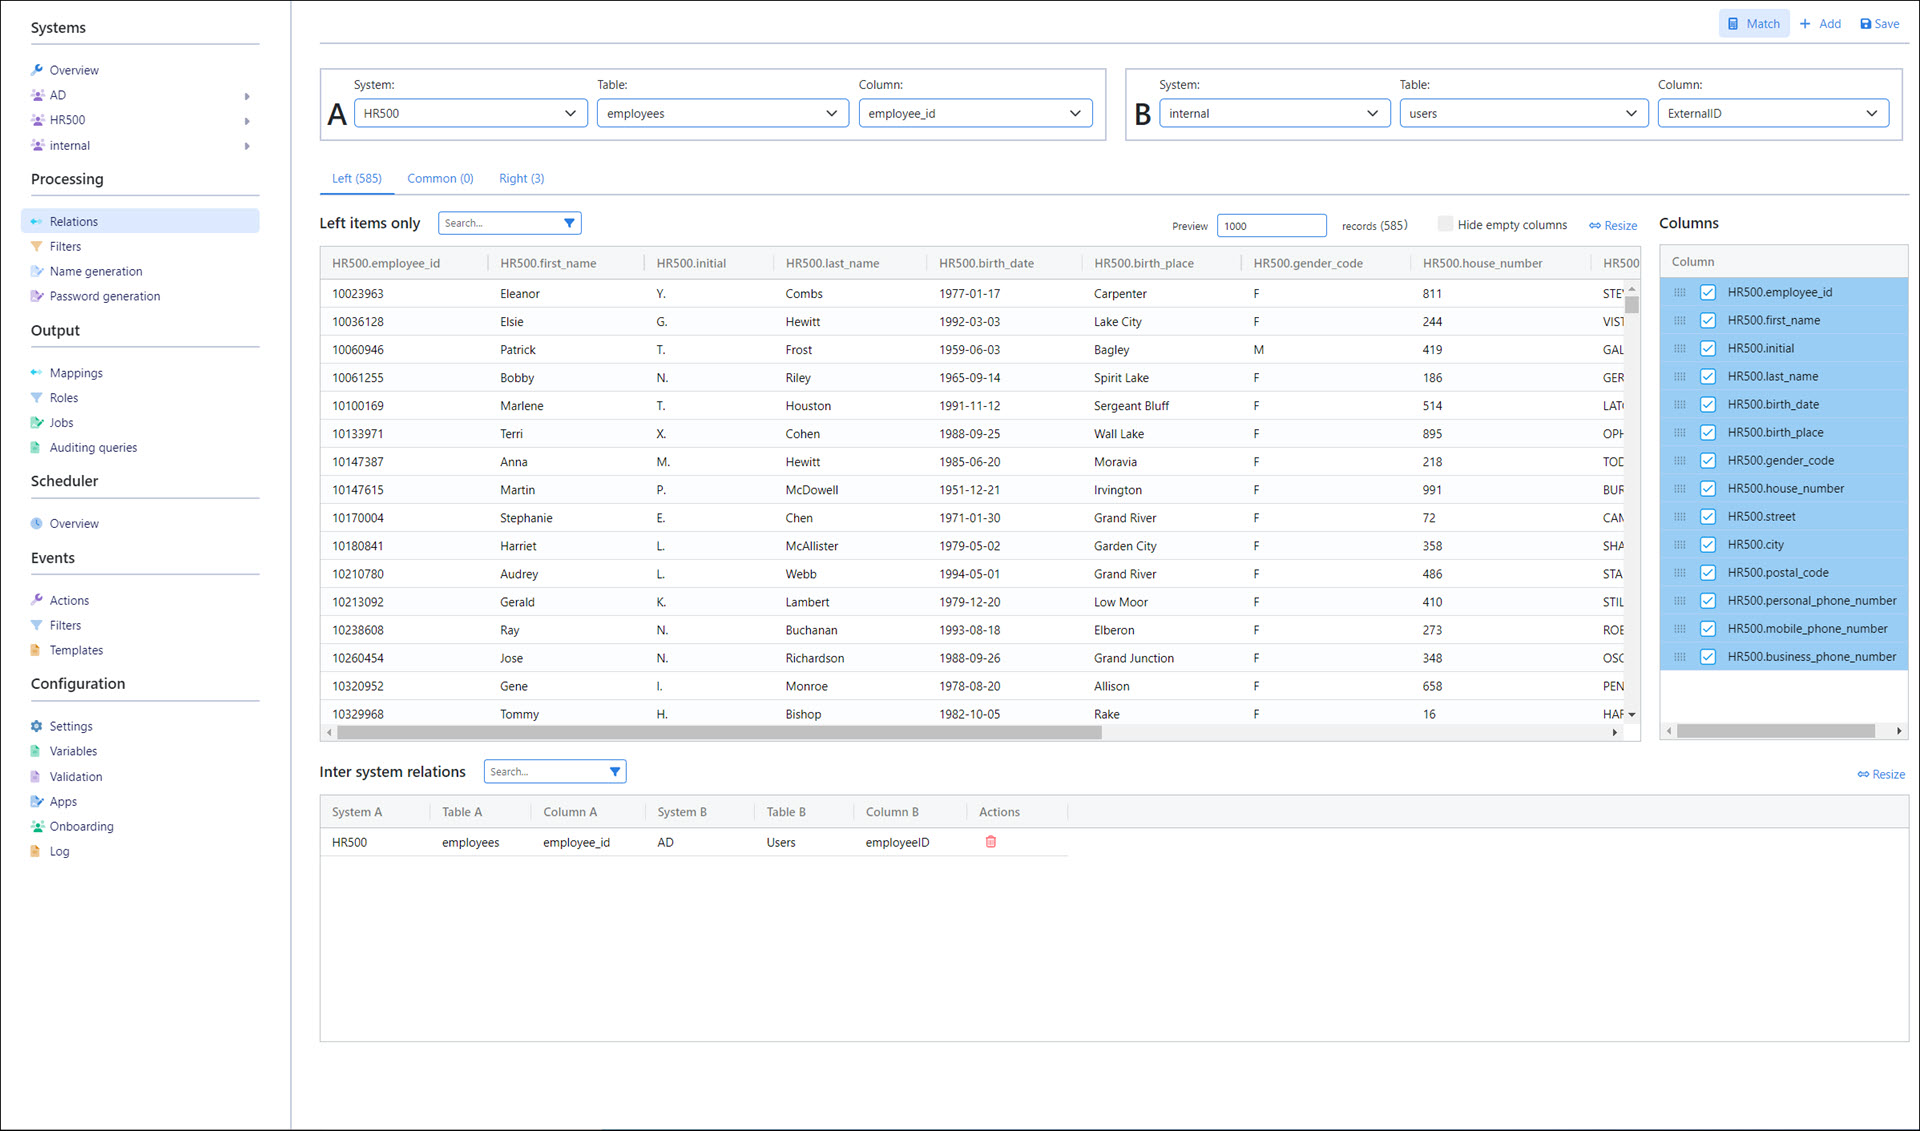
Click Match.
Click Add.
The new relation is populated into the Inter-System Relations pane.
Click Save.
Add a filter that selects employees without internal accounts
Go to Processing > Filters.
Click Add.
Enter a Filter Name.
For this example, we'll call our filter
HR500_internal_User_Create, following the convention SourceSystem_TargetSystem_ObjectType_Action.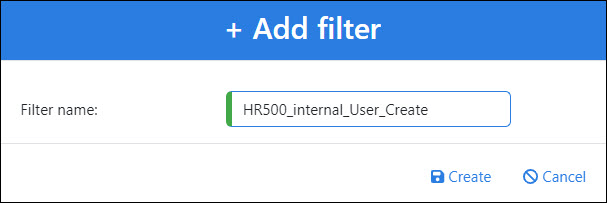
Click Create.
Configure the filter's logic
Configure the filter to join the HR500.employees table to the internal.users table, using no logic.
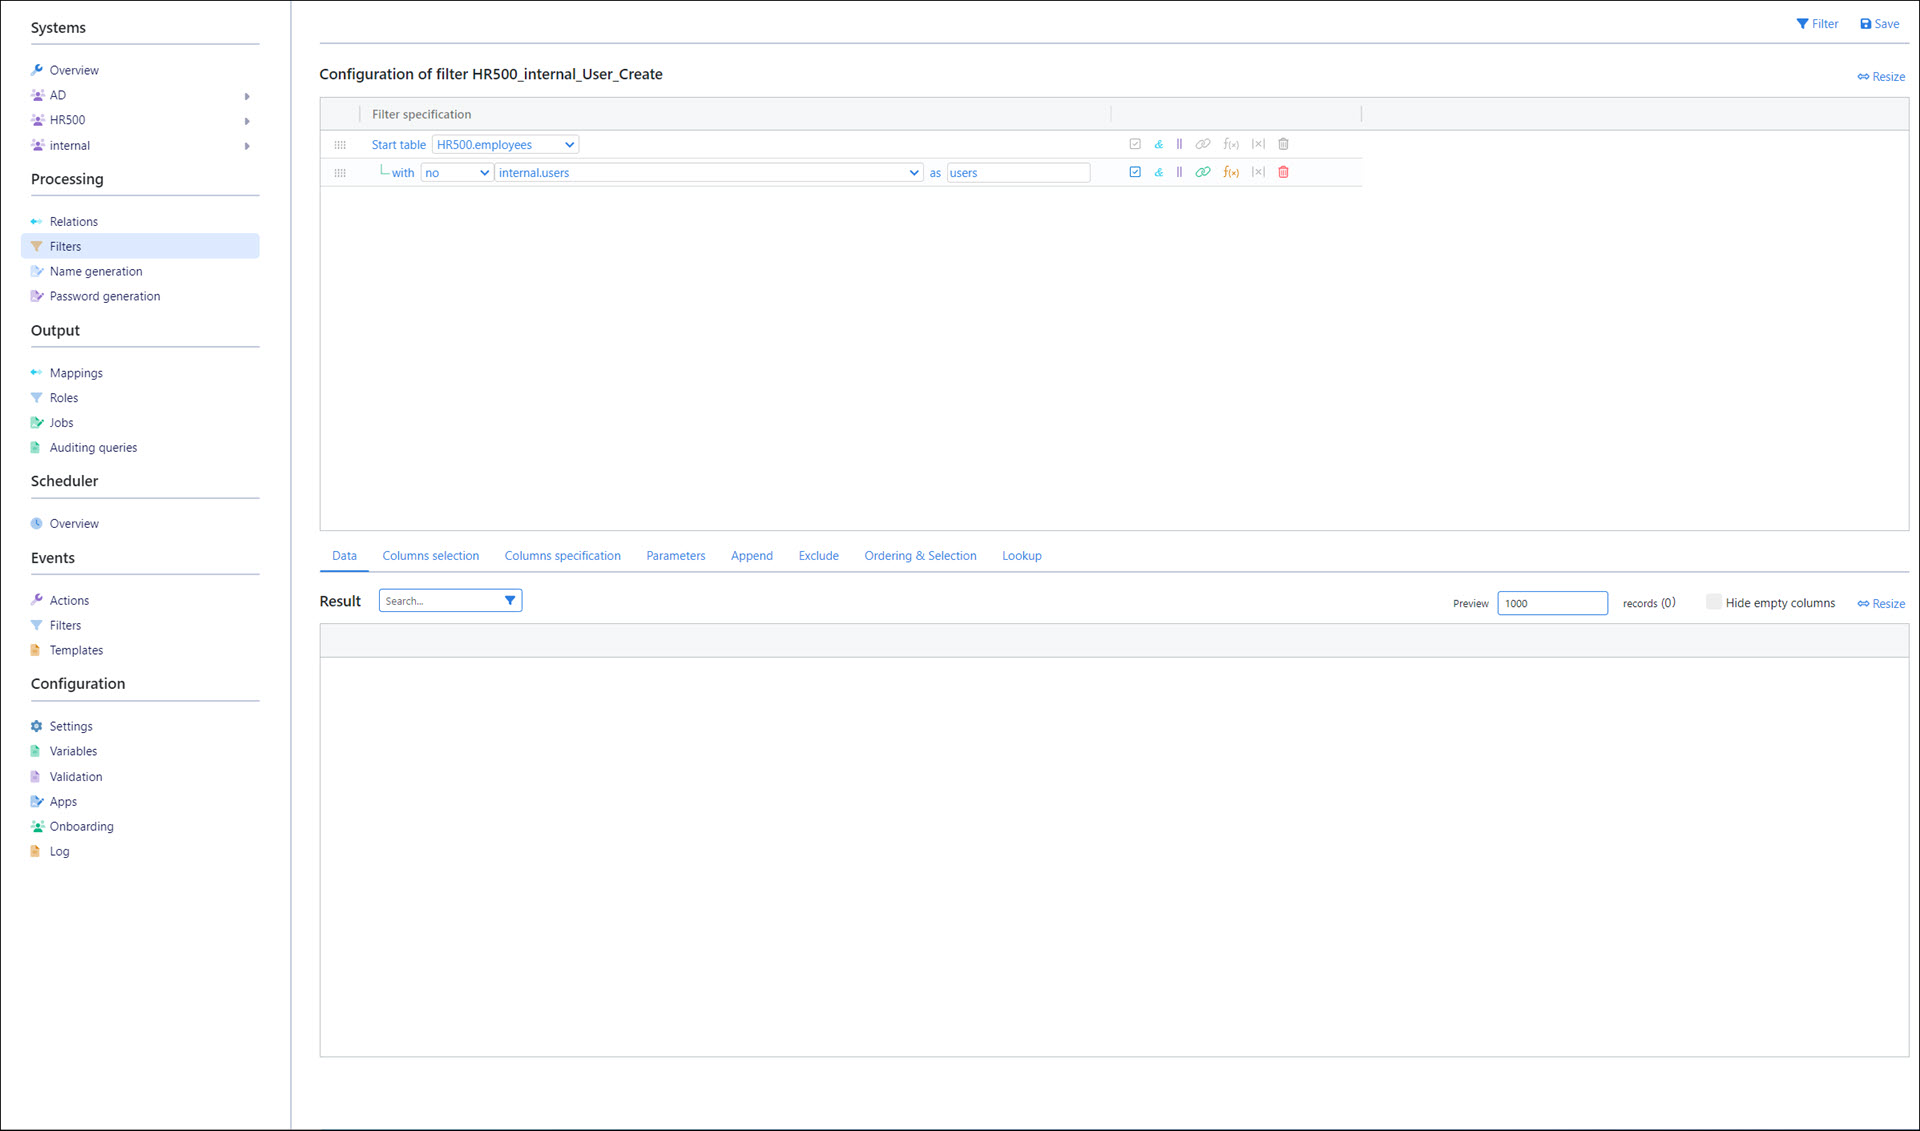
Click Save.
Click Filter to run the filter. The results are populated into the Result pane. In our case, all 585 employees in the CSV system do not yet have an account in the internal system.
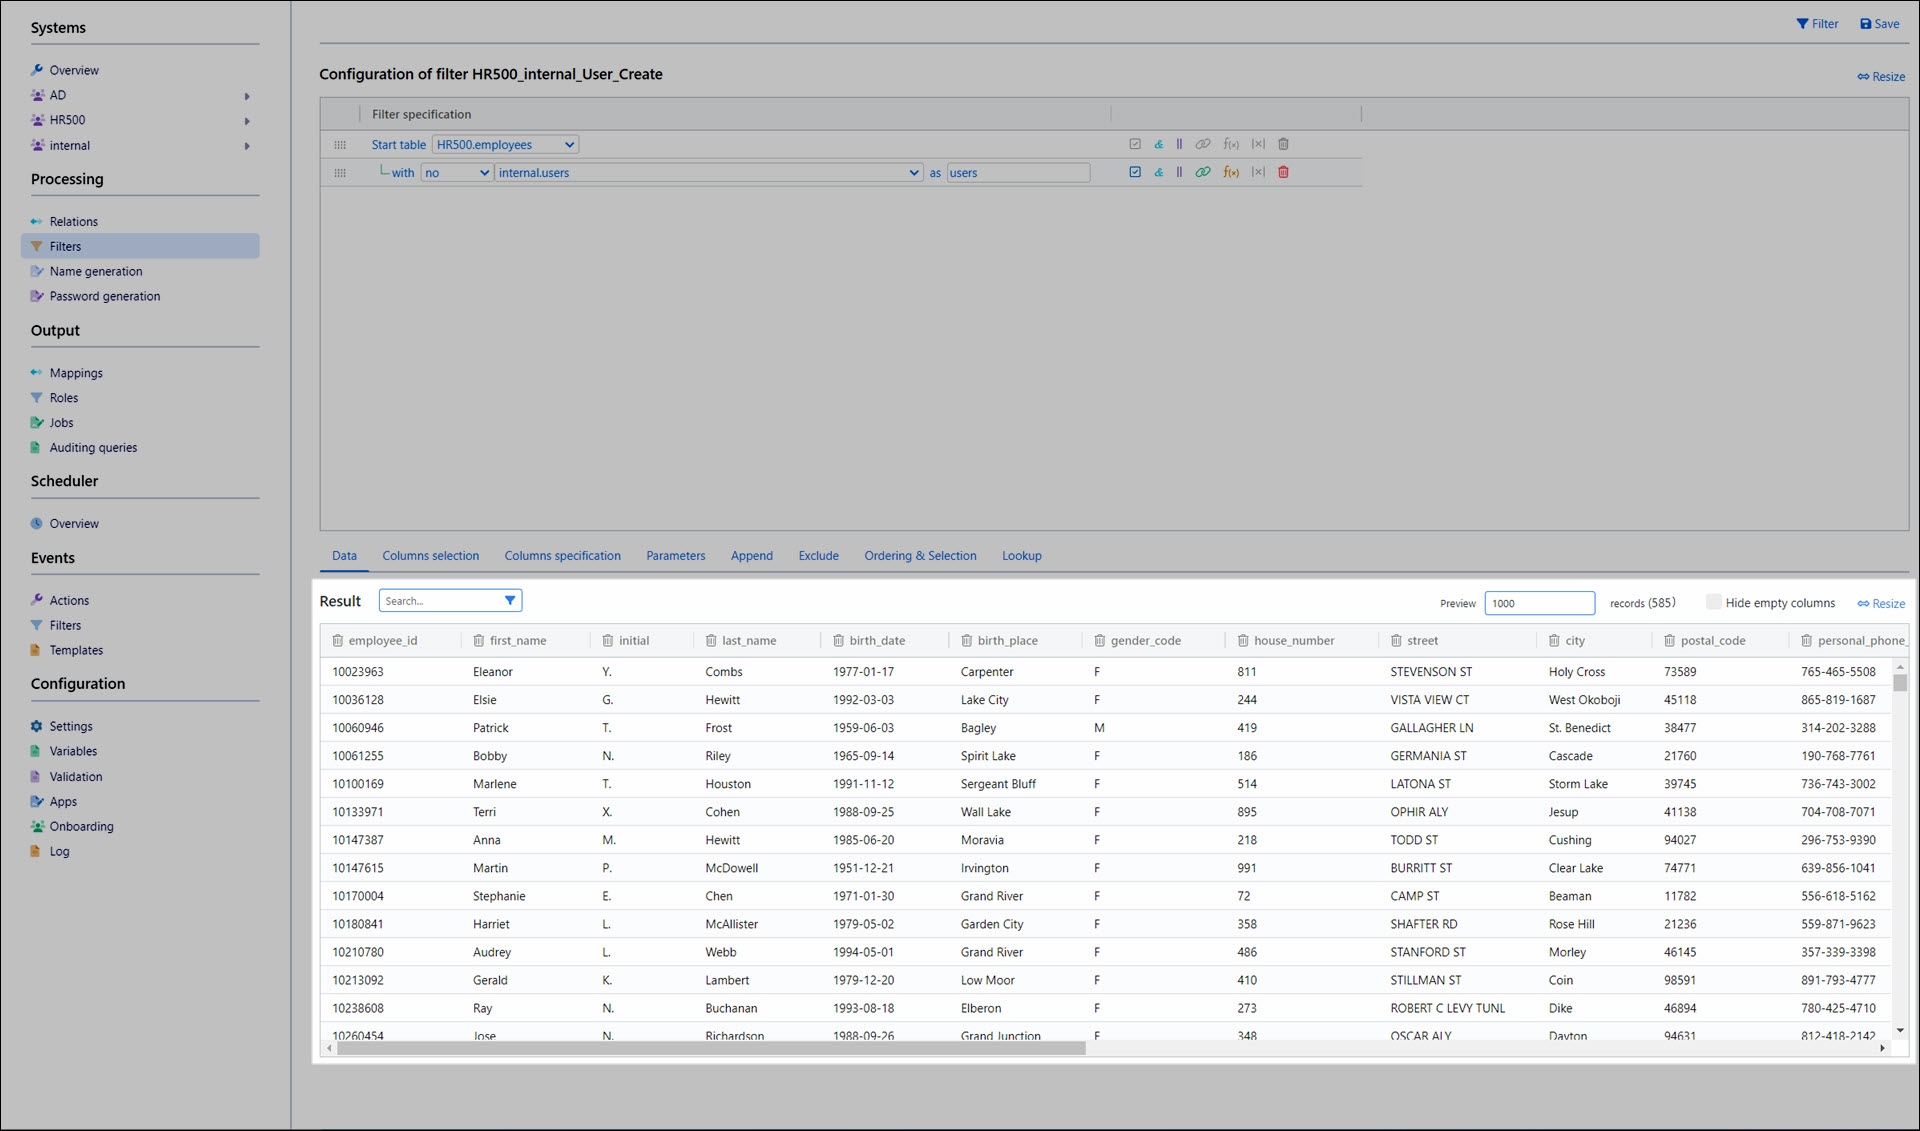
Go to the Columns Selection tab and hide all columns under the users alias, which will always be empty.
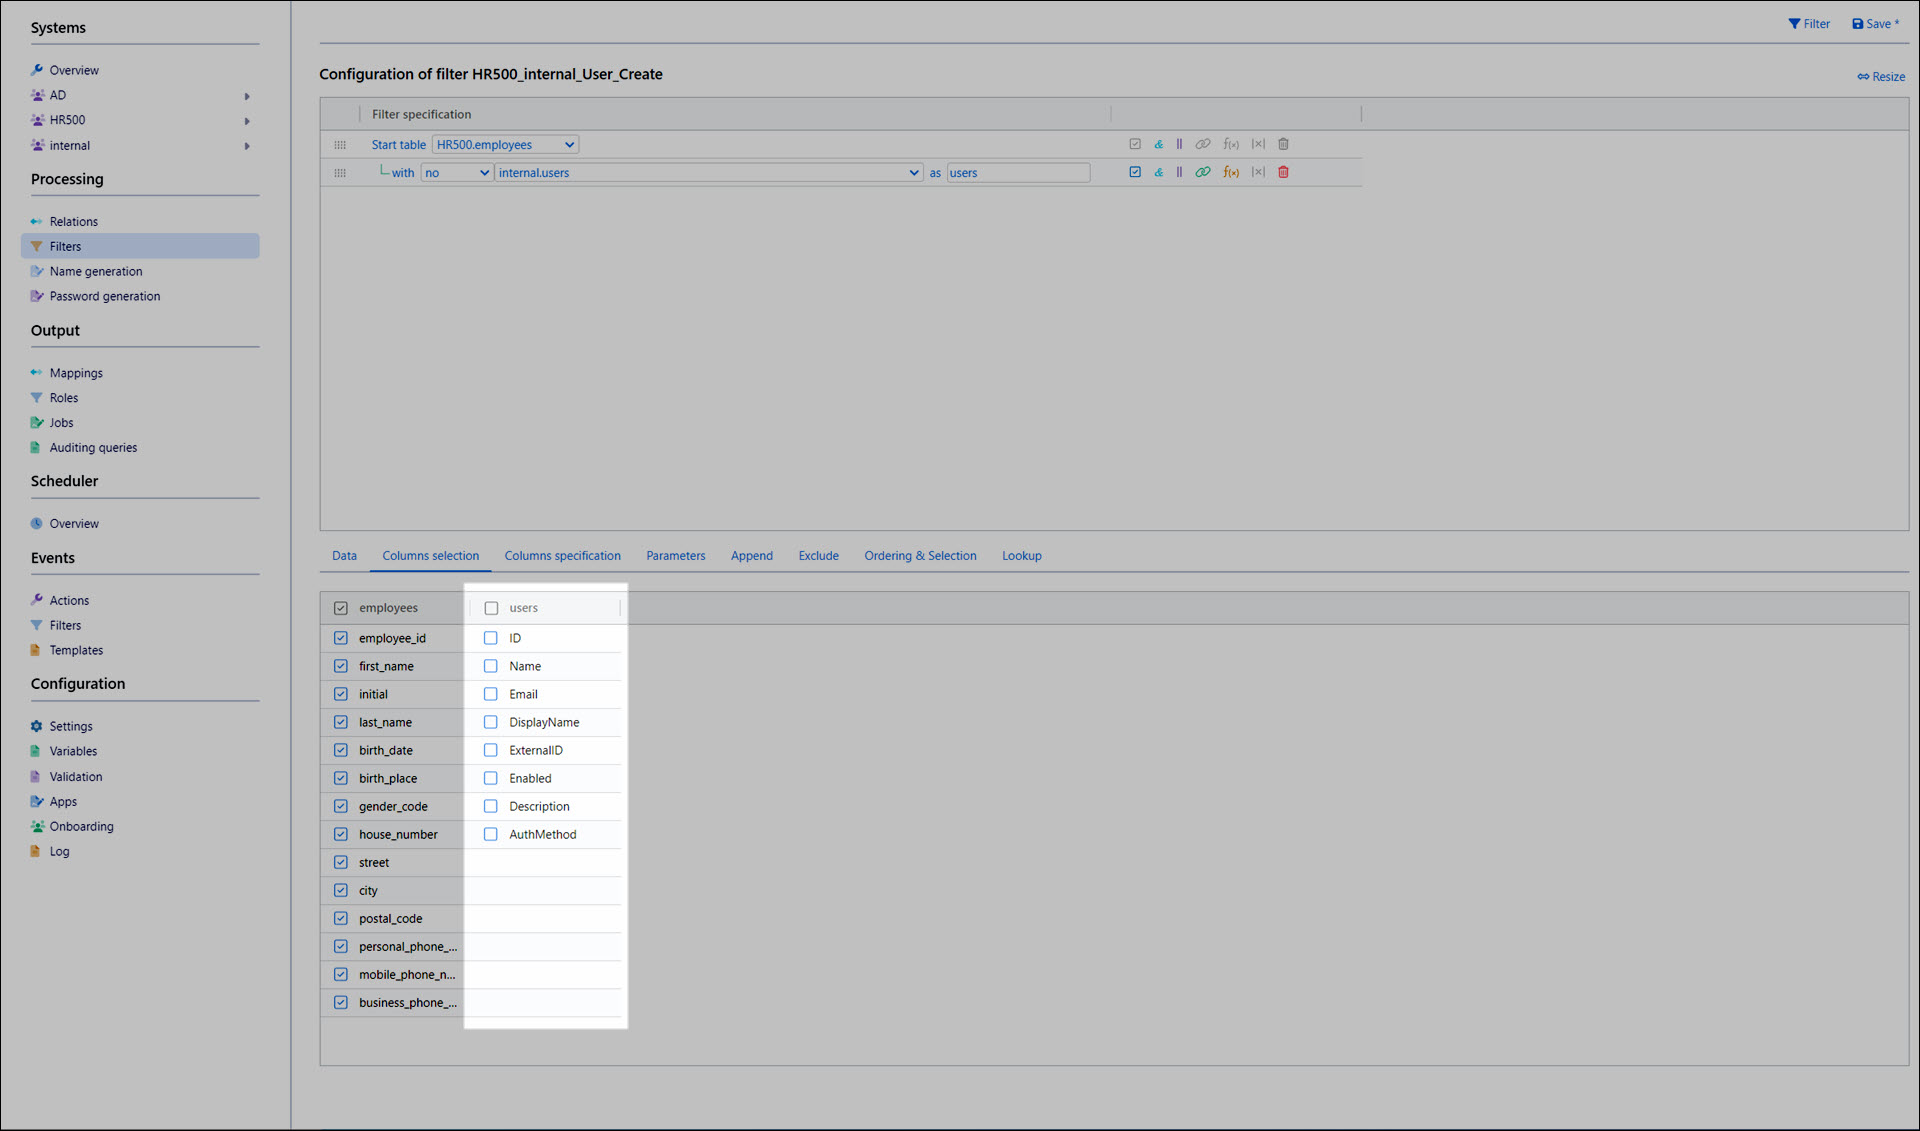
Click Save.
Add a name generator to generate internal usernames
Go to Processing > Name Generation and add a name generator named
ng_internal.For the Based On Filter, select the HR500_internal_User_Create filter we created previously.

Add a Name called ng_internalUsername.
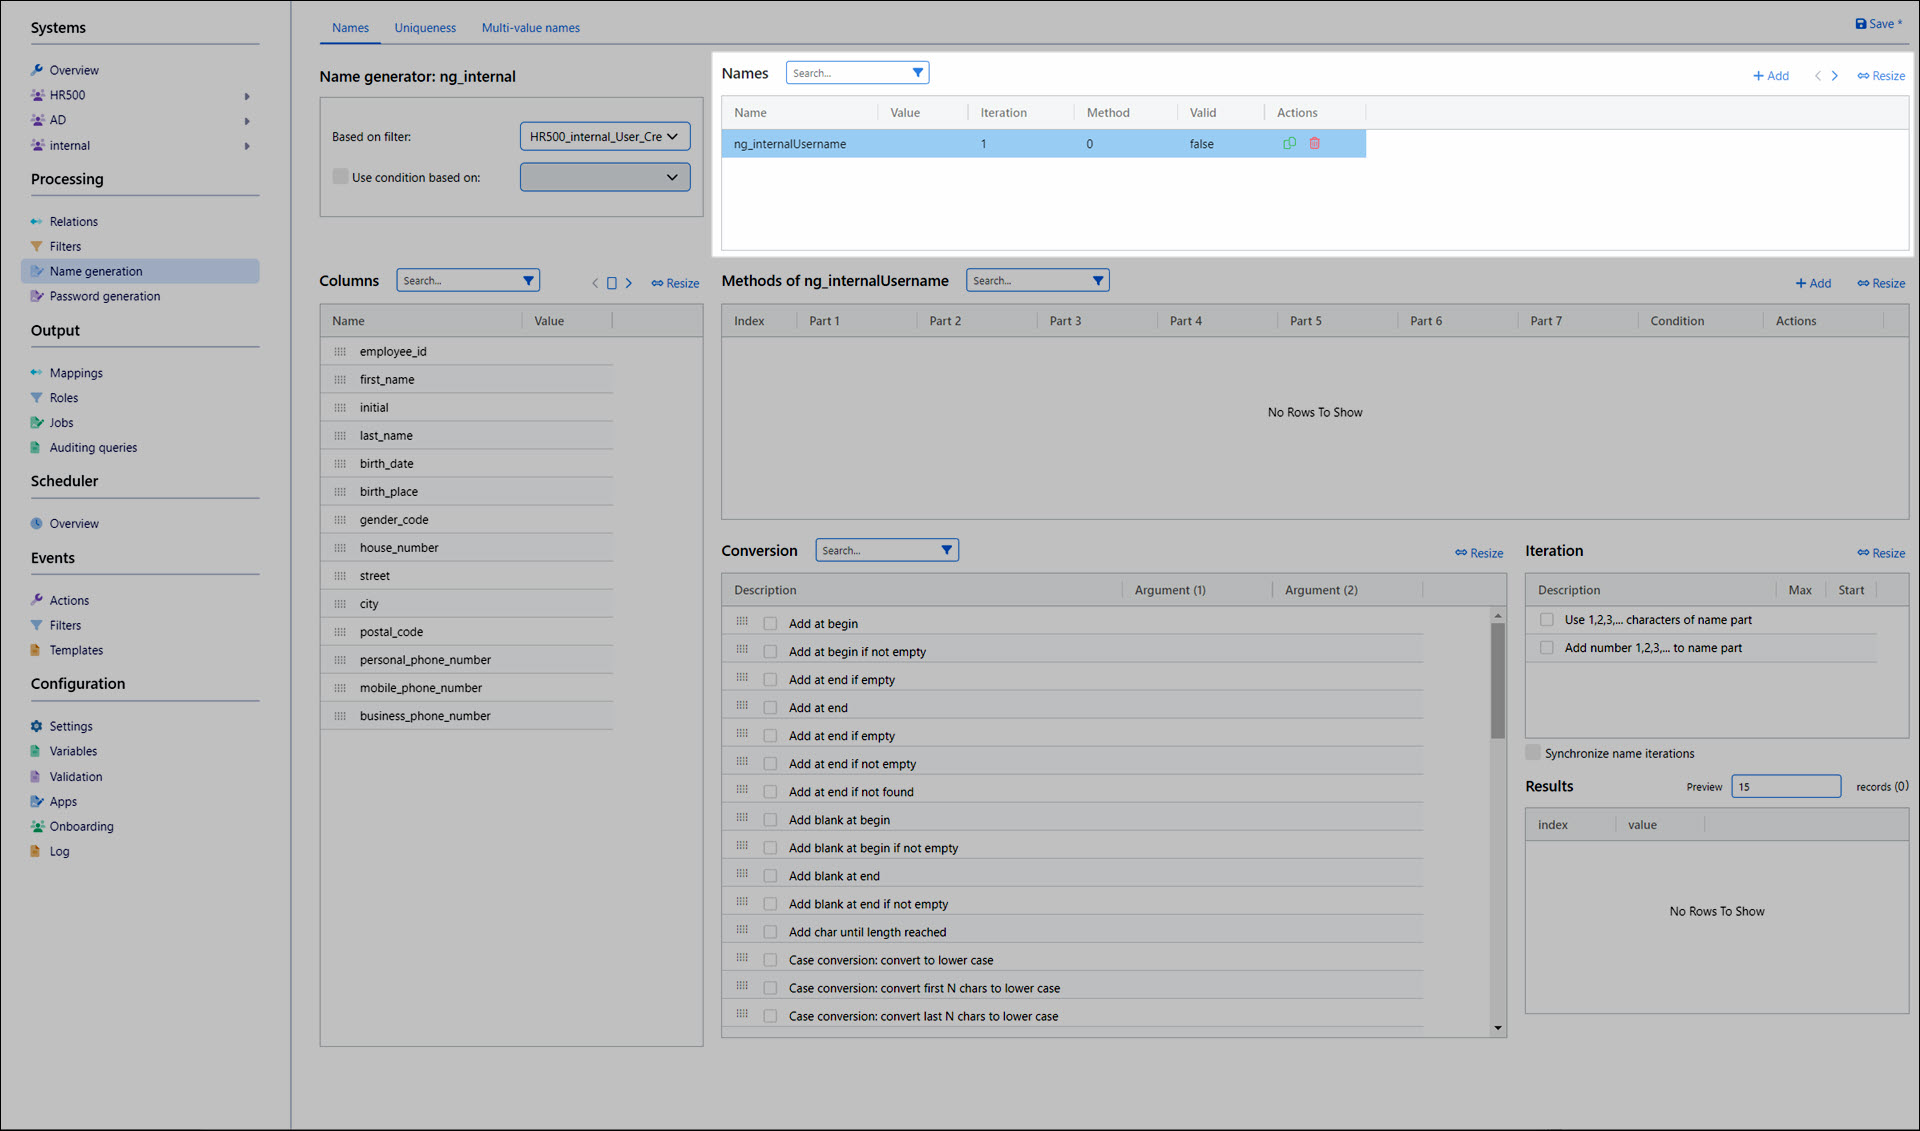
Add a new Method for ng_internalUsername.
Drag and drop first_name to Part 1, last_name to Part 2, and employee_id to Part 3.

We'll apply the following Conversions:
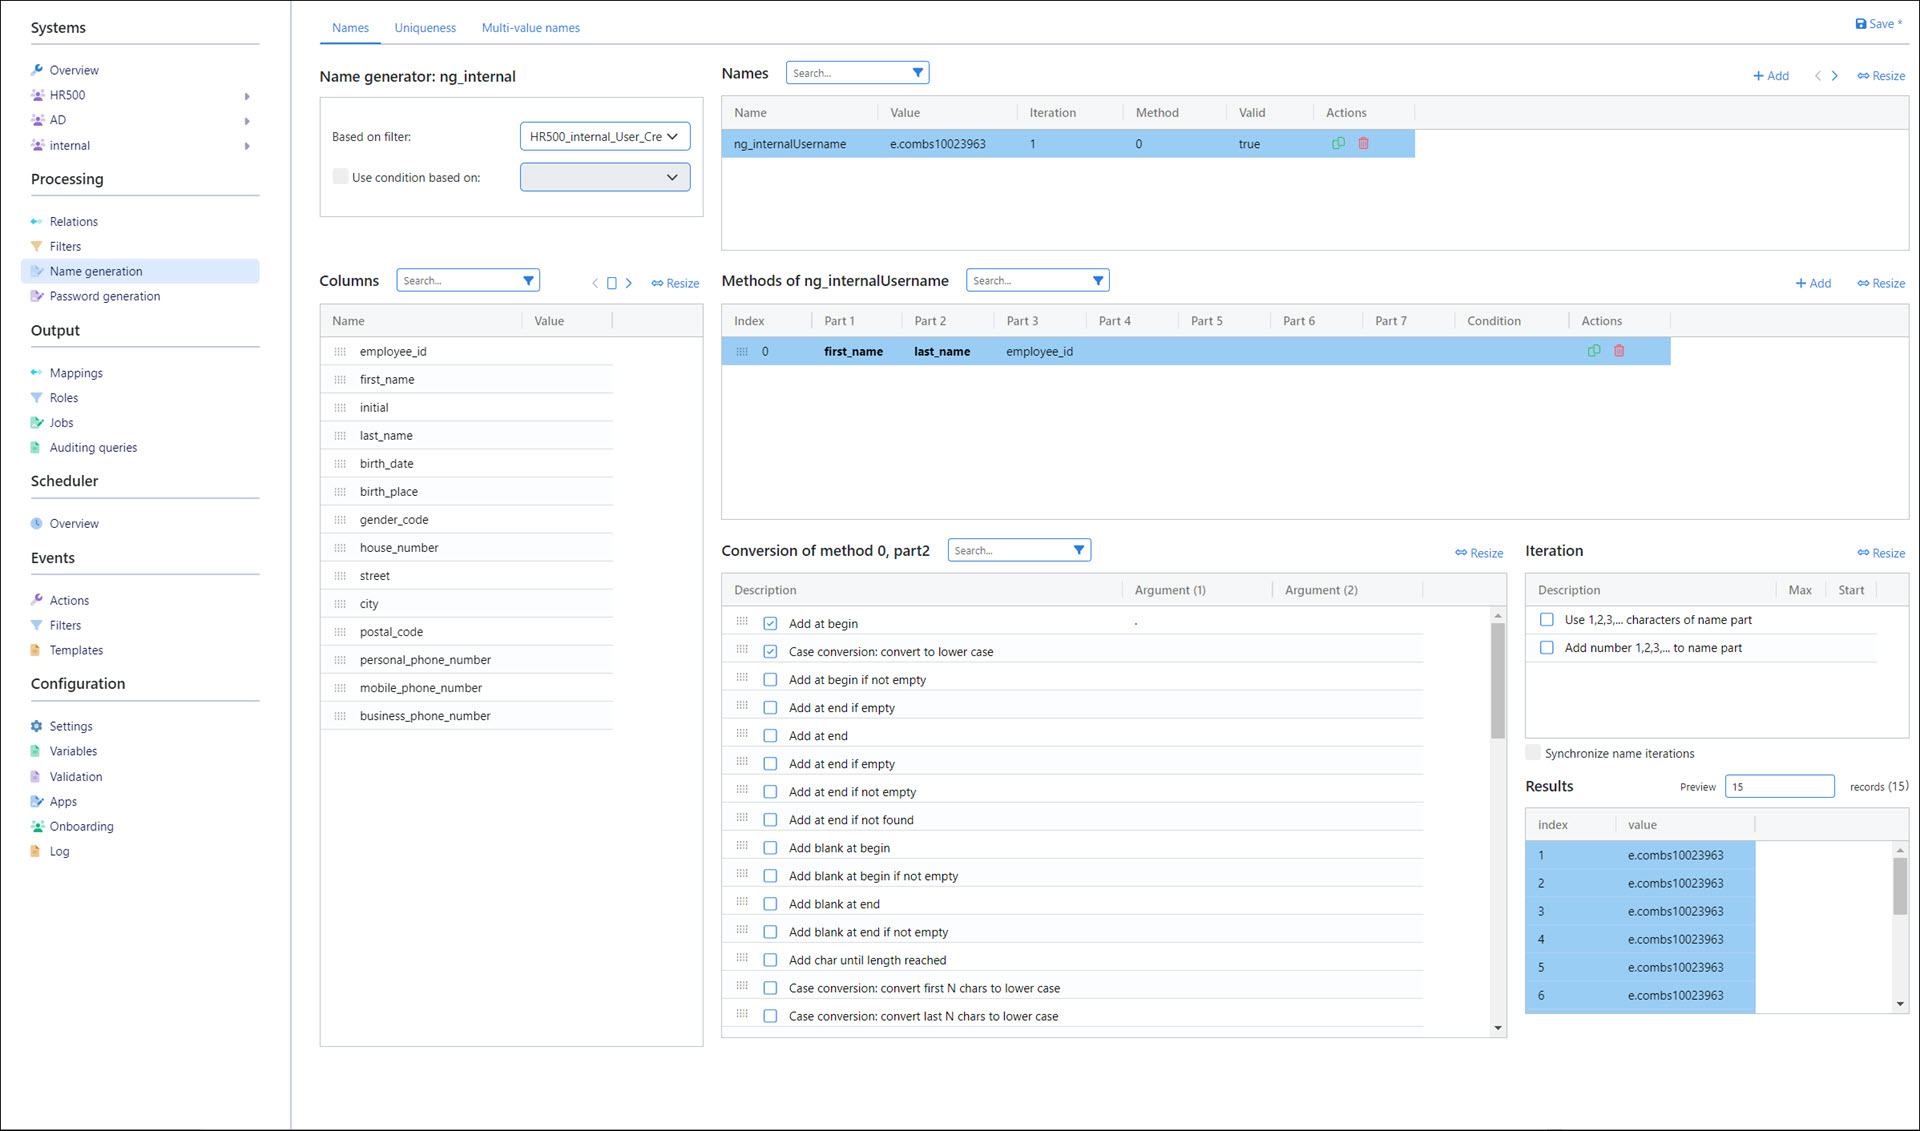
Part 1 (first_name): Case conversion: convert to lower case and Shorten: use first character.
Part 2 (last_name): Case conversion: convert to lower case and Add at begin with Argument (1) =
..
Click Save.
Add a password generator to generate internal account passwords
Tip
In a production scenario, we'd likely want to add a password generator. However, for this example, we'll skip it and instead map static passwords to make it easier to test the accounts we create.
Add a mapping to create internal accounts
Go to Output > Mappings and add a mapping with the following values:
System: internal
Target: users
Function: user_create
Name: HR500_internal_UserCreate

For the mapping's Filter, select HR500_internal_User_Create. For the Name Generator, select ng_internal.
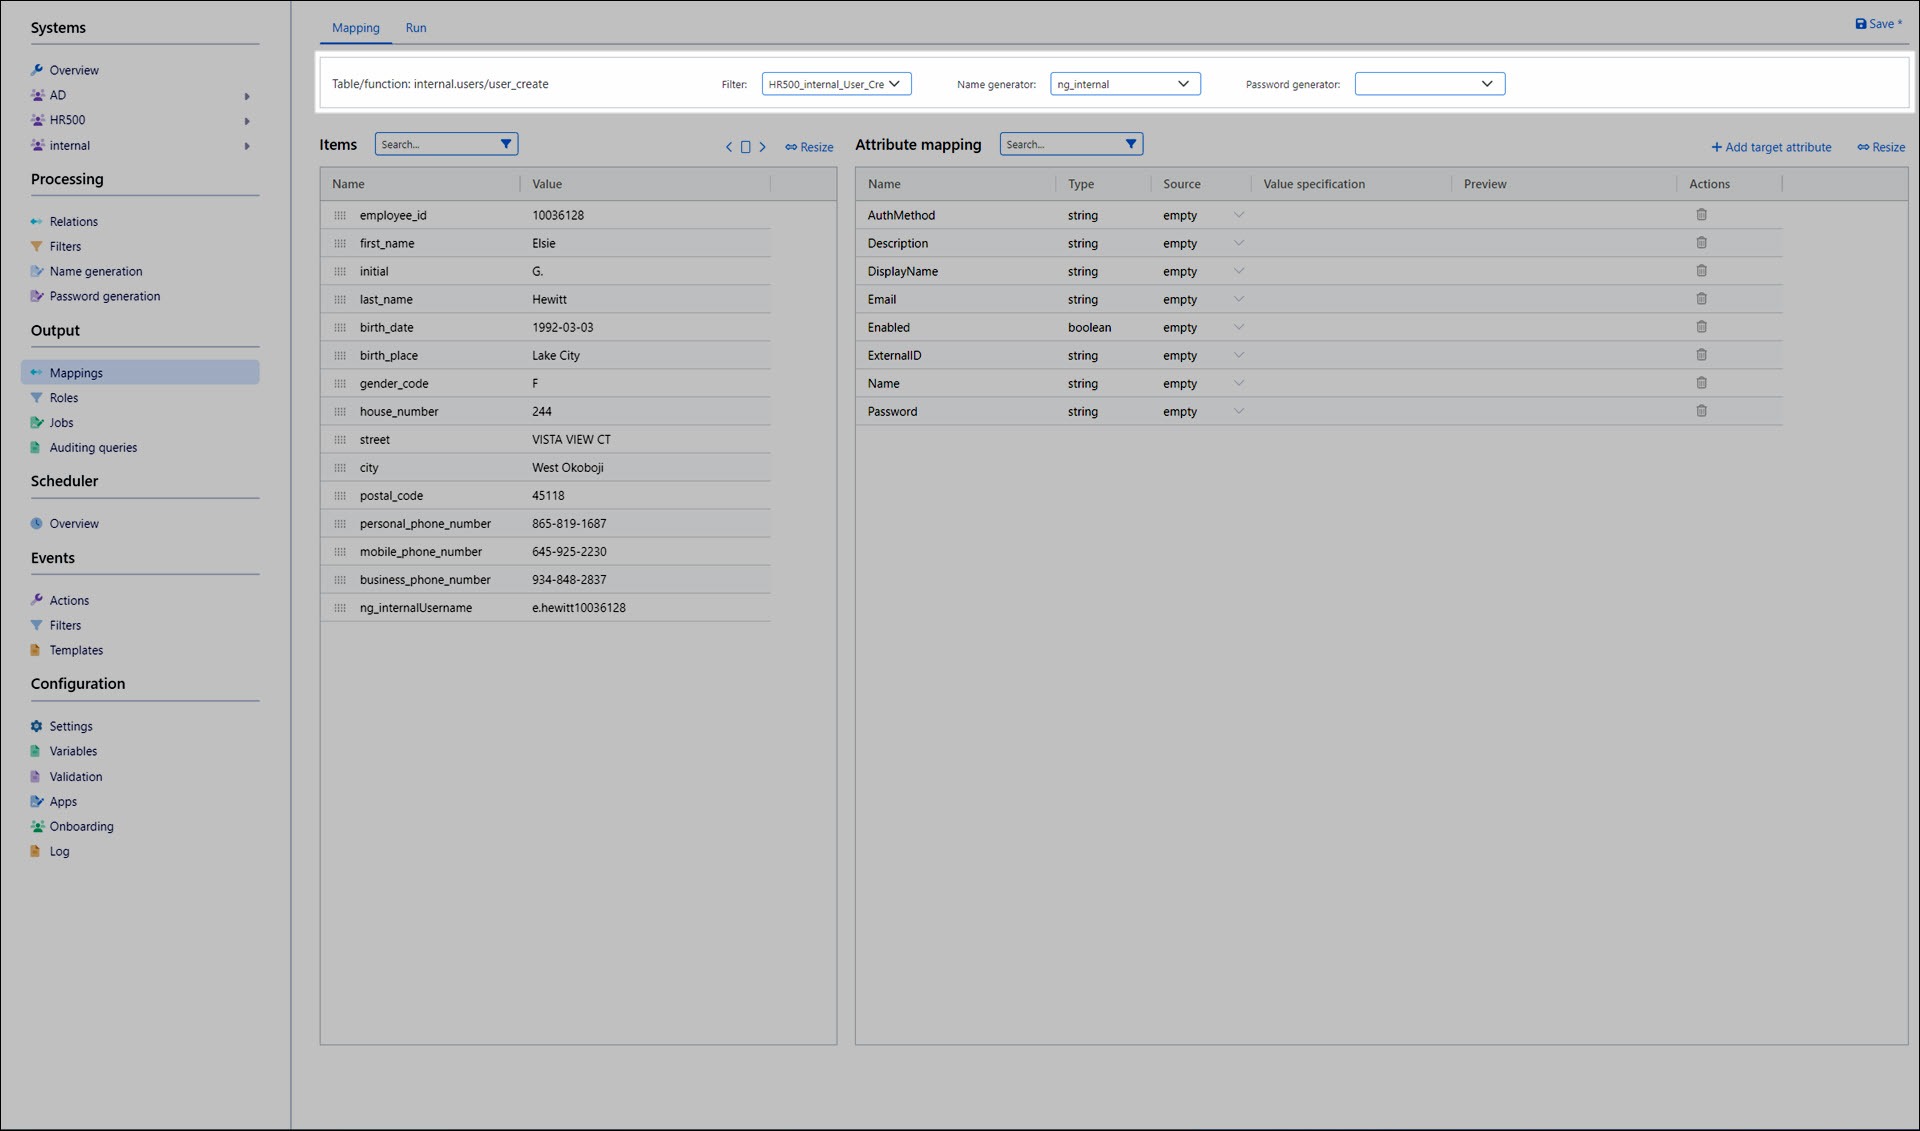
We'll map the following attributes:
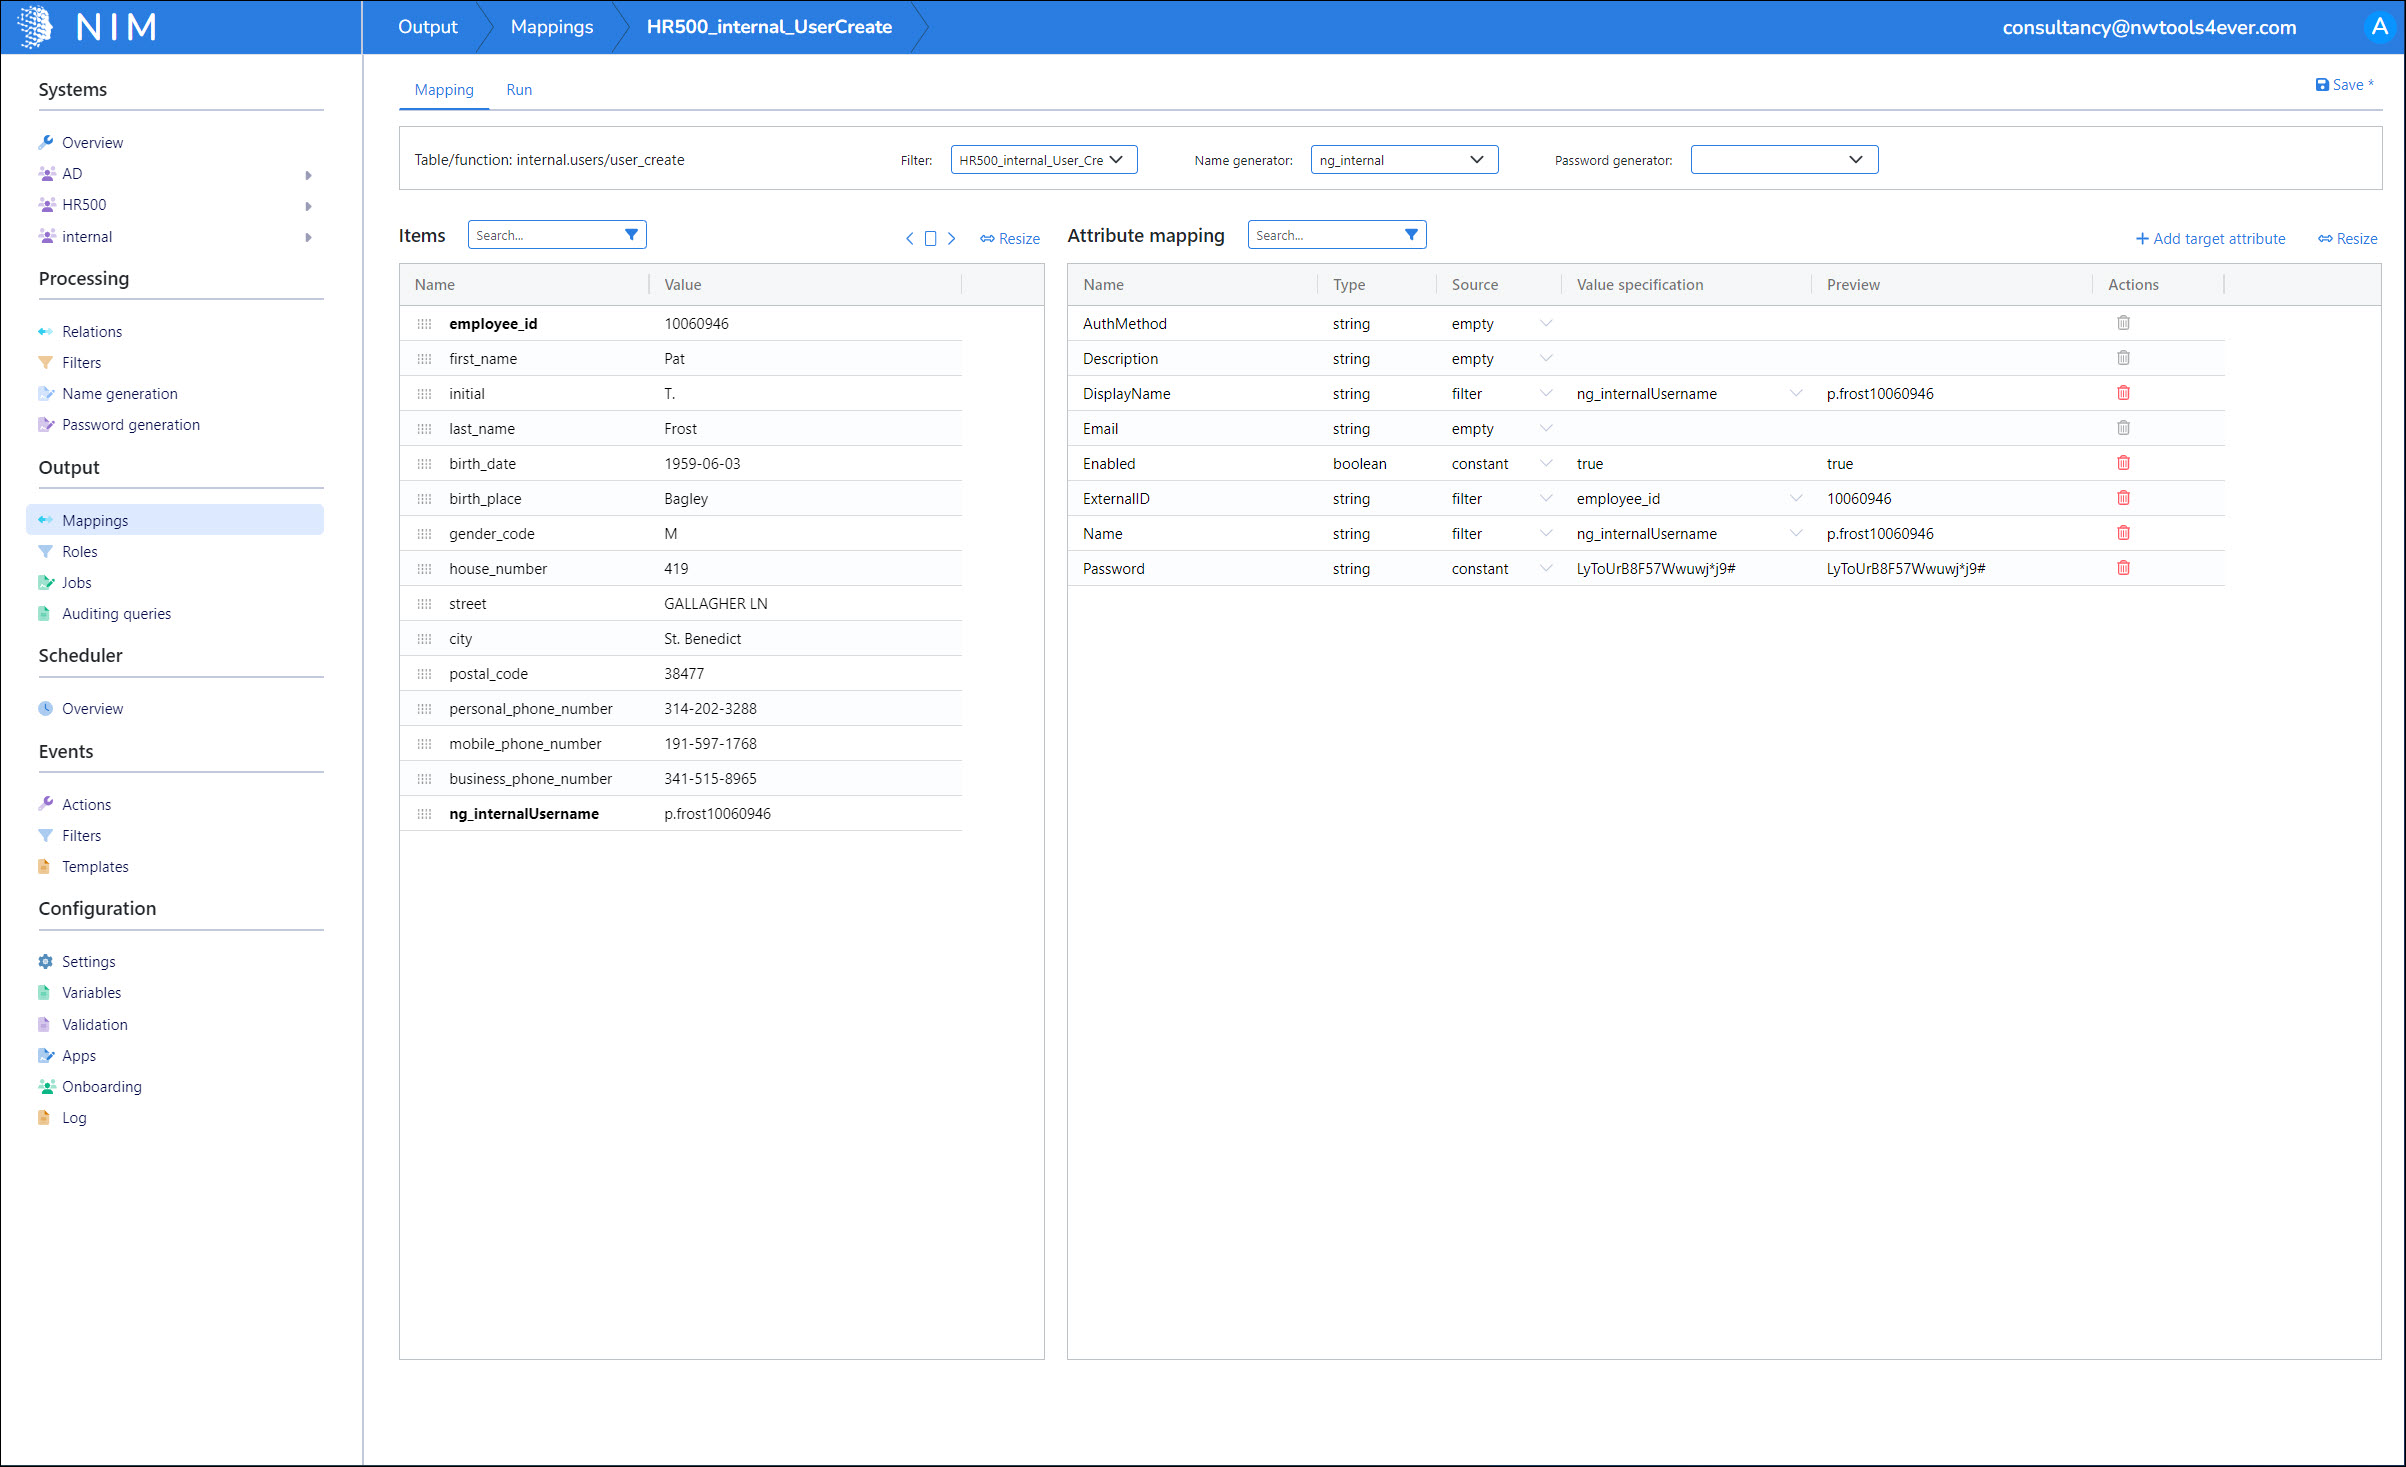
Attribute
Item
Note
DisplayName
ng_internalUsername
Enabled
true
You must manually type in
true.ExternalID
employee_id
Name
ng_internalUsername
Password
<a static password>
We're mapping a static password instead of using a password generator, to make testing easier.
Click Save.
Add a job for the internal system
Go to Output > Jobs and add a job named
HR500_internal.Add a new job item with a type of crud. For the Name, we'll select the HR500_internal_UserCreate mapping. We'll set the Threshold to 1000.
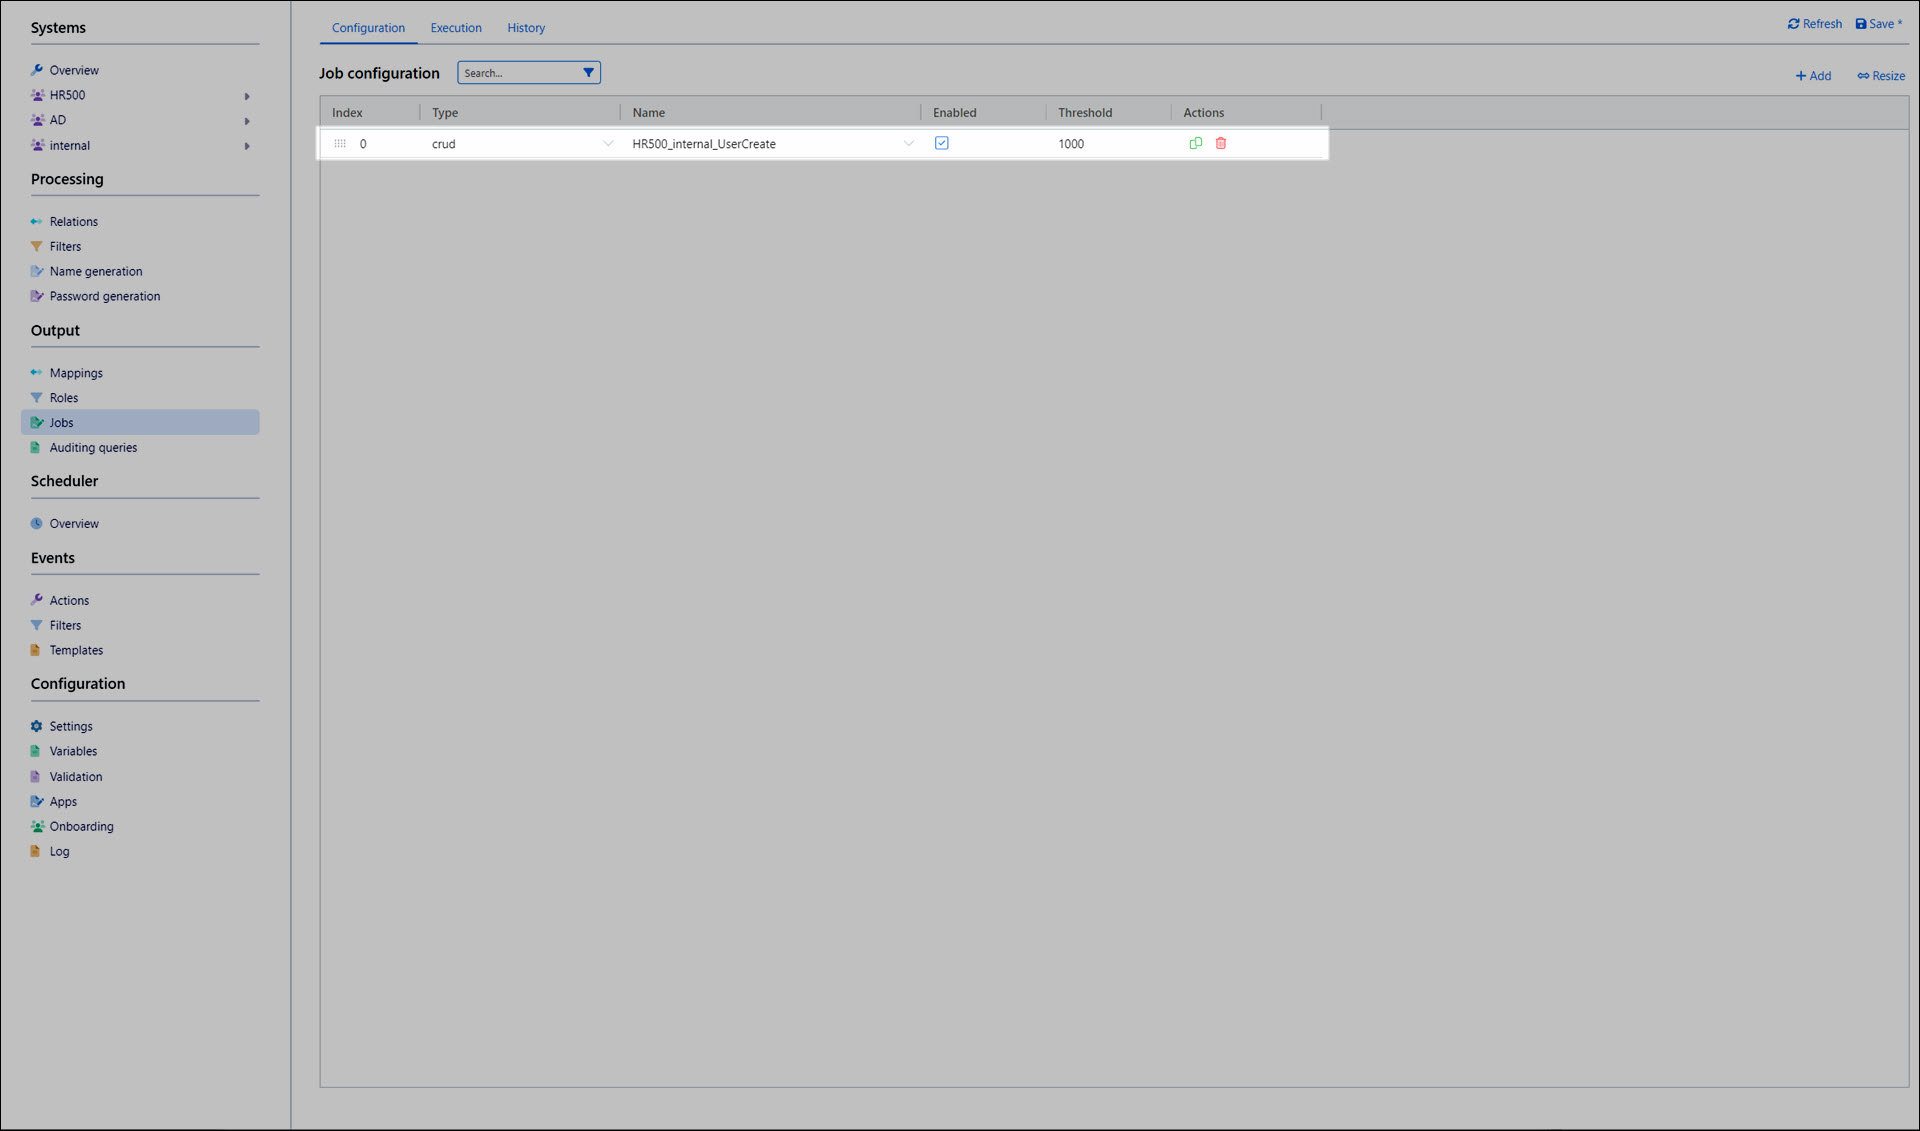
Click Save.
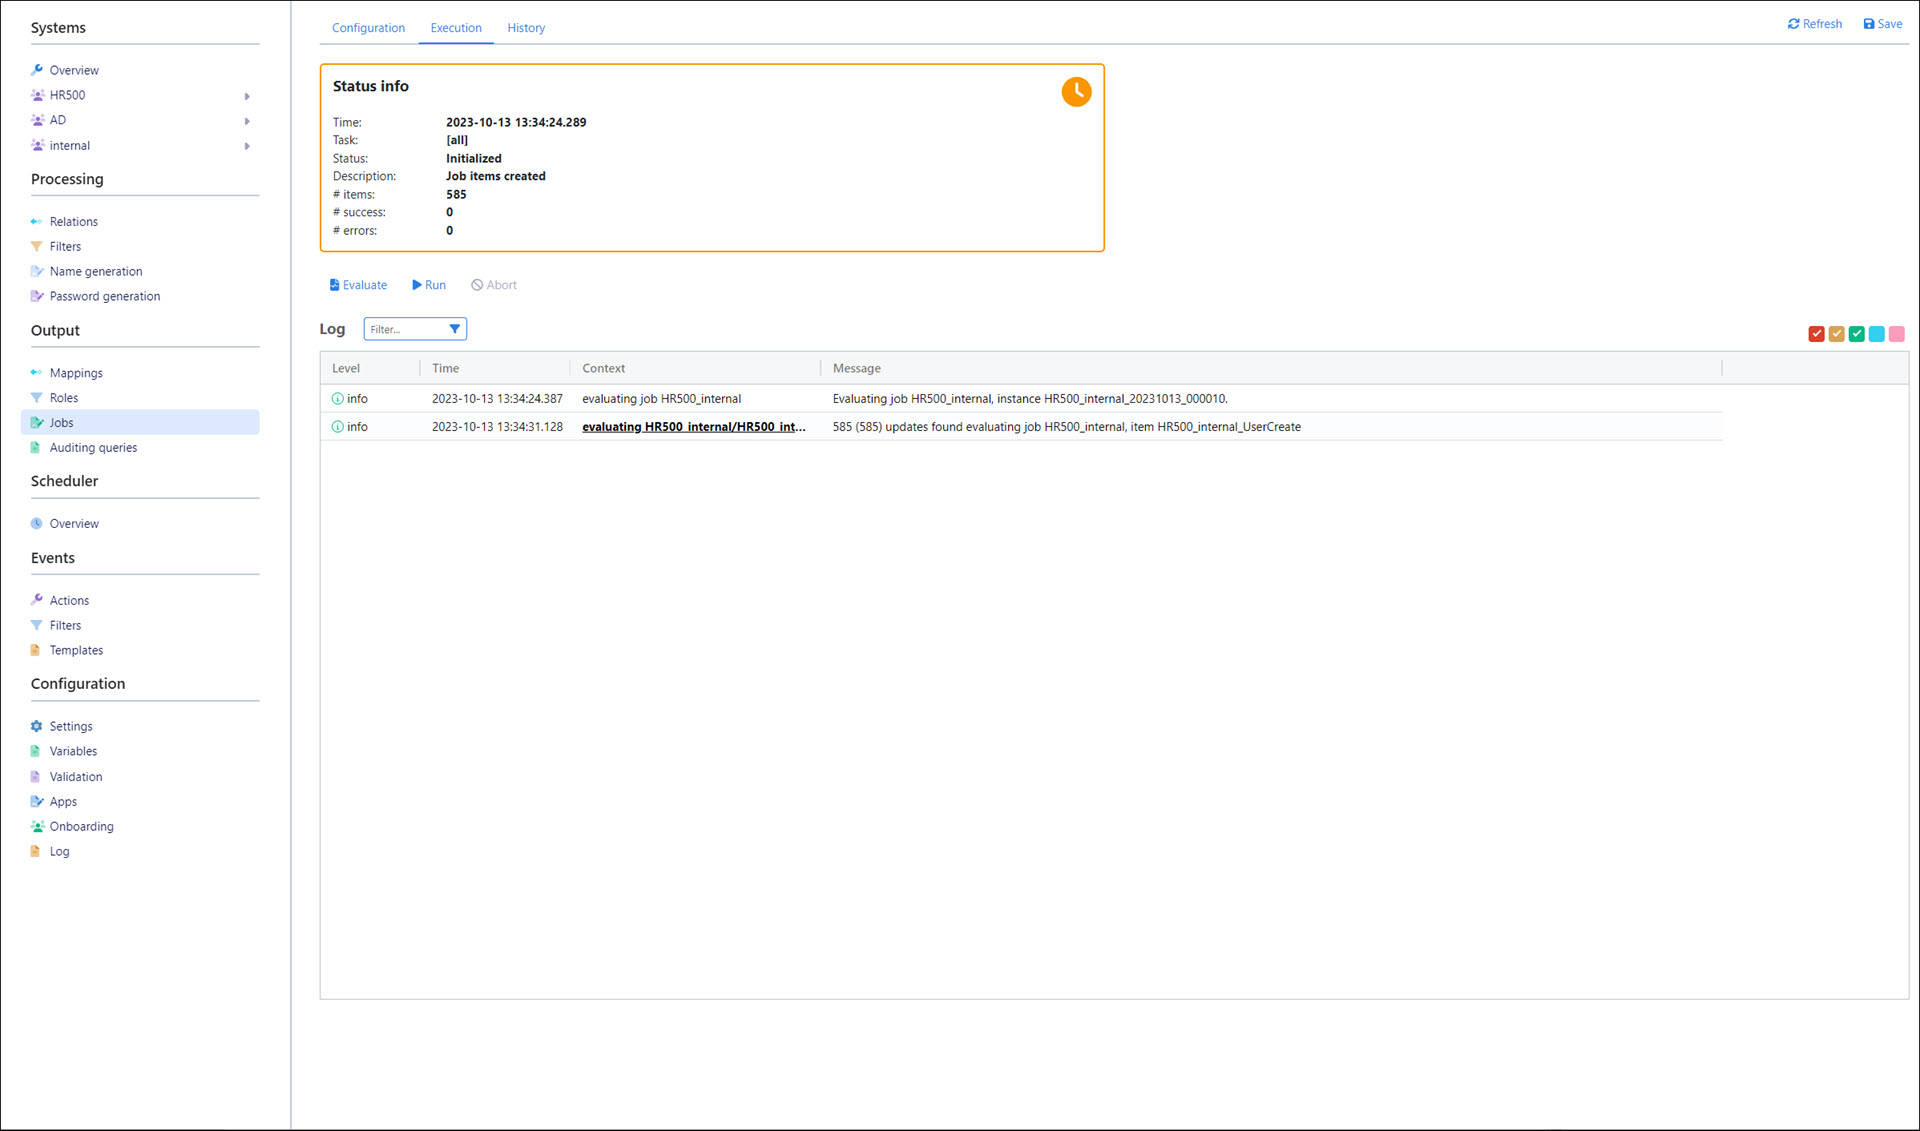
Go to the Execution tab and click Evaluate.
This job will create 585 internal NIM user accounts.
Add & configure a scheduler for the internal system
Go to Scheduler > Overview and add a sync type scheduler named HR500_internal.
We'll turn off the Evaluate toggle.
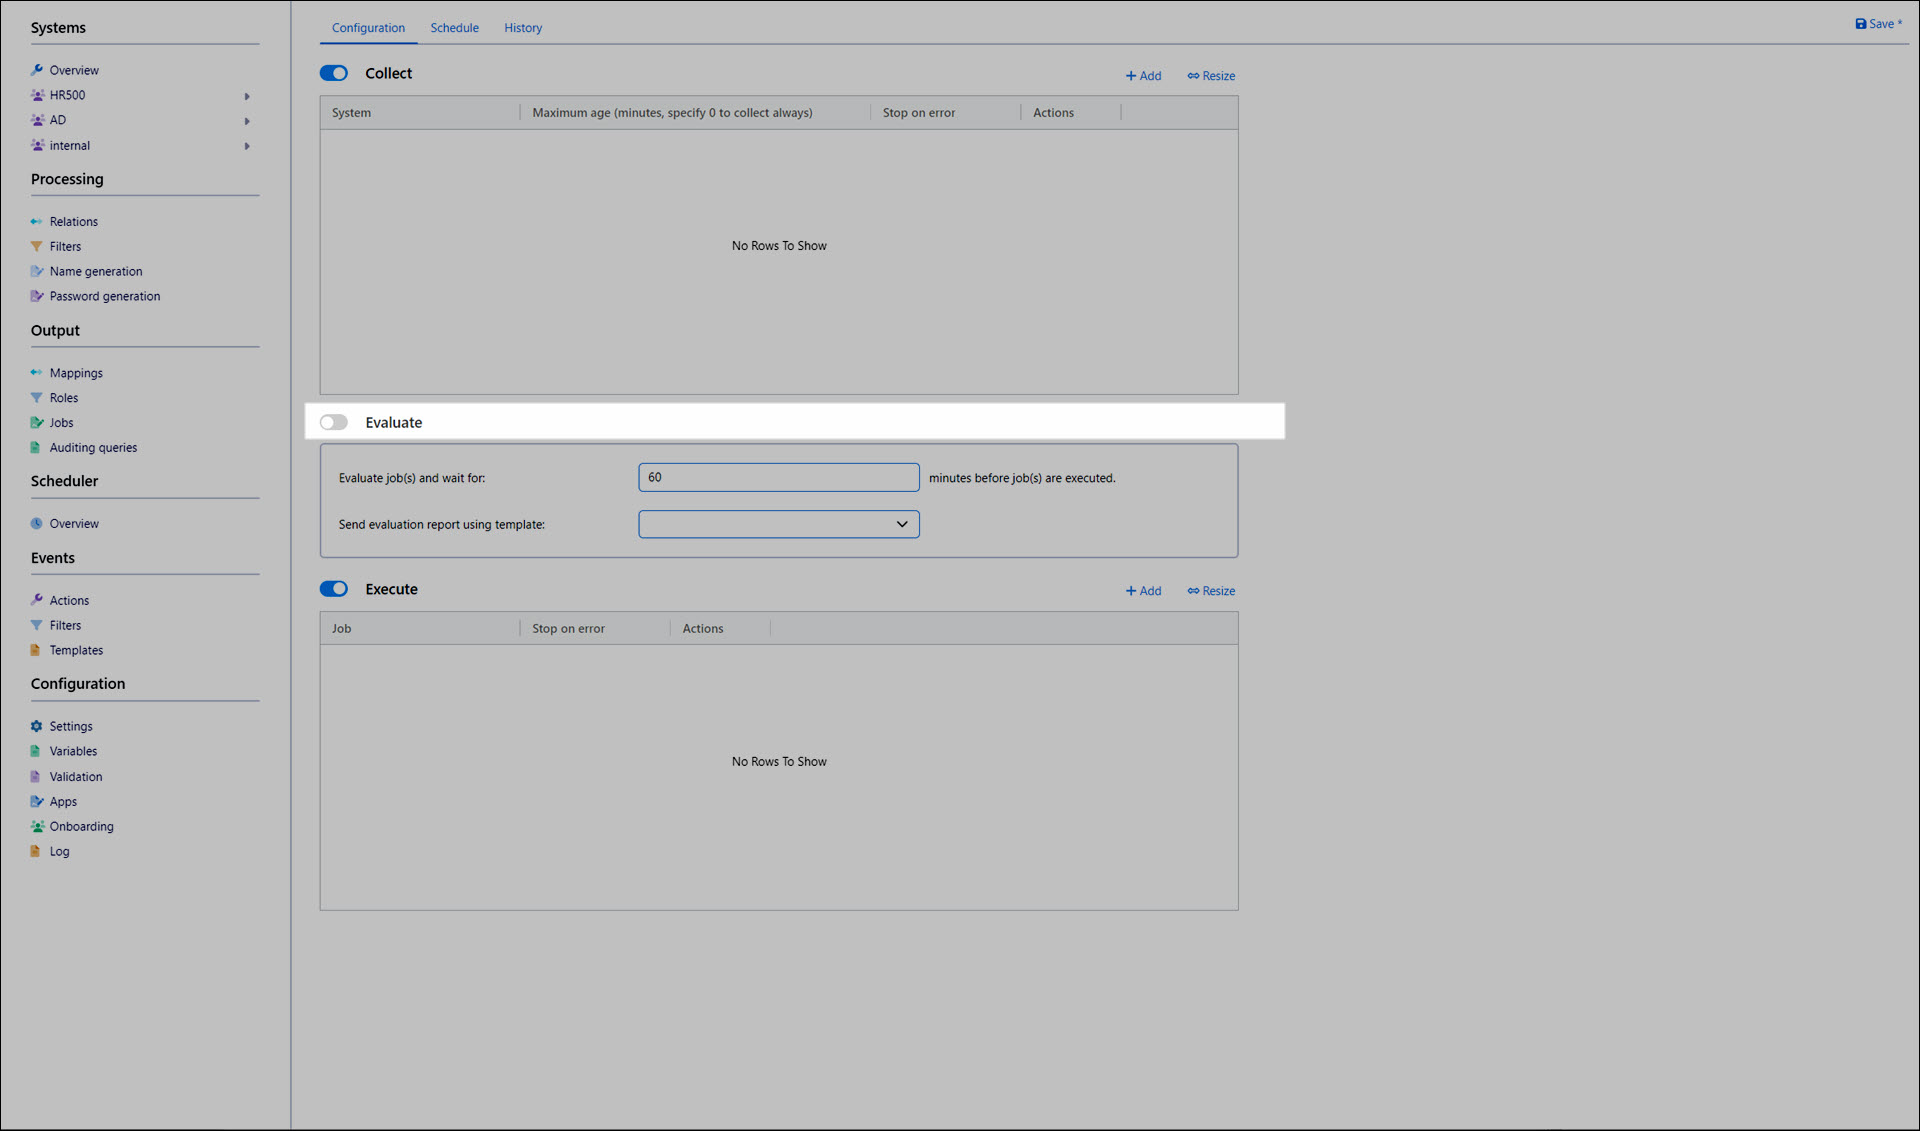
We'll add our HR500 source system to the scheduler's collection, with a Maximum Age of
0and Stop On Error enabled.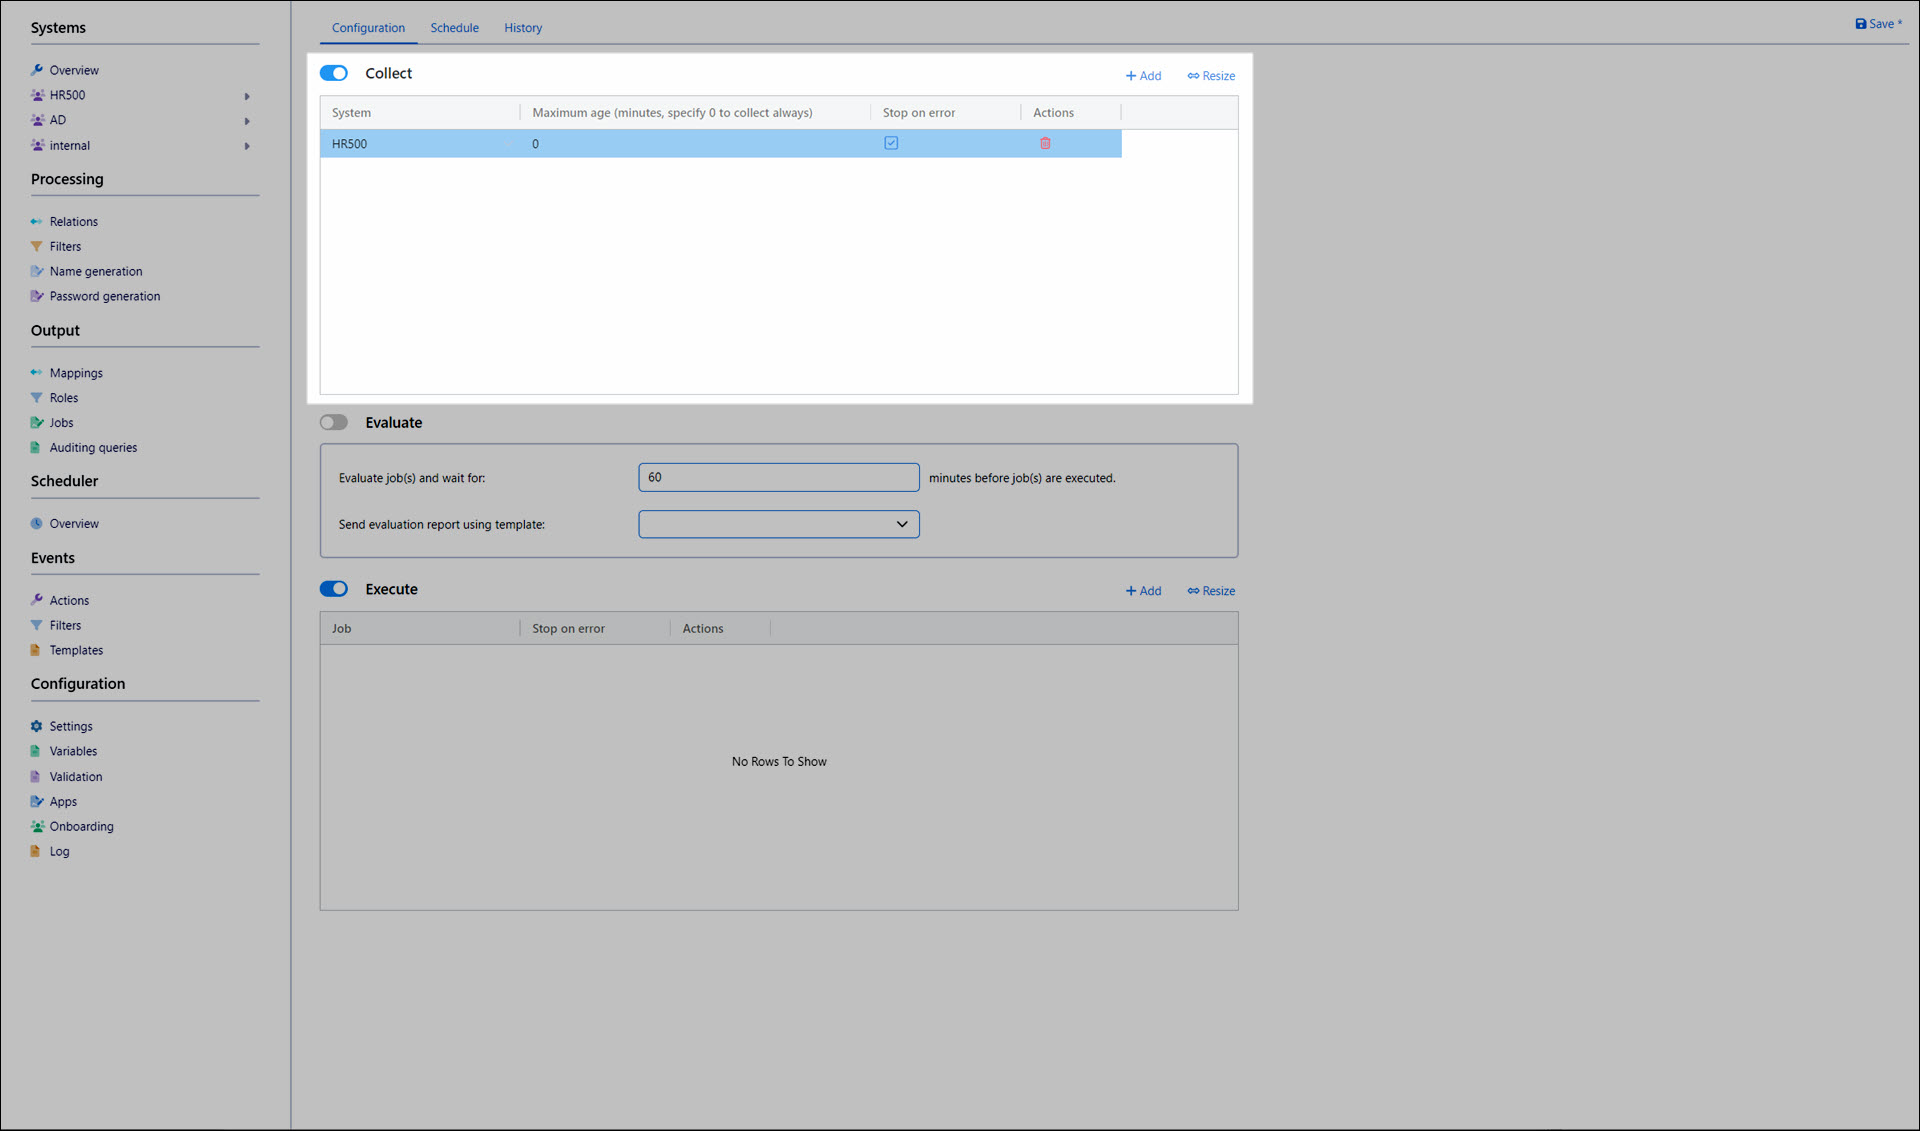
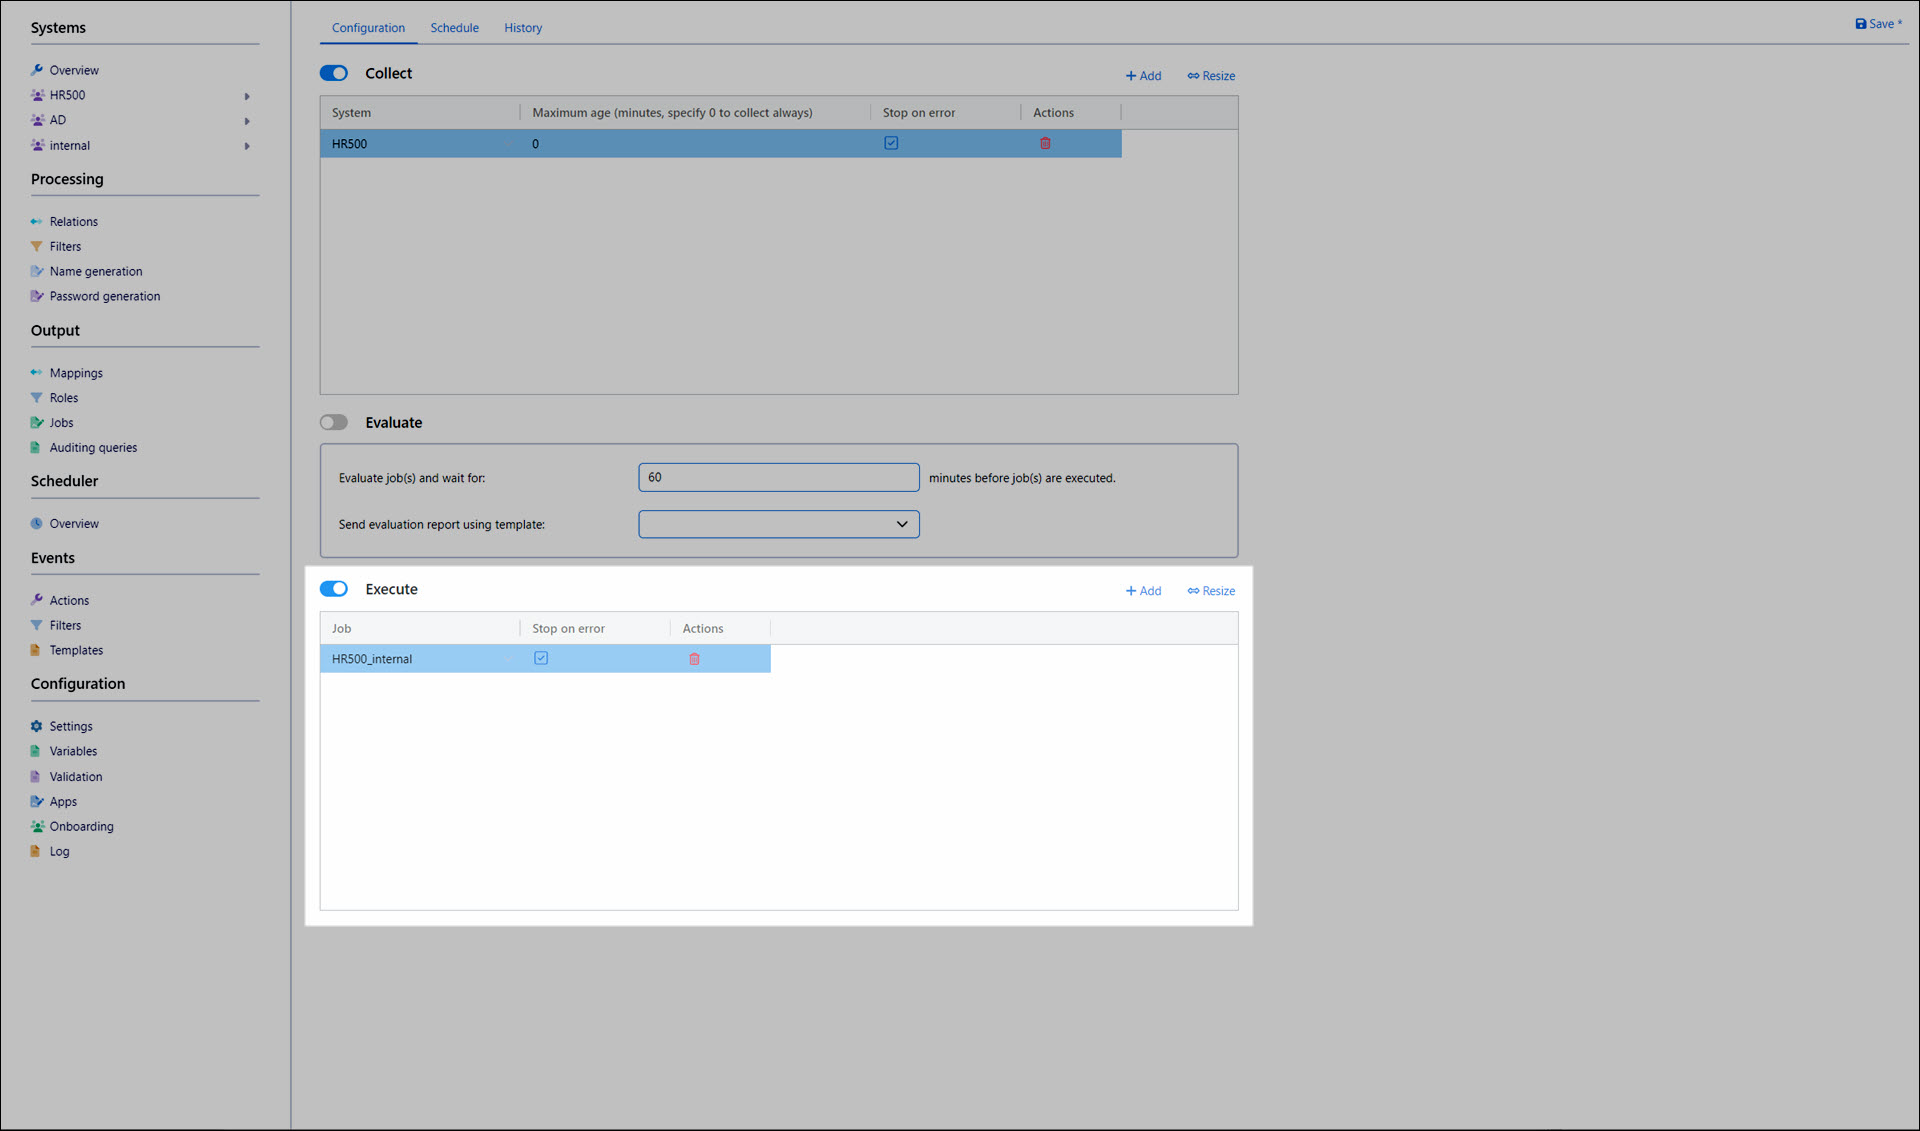
We'll add our HR500_internal job to this scheduler, with Stop On Error enabled.
Go to the Schedule tab.
Enable the Scheduling Enabled checkbox.
We'll configure the schedule to run at 2:15am, M-F.
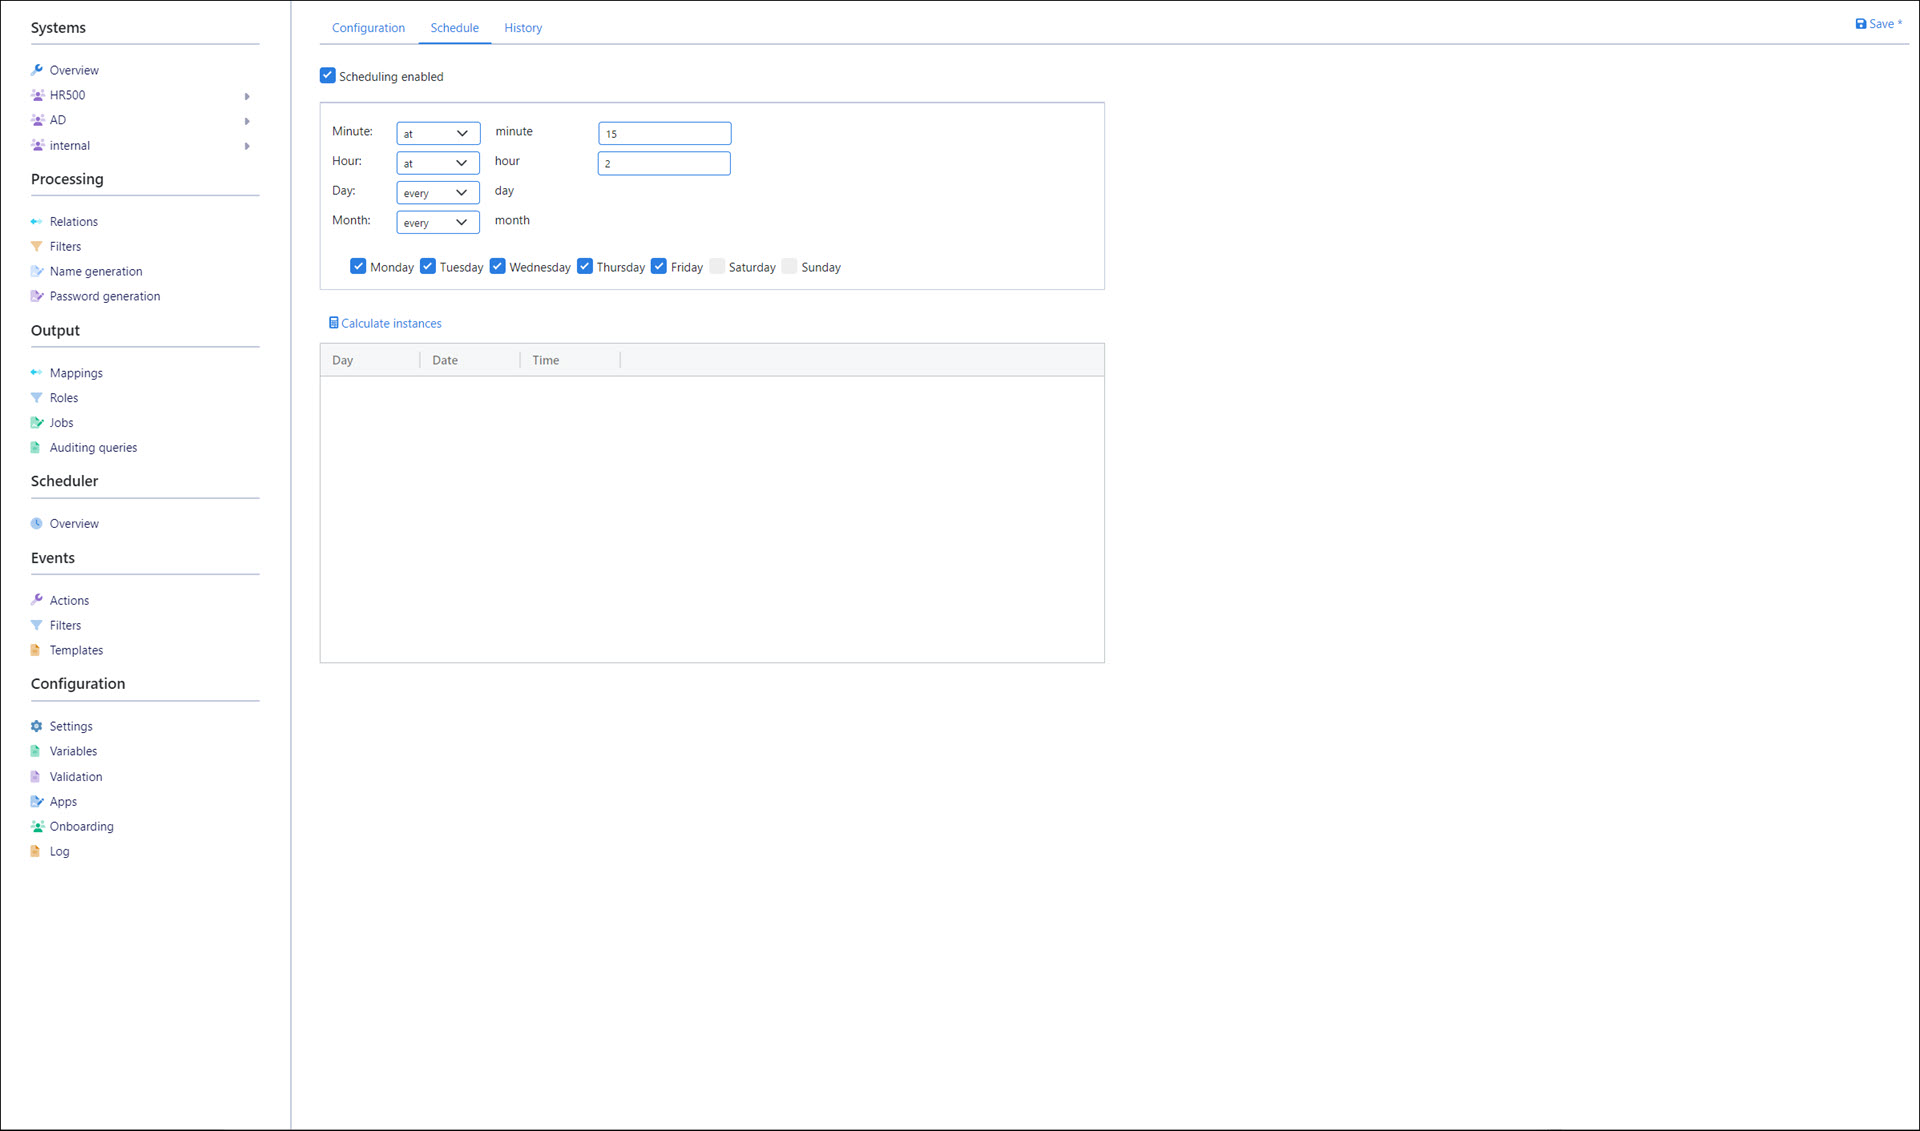
Click Save.
Perform an initial manual run & troubleshoot errors
Go back to Scheduler > Overview and click
Manual Run for the HR500_internal schedule.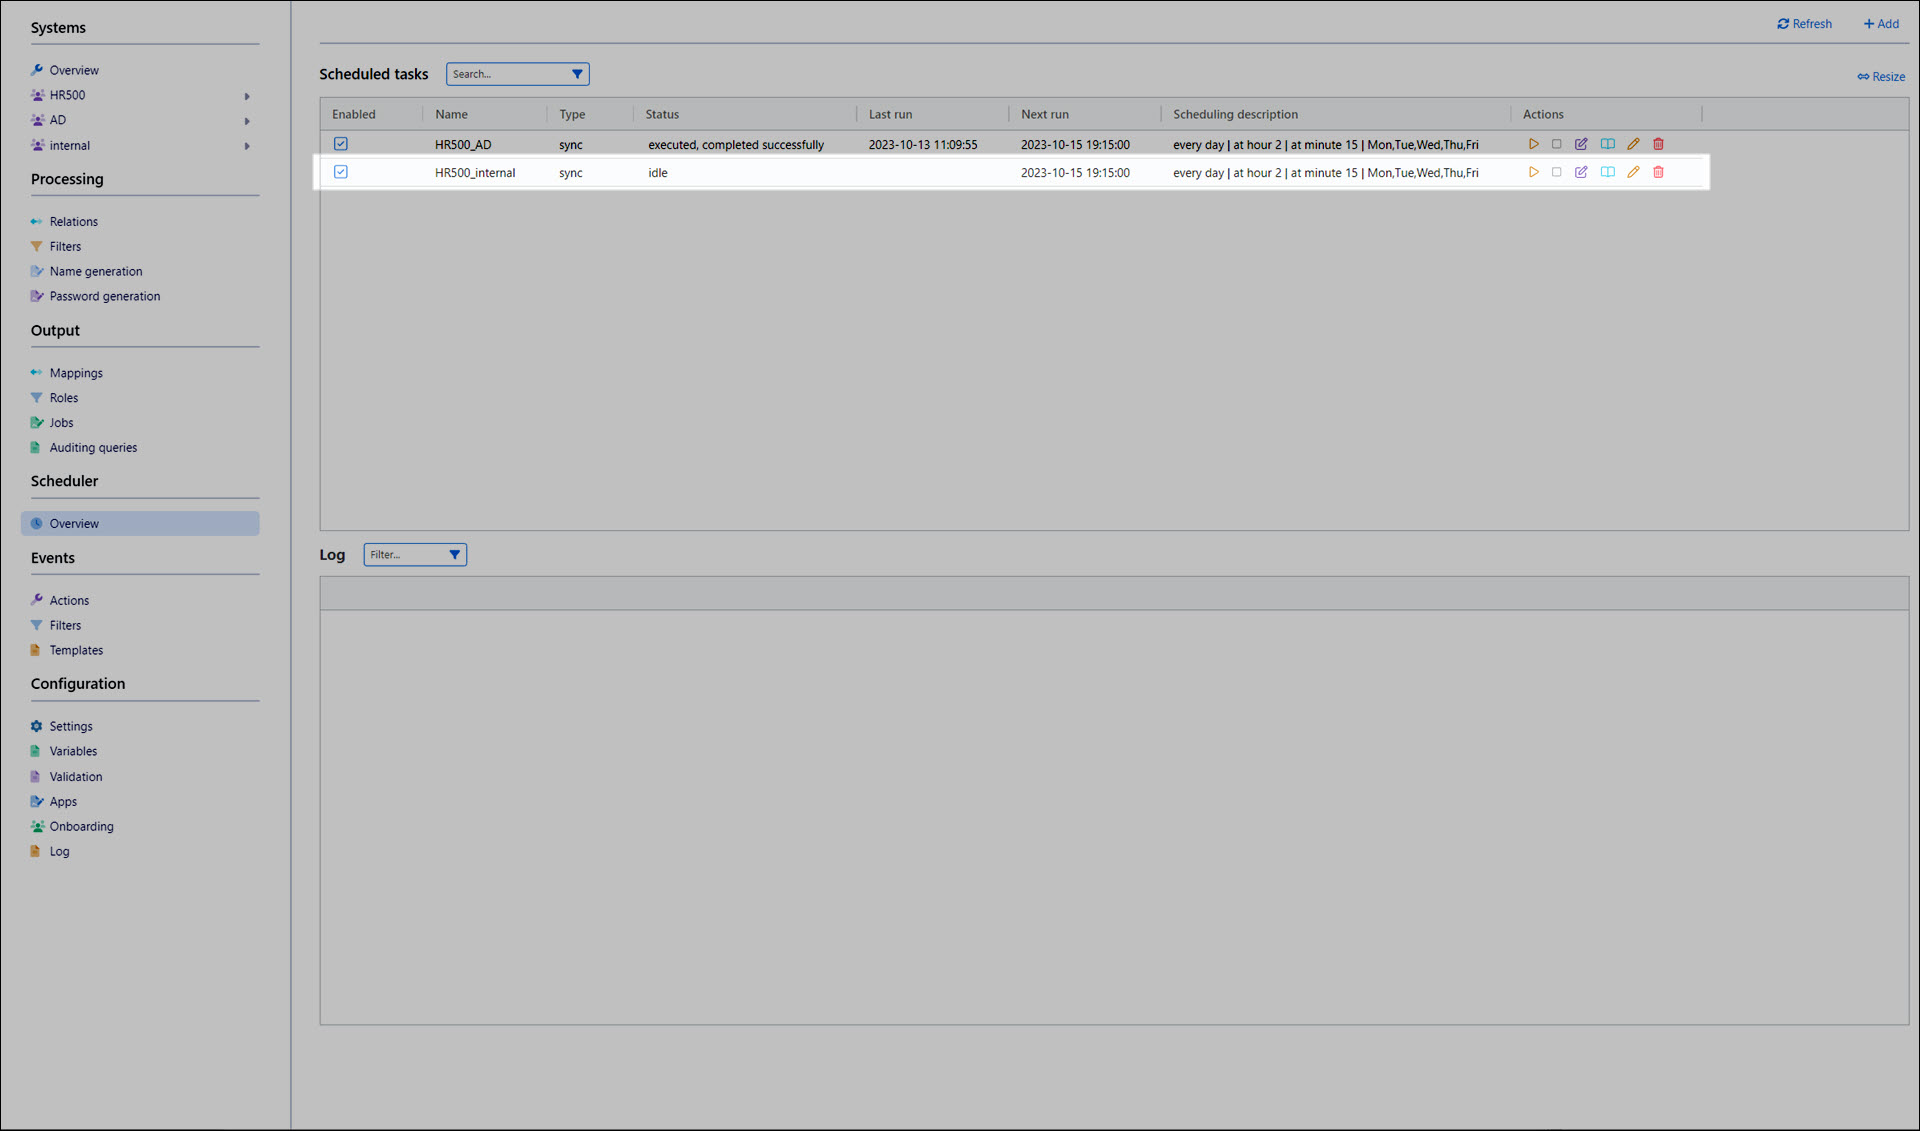
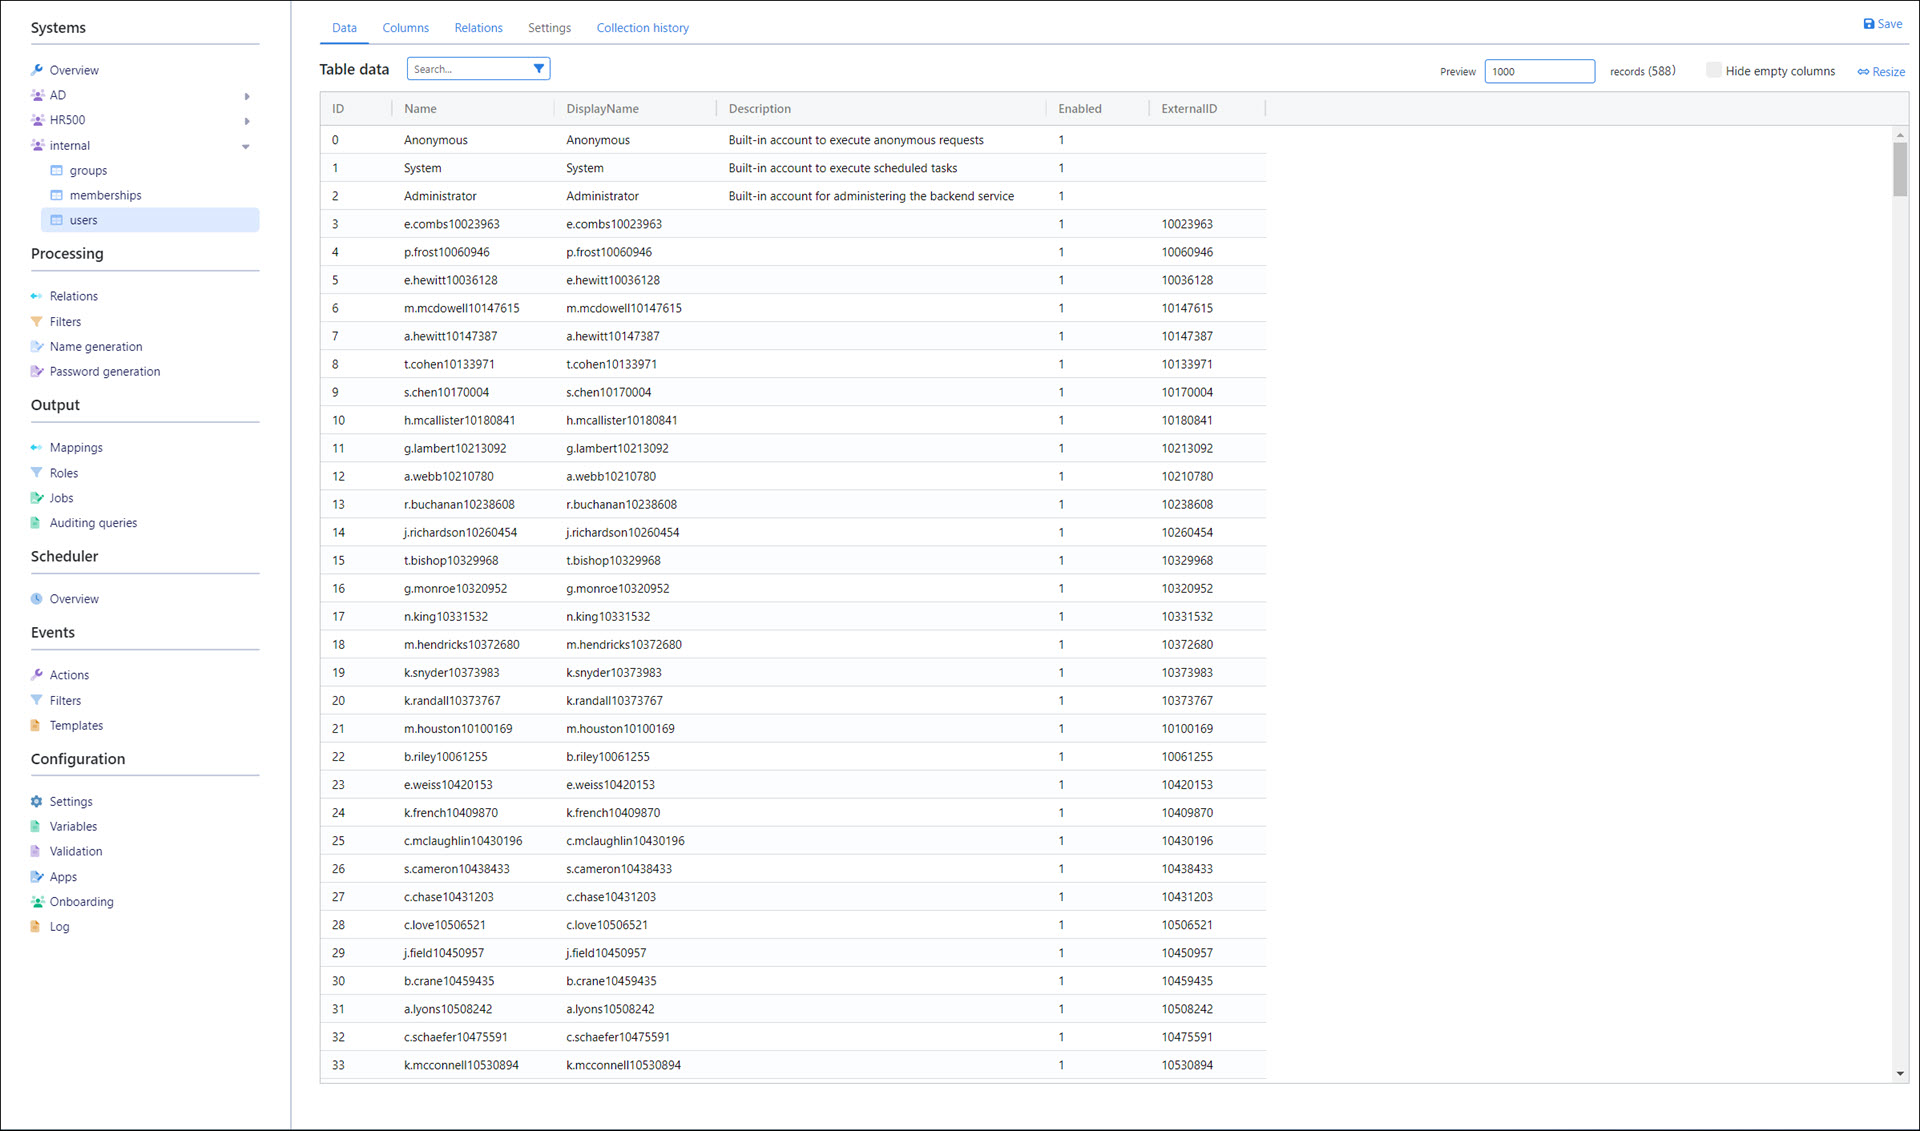
The scheduler executes successfully. The internal accounts have been created.
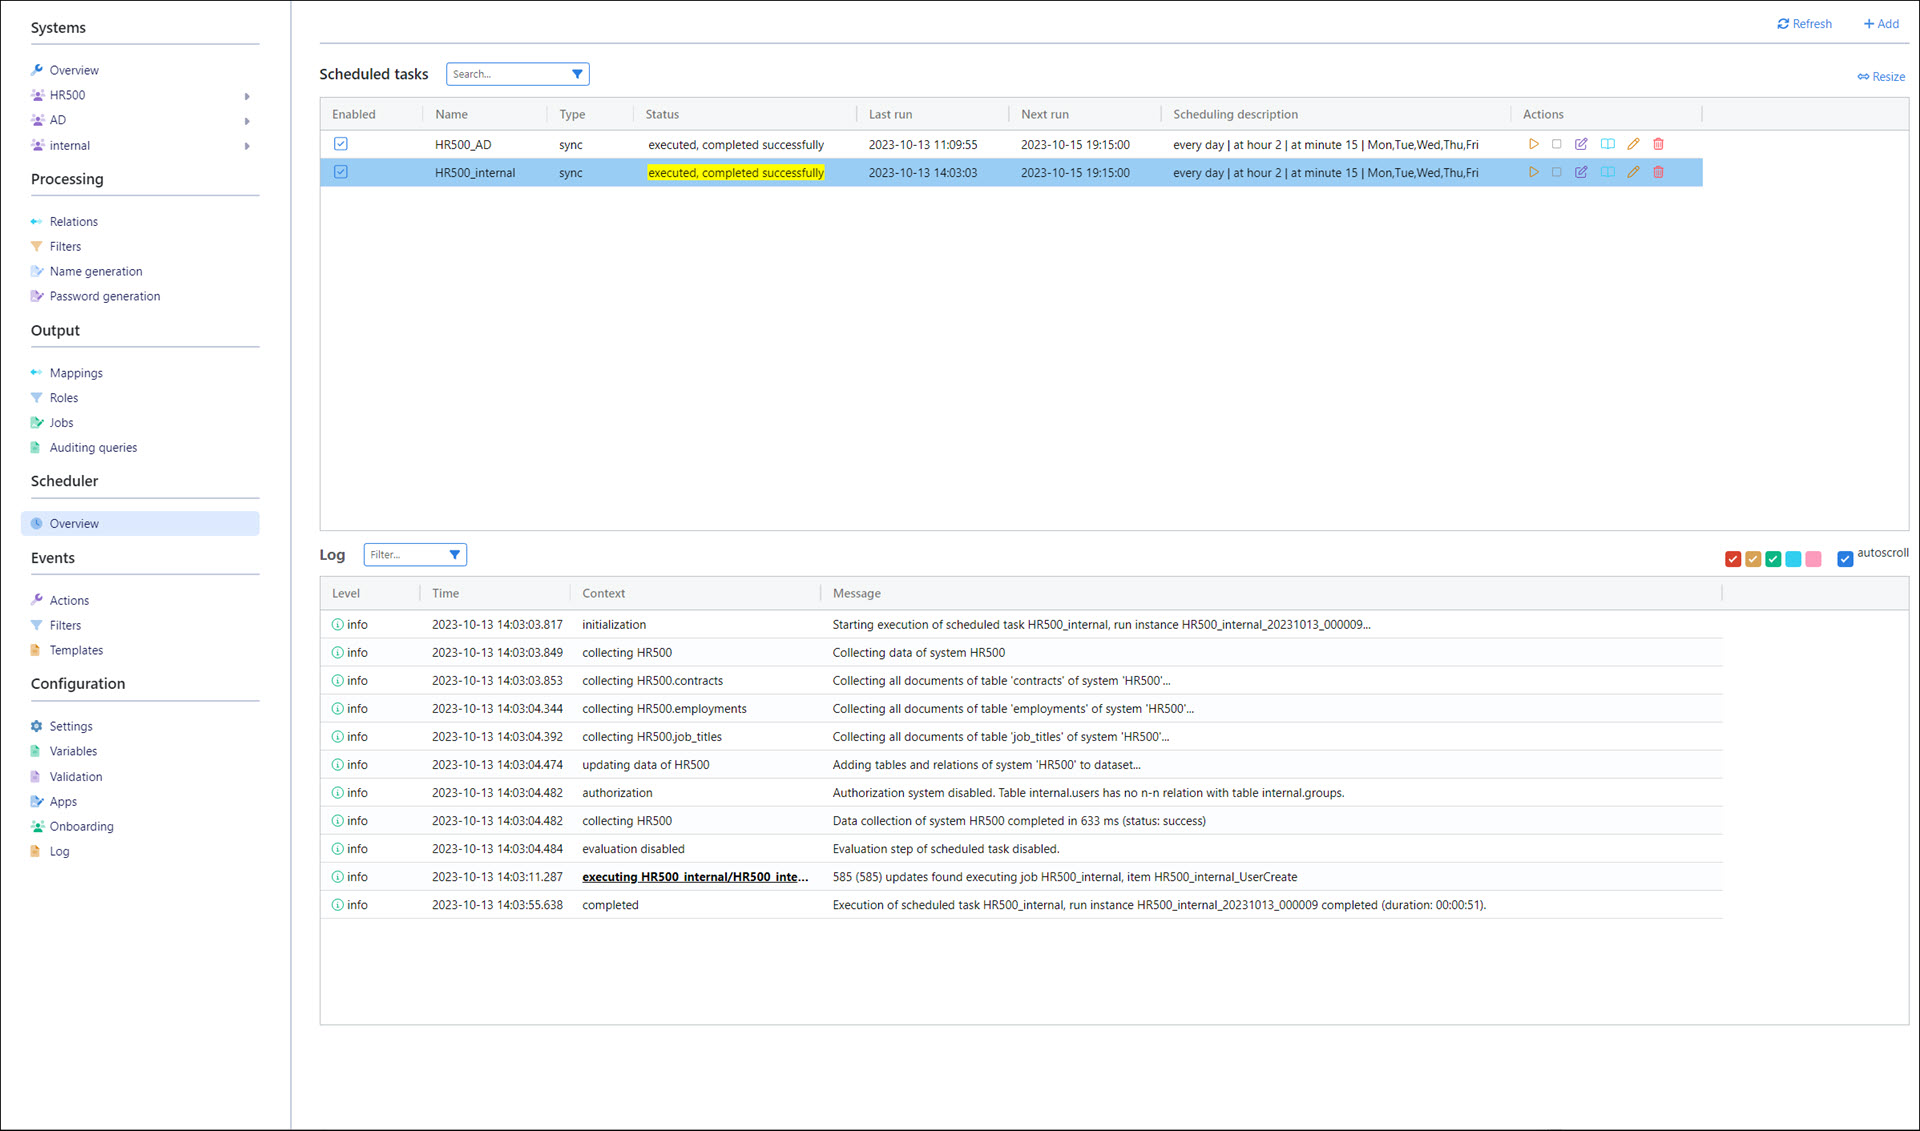
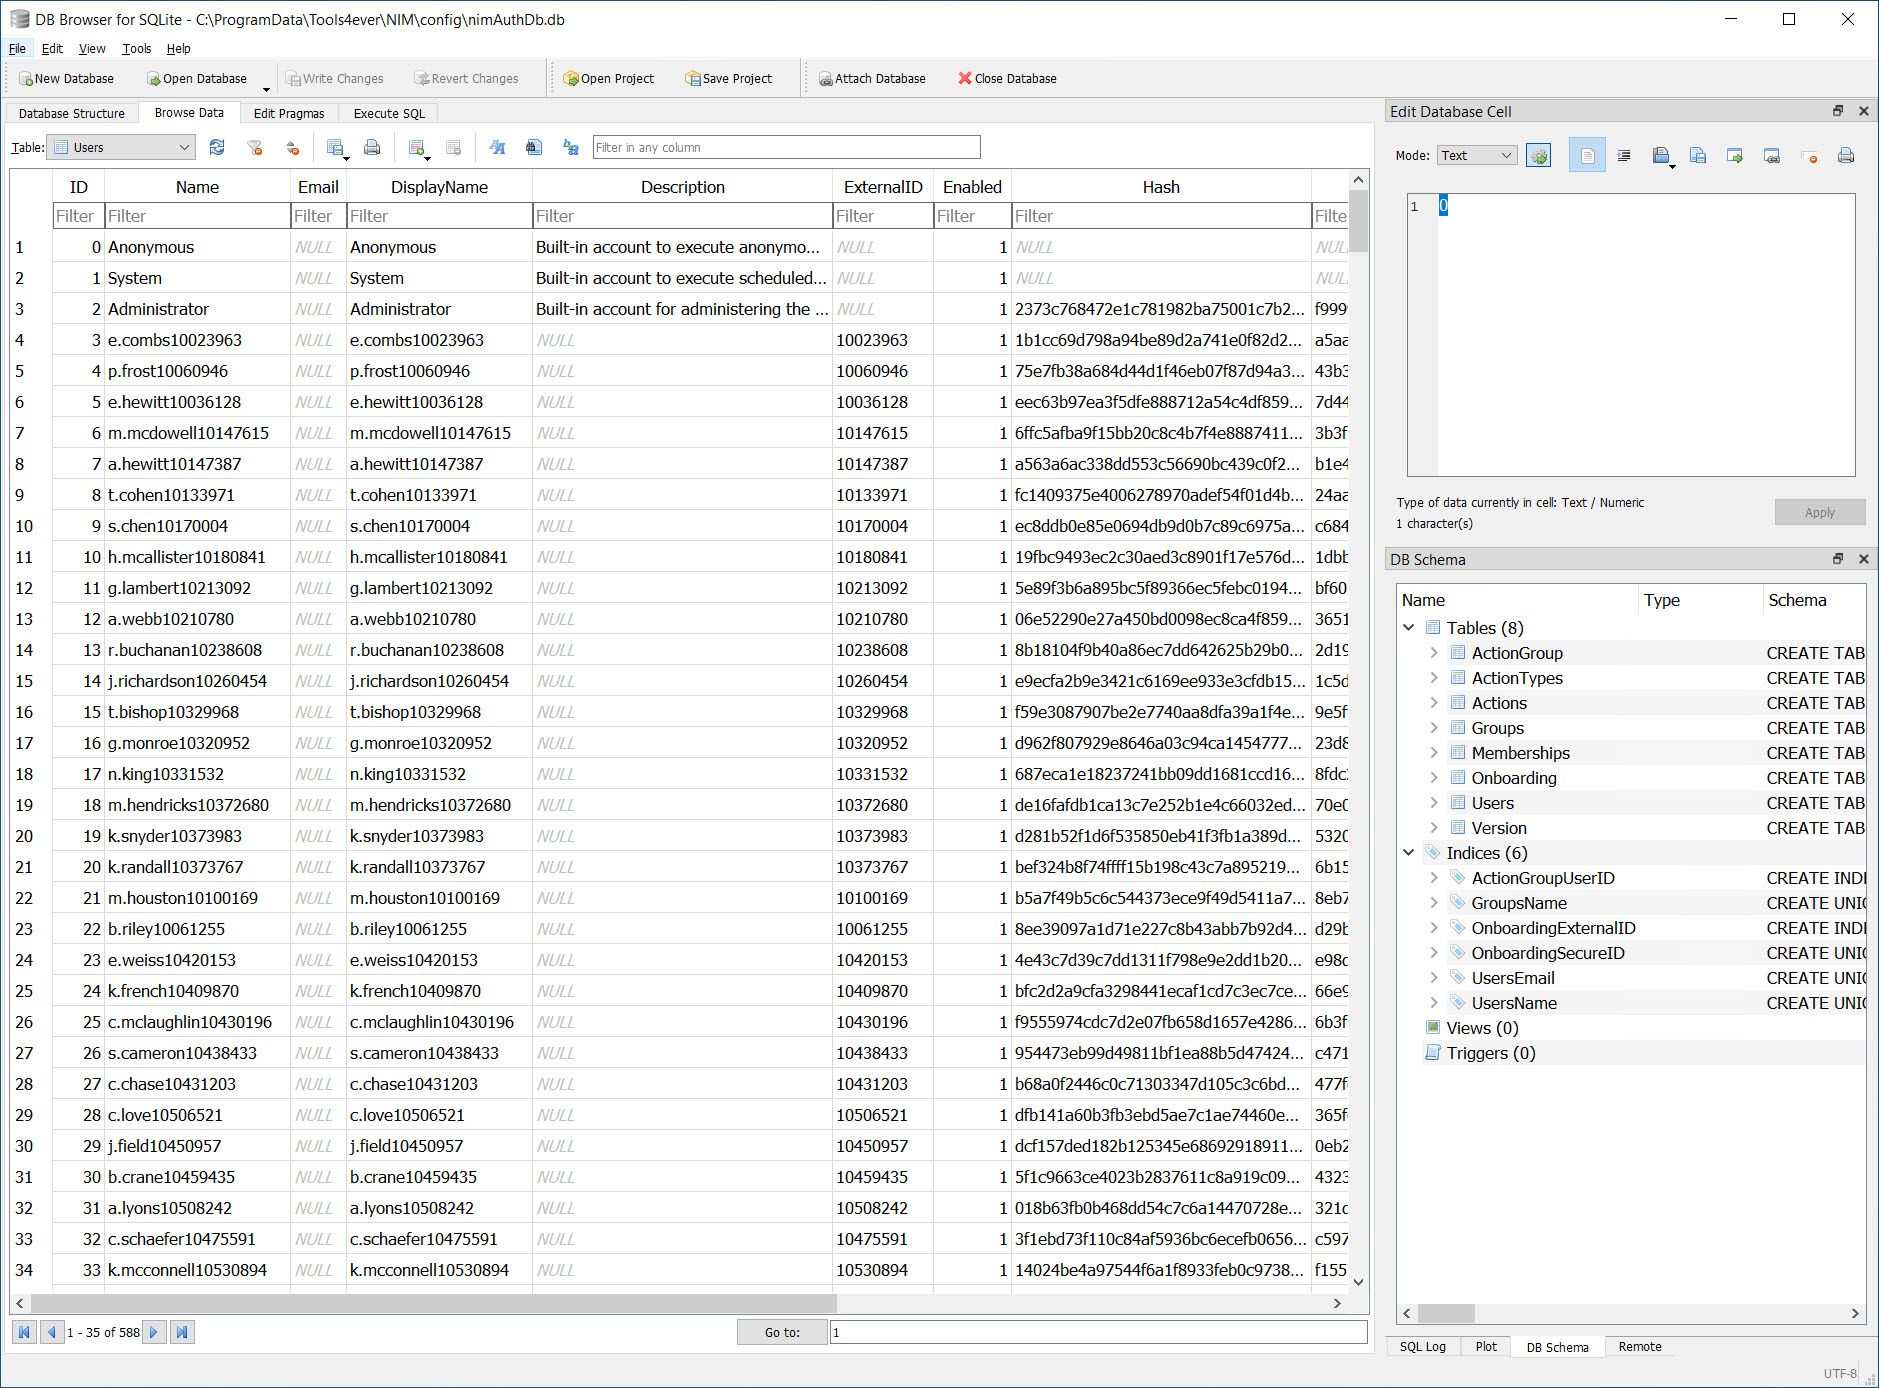
We can verify this by checking the users table of the internal system.
We can also verify the same thing by browsing the users table of the C:\ProgramData\Tools4ever\NIM\config\nimAuthDb.db database: