Step 2: Create an Onboarding Profile
Onboarding profiles contain the settings and configurations that tie each onboarding component together and define how they interact. They control which forms are displayed to the end user, and how they are challenged to prove their identity—either via OTP code, or a question/answer combination. It is possible that your organization may need to use more than one onboarding profile, depending on your use case. For example, a school may onboard students with a question/answer challenge, but employees onboard with an OTP code.
Note
Onboarding profiles define which forms a user interacts with during the onboarding process. Each form serves a purpose, and contains text placeholders that can display customized messages for each onboarding profile that is using the form. For example, the Registration form can prompt employees for their employee ID, but prompt students for their student ID.
The following list details each available onboarding form and its purpose:
Welcome: Provides a welcome message to the user. This form is skipped if the user arrives through a link that bears their secure ID.
Registration: Prompts the user for their unique identifier, such as an employee ID. This form is skipped if the user arrives through a link that bears their secure ID.
QuestionText: Prompts the user to enter textual input. Upon submission, NIM compares the selected date to the value in the selected Answer column that is returned by the Question-answer filter.
QuestionDate: Prompts the user to select a date. Upon submission, NIM compares the selected date to the value in the selected Answer column that is returned by the Question-answer filter.
Method: Allows the user to choose between receiving their OTP code via email or SMS. They are only given options that have values populated in their onboarding record. E.g., if they do not have an email address, they will not receive the email option.
Confirm: Prompts the user for the OTP code, and allows them to resend the code. If they enter in the correct code, they are allowed to proceed to the next form.
InputVariable: Prompts the user for aritrary textual input. The value of the user's provided input can be used in an onboarding action to update another system.
InputPhone: Prompts the user to put in a phone number, and validates that their input is valid. The user's provided information can be used in an onboarding action to update another system.
Password: Prompts the user for a new password. Once submitted, the form executes the actions listed in the Onboarding Actions tab.
Summary: Provides a summary message to the user, which can include their username, email, and password. Like other screens, the message here is customizable.
Message: This is a generic form for displaying error messages to end users. It should not be used in the Onboarding Profile Forms section.
Create the Onboarding Profile
Follow these steps to create an onboarding profile:
Go to Configuration > Onboarding.
Click Add to create a new onboarding profile. Provide it the same name as the
Profilefield in the mapping you created previously.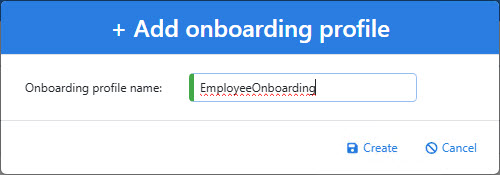
In the top section of the profile, configure the dropdown fields accordingly:
Under Onboarding app, select
Onboarding.Important
If this app is not present in the list, please contact support.
Under Question-answer filter, select the
Onboarding_Employee_Lookupfilter you created earlier.Select
messagefor the remaining two drop downs on the right.

Next, you must choose how users will verify their identities in this onboarding profile. You have two options: OTP code, or question/answer challenge.
Option 1: Verify through OTP code
NIM can validate a user's identity by sending them an OTP code, either to their email or their SMS-enabled mobile device. After providing that code back to NIM, the user can reset their password and begin using their account.
Requirements:
NIM must be able to send emails and SMS messages.
The user must have either an email or a mobile phone number in their onboarding record.
If the above requirements are met, follow the instructions below to configure an onboarding profile to verify a user's identity through an OTP code.
In the Onboarding Profile Forms section, click the Add button six times to add six form entries (one for each screen of the onboarding process). If you want to challenge users with more than one question, add an another form for each additional question.
For each entry, use the dropdown menus to set the Form Name, Form Function, Form Variable, and Onboard Variable fields. On the
passwordform entry, select the Execute and Notification options. Your section should look like the screenshot below.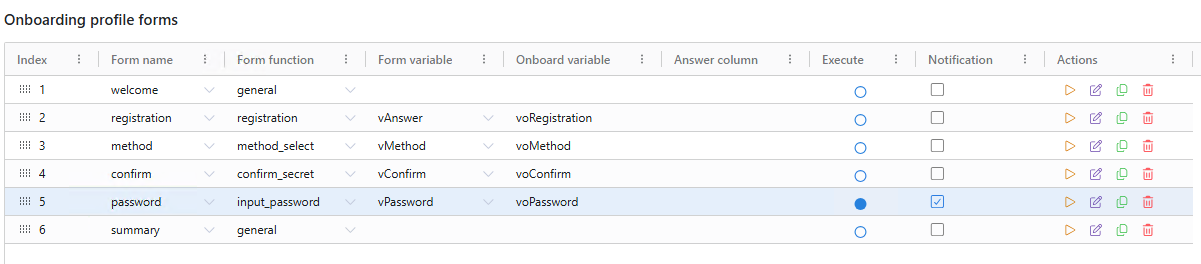
Click Save.
Option 2: Verify through Question/Answer Challenge
NIM can validate a user's identity by having them answer a question whose answer is provided by data returned in the Question-answer filter that is defined in the profile. The data can be a field from any system that is associated with the user's record (e.g., birth date or postal code) or a custom javascript field.
Requirements:
Each user going through this onboarding profile must be challenged with the same question.
Each user must have data populated in the field that provides the answer to the question. If prompting users for their postal code, for example, anyone with a blank postal code field will be unable to complete the onboarding process.
If the above requirements are met, follow the steps below to configure an onboarding profile to verify a user's identity through a question/answer challenge.
In the Onboarding Profile Forms section, click the Add button at least five times to add five form entries (one for each screen of the onboarding process). If you want to challenge users with more than one question, add an another form for each additional question (like we have in the screenshot below).
For each entry, use the dropdown menus to set the Form Name, Form Function, Form Variable, and Onboard Variable fields. On the
passwordform entry, select the Execute and Notification options. Your section should look like the screenshot below, depending on how many questions you are challenging the users with (we have two shown here).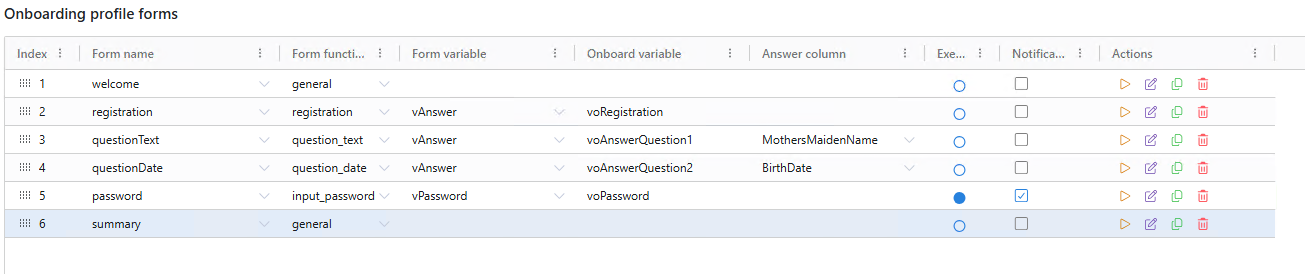
Click Save.
Customize Form Contents
Each form within the onboarding process contains placeholder text. These placeholders have default values, but you should customize them to suit your needs. For example, the default text of the QuestionText form prompts for an employee ID. Instead, you may want to prompt the users for their mother's maiden name, or their birth year.
Follow the steps below for each form in your profile to configure their contents.
Click on one of the forms under Onboarding profile forms.
Under Form contents, customize the text of the form to suit your needs.

Repeat steps 1 and 2 for each of the forms.
Important
This is particularly important for the
summaryform, which displays the strings "[username]" and "[password]" instead of the variables you are using. You will need to come back to this step after setting up the form actions in the next part of this tutorial and replace those strings with the proper variable names.Click Save.