Step 4: Configure End-User Notifications
Good communication is part of an effective onboarding process. New users should be notified of their ability to onboard. If you are using OTP codes to validate their identity, these must be sent out to the user as well. Additionally, IT and/or management may want to be notified when a new user completes the onboarding process.
Follow the steps below to configure these types of notifications.
Configure End-User Welcome Email
When an onboarding record is provisioned, NIM can send the end user an email that welcomes them to the organization and provides them a personalized link to the onboarding process. This link uses the secureID value that was generated for their record and bypasses the need for them to supply their unique identifier (e.g., employee ID).
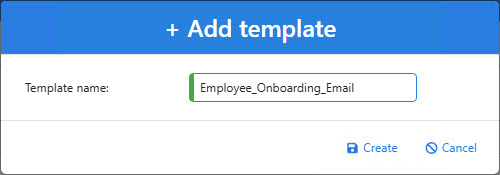
Navigate to Events > Templates.
Add a new template.

In the Notification Event dropdown, select
mapping: Onboarding_Employee_Create.In the To field, type or use the Append button to add the variable
{var.event.argument.MailAddress1}(or whichever field you mapped the personal email address to).Provide a suitable subject for the email.
In the body, provide a suitable message. Be sure to include a URL or hyperlink constructed of the following variables, which the user can visit to claim their account and bypass the need for identity verification:
{var.system.ExternalHostUrl}/onboarding/{var.event.argument.Profile}/{var.event.argument.SecureID}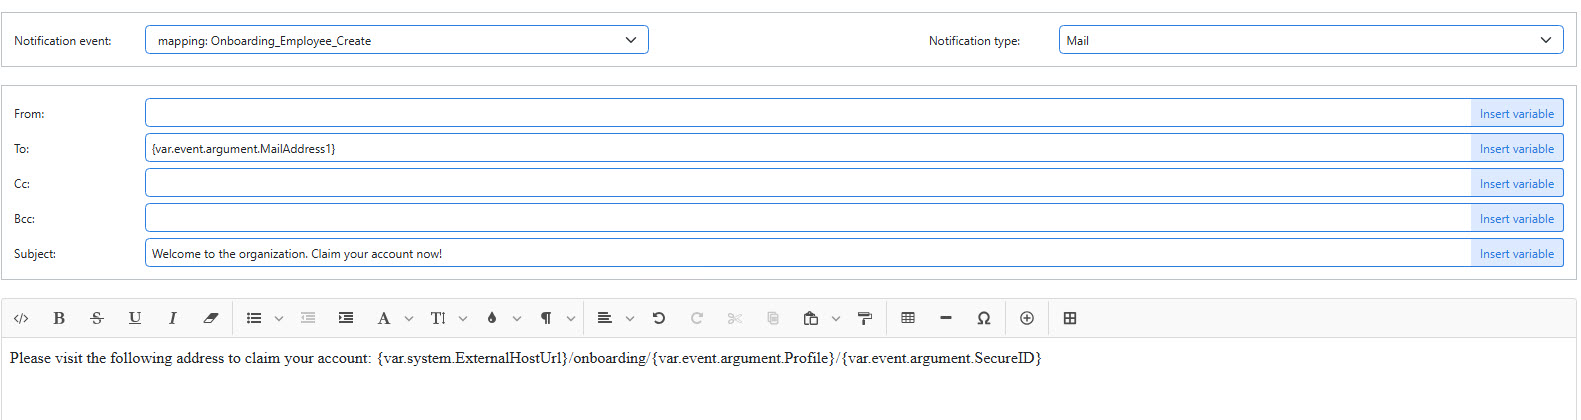
Save the template.
Navigate to Events > Actions.
Add a new action. Set the Event Type to
mappingand select the mapping that provisions your onboarding records in the Event Name dropdown.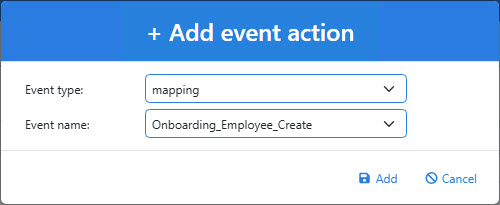
In the Template dropdown, select the name of the event template you created earlier.

Click Save.
Configure OTP Verification Email Message
To confirm their identity, NIM will send end users a one-time passcode (OTP) token. During onboarding, users can choose to receive the code via email or SMS text message, depending on the methods listed in their onboarding profile. The following steps show you how to create a template and event to handle email notifications.
Navigate to Events > Templates.
Add a new template.
In the Notification Event dropdown, select
onboarding-code-mail: EmployeeOnboarding.In the To field, type or use the Append button to add the variable
{var.event.data.voConfirmationCodeAddress}. This variable contains the address the end user selected to receive their OTP token.Provide a suitable subject for the email.
In the body, provide a suitable message. Be sure to include the variable
{var.event.data.voConfirmationCode}, which contains the OTP token for the end user.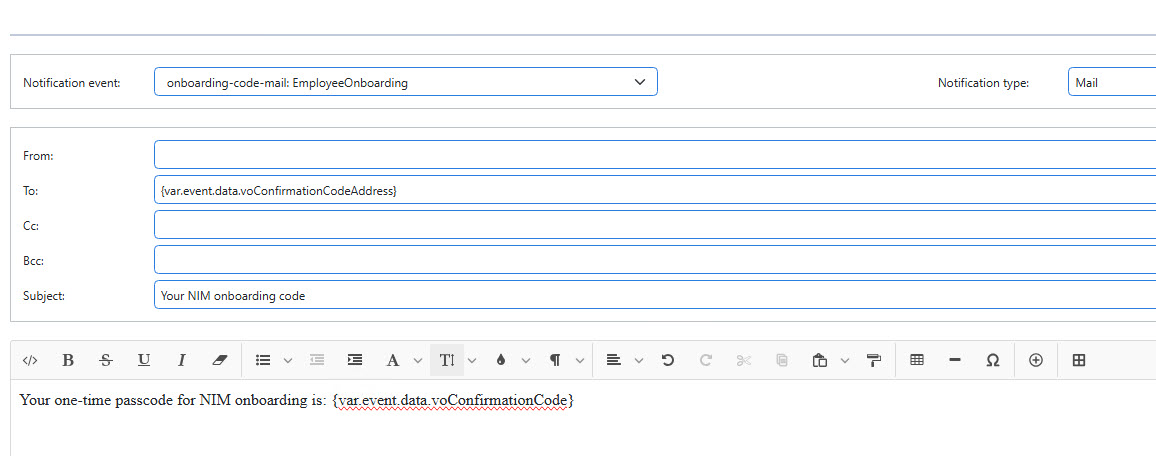
Save the template.
Navigate to Events > Actions.
Add a new action. Set the Event Type to
onboarding-code-emailand select your onboarding profile name in the Event Name dropdown.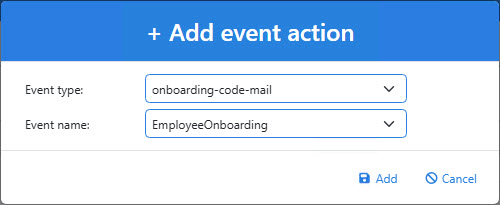
In the Template dropdown, select the name of the event template you created earlier.

Click Save.
Configure OTP Verification SMS Message
To confirm their identity, NIM will send end users a one-time passcode (OTP) token. During onboarding, users can choose to receive the code via email or SMS text message, depending on the methods listed in their onboarding profile. The following steps show you how to create a template and event for an SMS notification.
Important
Sending SMS text messages requires an SMS license key to be installed. See this article for more information.
Navigate to Events > Templates.
Add a new template.

In the Notification Event dropdown, select
onboarding-code-sms: EmployeeOnboarding.In the Notification Type dropdown, select
SMS.In the To field, type or use the Append button to add the variable
{var.event.data.voConfirmationCodeAddress}. This variable contains the phone number the end user selected to receive their OTP token.In the Message field, provide a short but suitable message. Be sure to include the variable
{var.event.data.voConfirmationCode}, which contains the OTP token for the end user.
Save the template.
Navigate to Events > Actions.
Add a new action. Set the Event Type to
onboarding-code-smsand select your onboarding profile name in the Event Name dropdown.
In the Template dropdown, select the name of the event template you created earlier.

Click Save.
Your onboarding system is now ready for testing.