Form Workspace
The form workspace is where you construct NIM apps. The workspace is separated into multiple tabs, which are detailed below.
Forms
The Forms tab is where app developers can build their app's web forms using one or more form items. NIM form layout's are based on Bootstrap's grid system, which is split into 12 columns.
While in Design Mode, form items can be dragged onto the design surface using the drag-and-drop handle  . When positioned over an area where the form item can be dropped, a red rectangle will appear over the target area with a darker red border where the item will be positioned. Form items can be dropped above, below, or to either side of other form controls.

Selecting a form item on the design surface will expose that item's properties in the Props tab on the left side of the screen. Depending on the item selected, additional options may be available under the Table and Actions tab.
Variables
The Variables tab allows you to create variables that can be accessed throughout your application. Here, you may create either Javascript variables or timer variables. The value of a variable can be accessed through form items, such as static text.
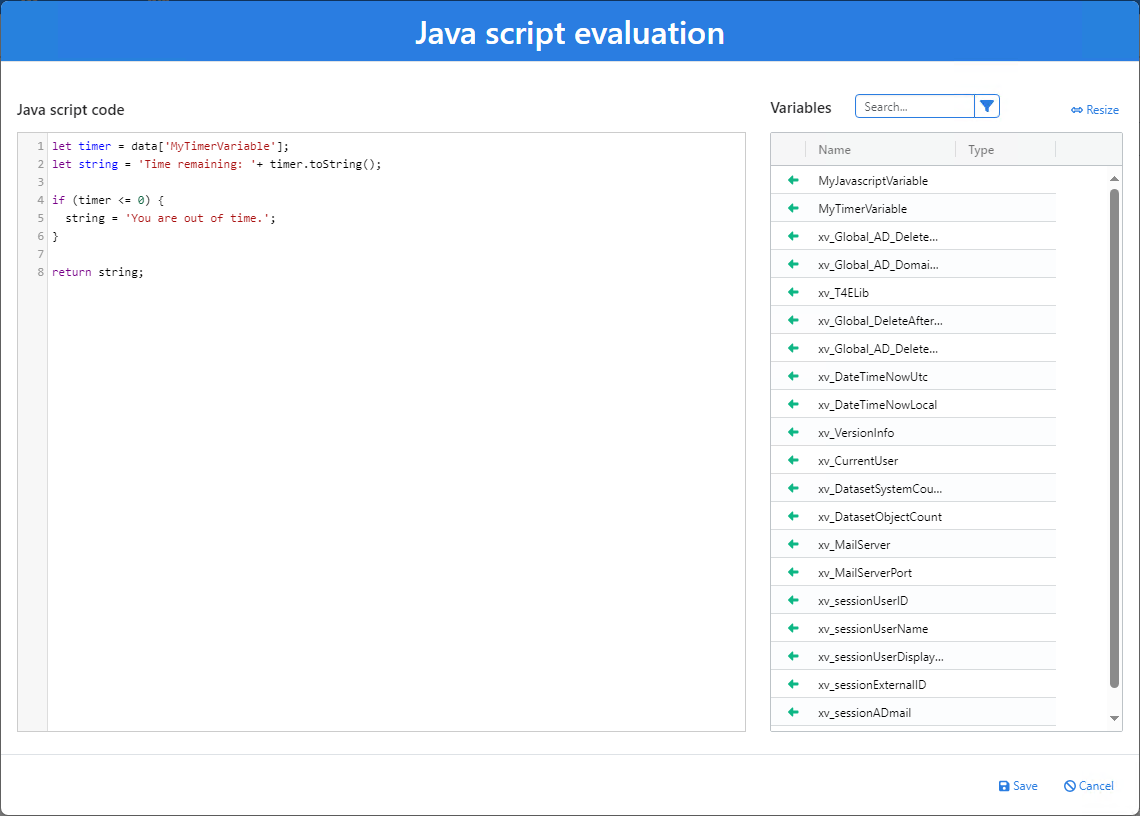
Javascript
Javascript variables allow you to write arbitrary Javascript that evaluates the data within your application—even the value of other app variables. For example, you may have a timer variable that counts down from 60 to 0, and a Javascript variable that displays the timer as part of a user-friendly message.
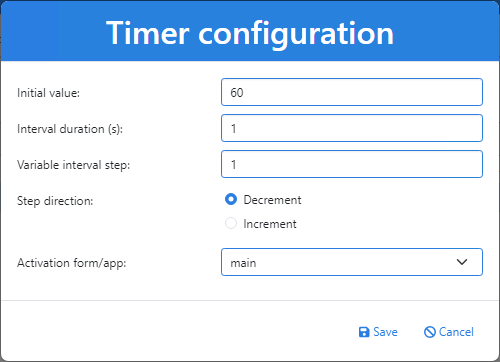
Timer
Timer variables allow you to create incrementing or decrementing timers. These timers can be started when an end user launches your app, or from a particular screen within your app.
Access
The Access tab allows you to control what users and groups have permissions to run the NIM app. The list of available users and groups are pulled from NIM's internal system.
Every NIM app also has its own group, which is prefixed by "nga_". Members of those groups are automatically granted access to the associated app.
In order to manage membership to NIM groups, you must use roles.

Name Generator
The Name Generator tab allows form developers to generate names, which are typically used when creating new accounts in target systems. These names may or may not utilize input from the end user of the form.
Important
Before utilizing the Name Generator tab, you must create a name generator
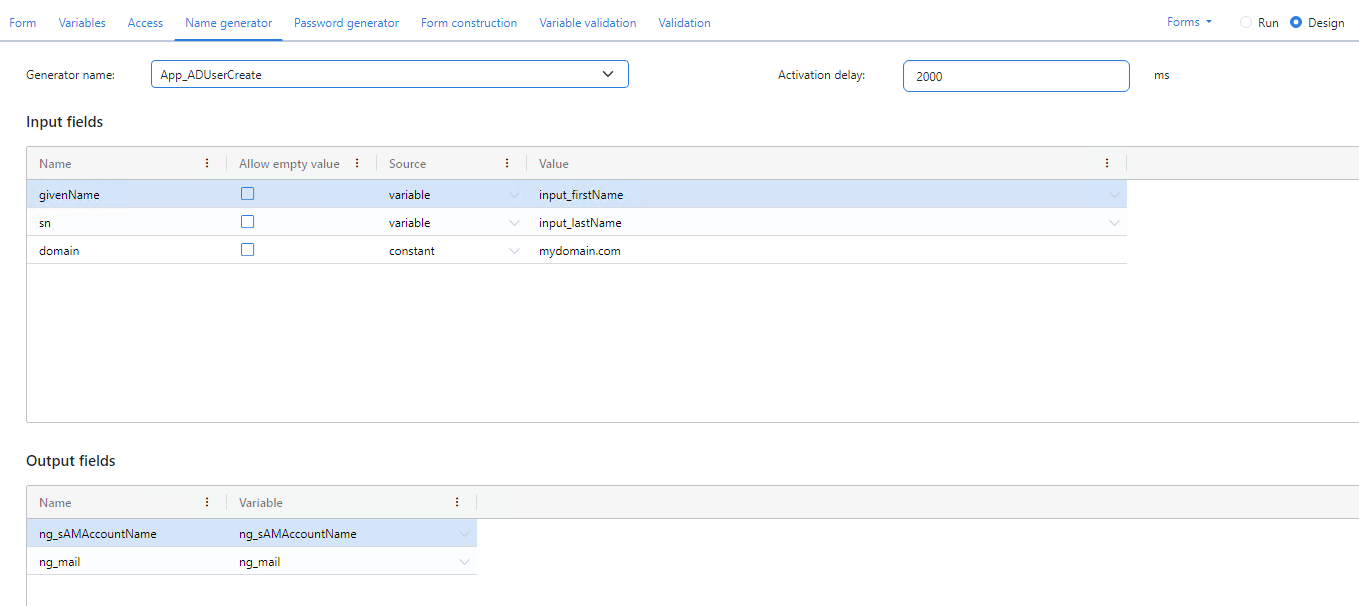
The Name Generator tab contains the following settings:
Generator Name: This dropdown field displays all configured name generators in NIM.
Activation Delay: The number of milliseconds NIM will wait after a user stops typing before data from the form is submitted to the name generator.
Input Fields: This table contains a list of fields that the selected name generator takes as input. By default, all fields are required, but you may choose to allow blank values. In the Source column, each field can be supplied a value from a variable within the app, or a constant value that you manually define. In the Value column, you choose which variable to map onto the input field, or supply the constant value.
Output Fields: This table contains a list of fields that are ouput by the selected name generator. The value of these fields can be mapped onto variables that can be used within the app, such as in a target system action to create a new account.
Password Generator
The Password Generator tab allows form developers to generate passwords, which are typically used when creating new accounts in target systems. These passwords may or may not utilize input from the end user of the form.
Important
Before utilizing the Password Generator tab, you must create a password generator.
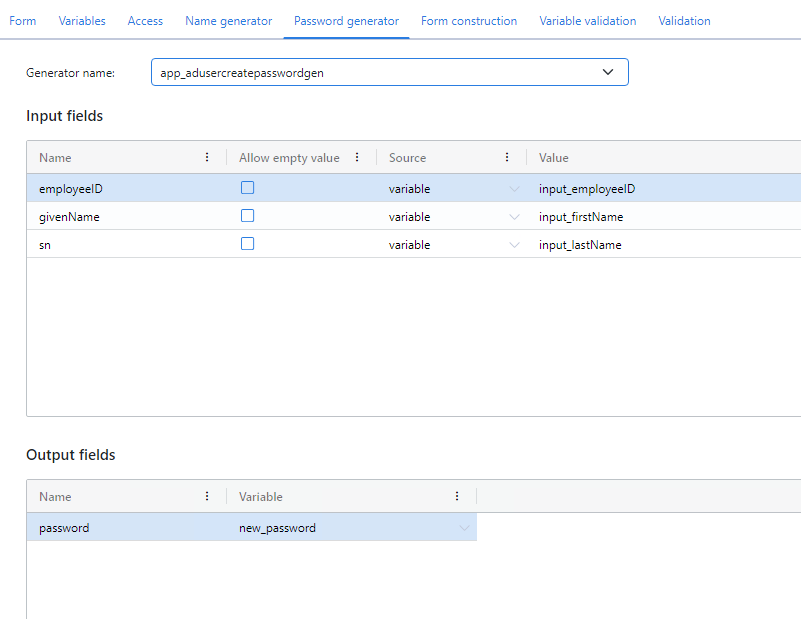
The Password Generator tab contains the following settings:
Generator Name: This dropdown field displays all configured password generators in NIM.
Input Fields: This table contains a list of fields that the selected password generator takes as input. By default, all fields are required, but you may choose to allow blank values. In the Source column, each field can be supplied a value from a variable within the app, or a constant value that you manually define. In the Value column, you choose which variable to map onto the input field, or supply the constant value.
Output Fields: This table contains a list of passwords that are ouput by the selected password generator. Each password can be mapped onto a variable that can be used within the app, such as in a target system action to create a new account.
Note
In order for the password generator to output a value in an app, you must use the generate password action.
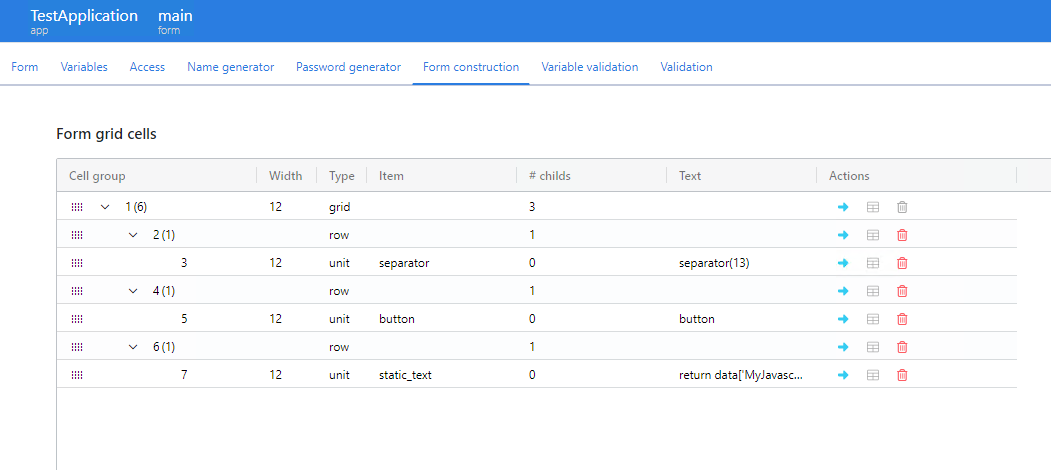
Form Construction
The form construction tab allows you to see the layout of the app's form in a hierarchical fashion. You can easily see how the app is split up into grids, rows, and form items.
Form items may be rearranged by dragging and dropping their drag-and-drop control, and removed with the trashcan  icon. Additional rows can be appended to the end of the form by clicking on the arrow
  icon of any form element.
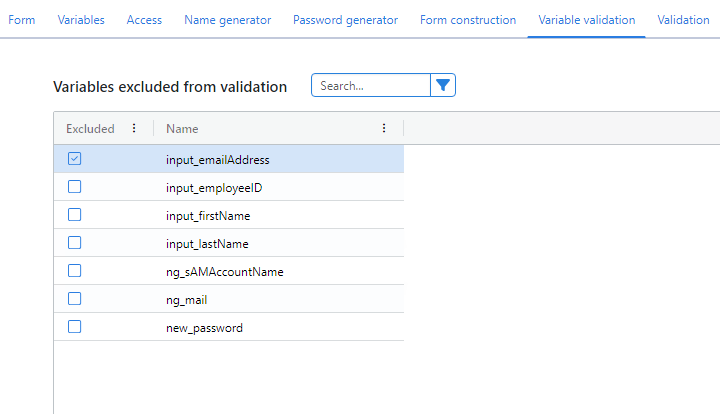
Variable Validation
The Variable Validation tab allows form developers to exclude variables from the validation process. Individual variables may be excluded by clicking their checkbox under the Exclude column.
NIM validates variables that are tied to form items, such as the text input box. This validation happens when the input loses focus (e.g., the end user moves to a different input field), and when the form is submitted.
Note
If your app contains randomly generated variable values, such as one generated by a javascript variable or a calculated field in a filter, it is recommended that you exclude those from validation. If you do not, the form submission may be considered invalid as the value will be regenerated upon submission and will not match what is in the service's memory.
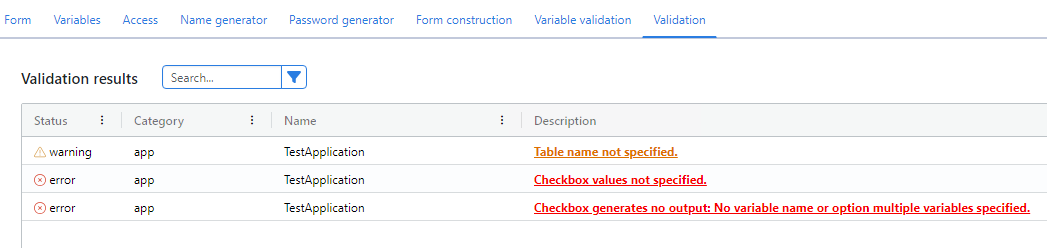
Validation
The validation tab allows form developers to verify that all form items are valid and there are no errors in form construction. The validation table displays all warnings and errors. Clicking on the message in the Description column will take you back to the Form tab and highlight the form item that is causing the error or warning.
Once you have resolved all errors within the form and saved it, you can revisit the Validation tab to see that the app has been validated successfully.
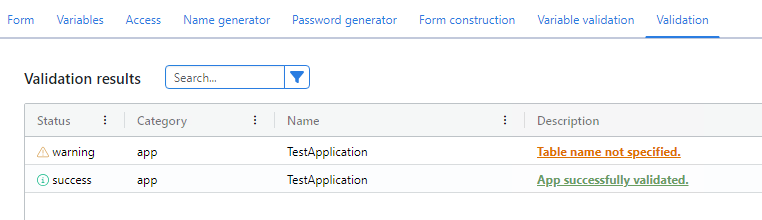
Note
Warnings do not prevent a form from being validated, but it is recommended that you resolve all warnings whenever possible.